> For AI agents: the complete documentation index is available at /llms.txt, the full documentation bundle is available at /llms-full.txt.
# How to Connect WireGuard
This guide shows how to connect to a WireGuard VPN on Windows and on phones.
## Connect WireGuard on Windows
### Download WireGuard
Download WireGuard for Windows from the [WireGuard download page](https://download.wireguard.com/windows-client/).
### Add an empty tunnel
Open WireGuard and click **Add empty tunnel** in the bottom-left corner.
 ### Enter the tunnel details
Set a name to identify the tunnel. The public key is generated automatically. In the box below, add the **Interface** and **Peer** details.
 ### Activate the tunnel
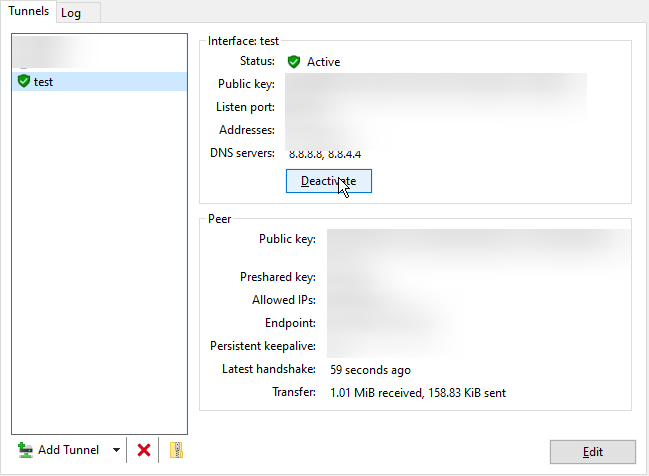
Once the configuration is saved, click **Activate** to connect to the VPN.
 ### Disconnect from the VPN
To disconnect from the VPN, click **Deactivate**.
## Connect WireGuard on Phones
:::note
The screenshots in this section are from an Android device.
:::
### Install the WireGuard app
Download the app for your phone:
- [iOS](https://itunes.apple.com/us/app/wireguard/id1441195209?ls=1\&mt=8)
- [Android](https://play.google.com/store/apps/details?id=com.wireguard.android)
### Add a tunnel
Open the WireGuard app and click the **+** button in the bottom corner.
 Choose how to add the tunnel. If you have a QR code, you can scan it to add the tunnel. In this example, we use the **Create from scratch** option.
 ### Fill in the interface details
When you select **Create from scratch**, a form appears. Fill in the details:
- Set a name to identify the tunnel.
- Click the reload button to generate the private key and public key.
- Add the **Address** and **DNS** details under **Interface**.
 ### Add the peer
Click **Add Peer** and enter the **Peer** details.
 ### Save the tunnel
Once the details are filled in, click the **Save** button in the top-right corner.
### Activate the tunnel
Once the tunnel is saved, click the **toggle button** beside the tunnel name to activate the VPN.
