

How to Install PHP Extensions Using EasyApache 4
PHP extensions can be managed and installed using EasyApache 4 in WHM. This guide explains how to install PHP extensions.
Access EasyApache 4
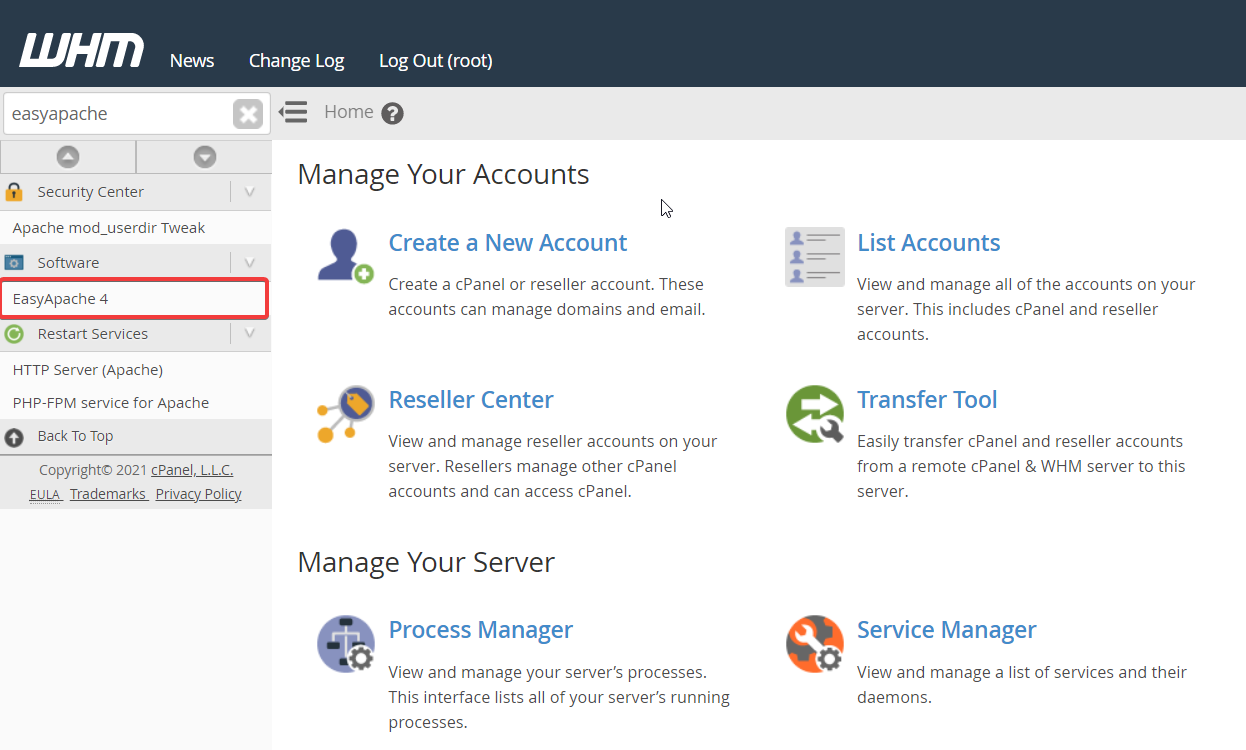
Open EasyApache 4
In WHM, use the search field in the top-left menu to search for EasyApache 4, then click the matching result.
Customize the Installed Packages
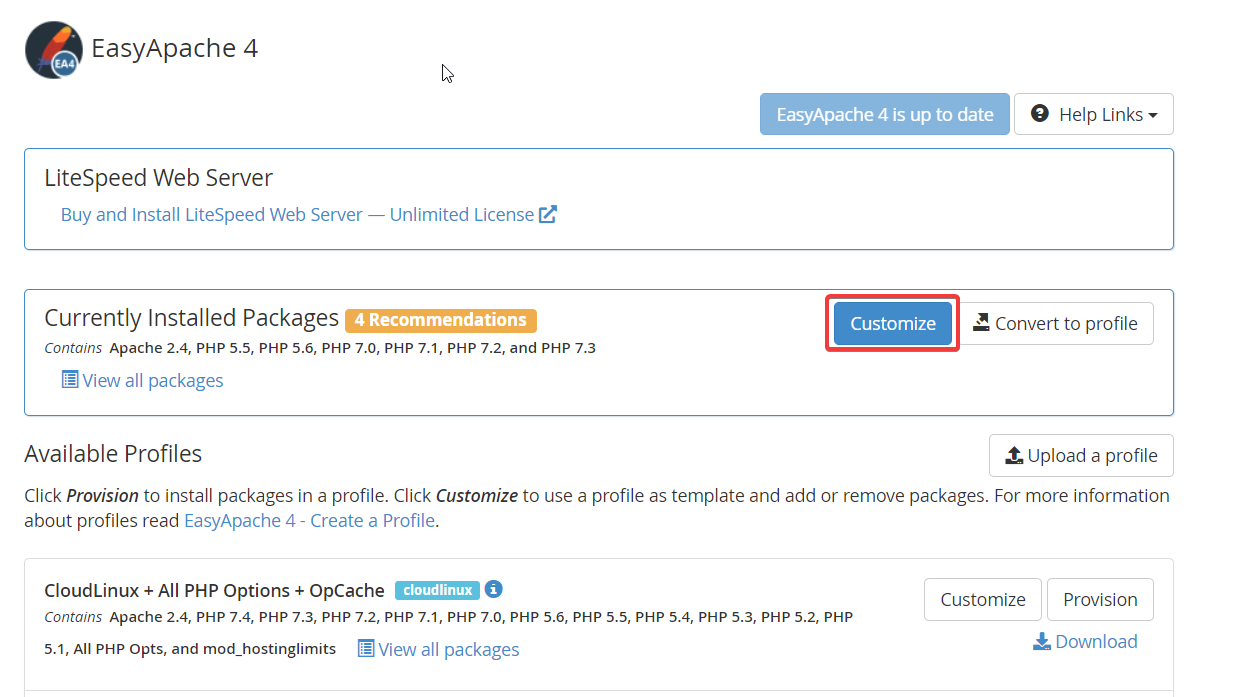
Open package customization
Under Currently Installed Packages, click Customize.
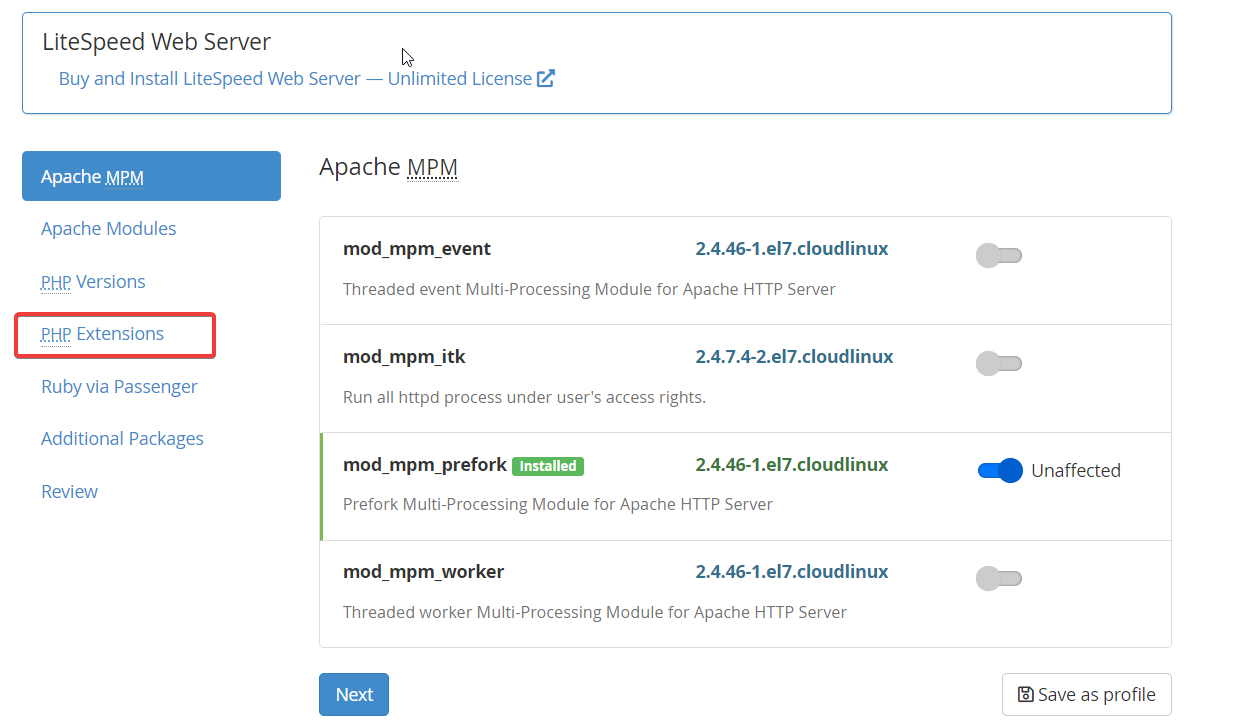
Select PHP Extensions
Select PHP Extensions.
Select the PHP Extension
Search for the extension
Enter the name of the PHP extension you want to install in the search field.
Select the required extension
Select the required extension and click Next at the bottom of the page.
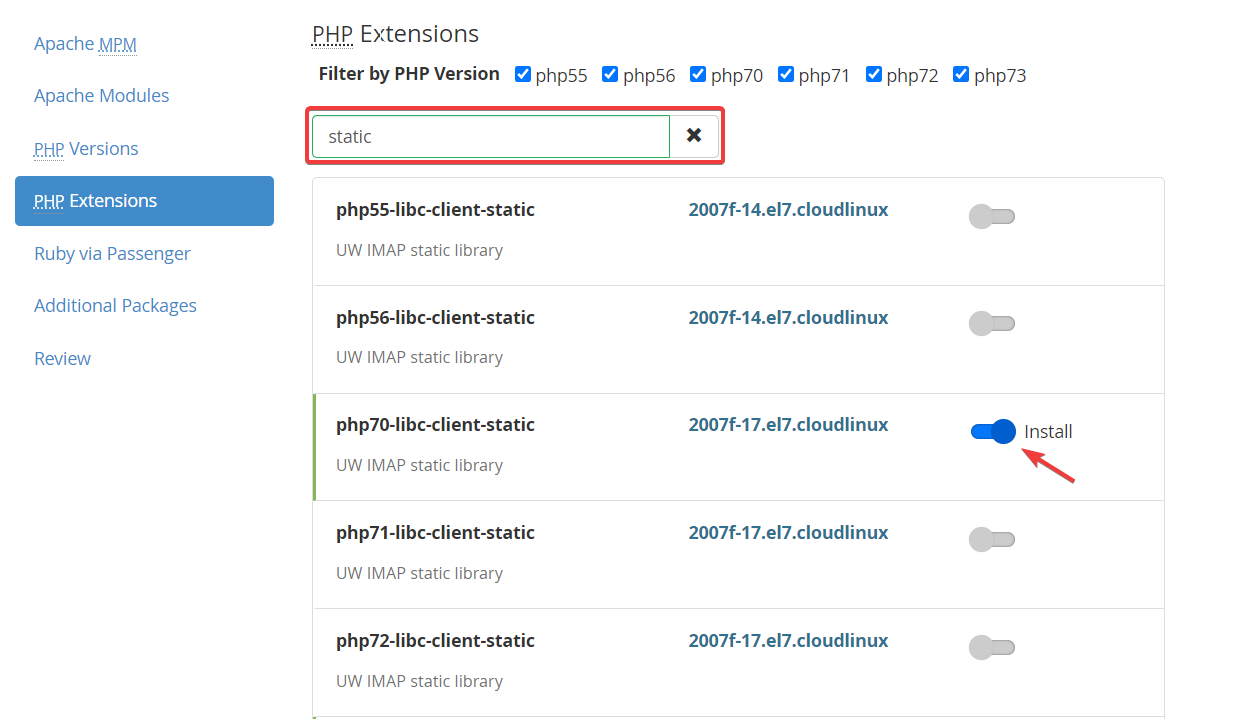
Make sure you select the correct PHP extension before proceeding.
Review the Changes
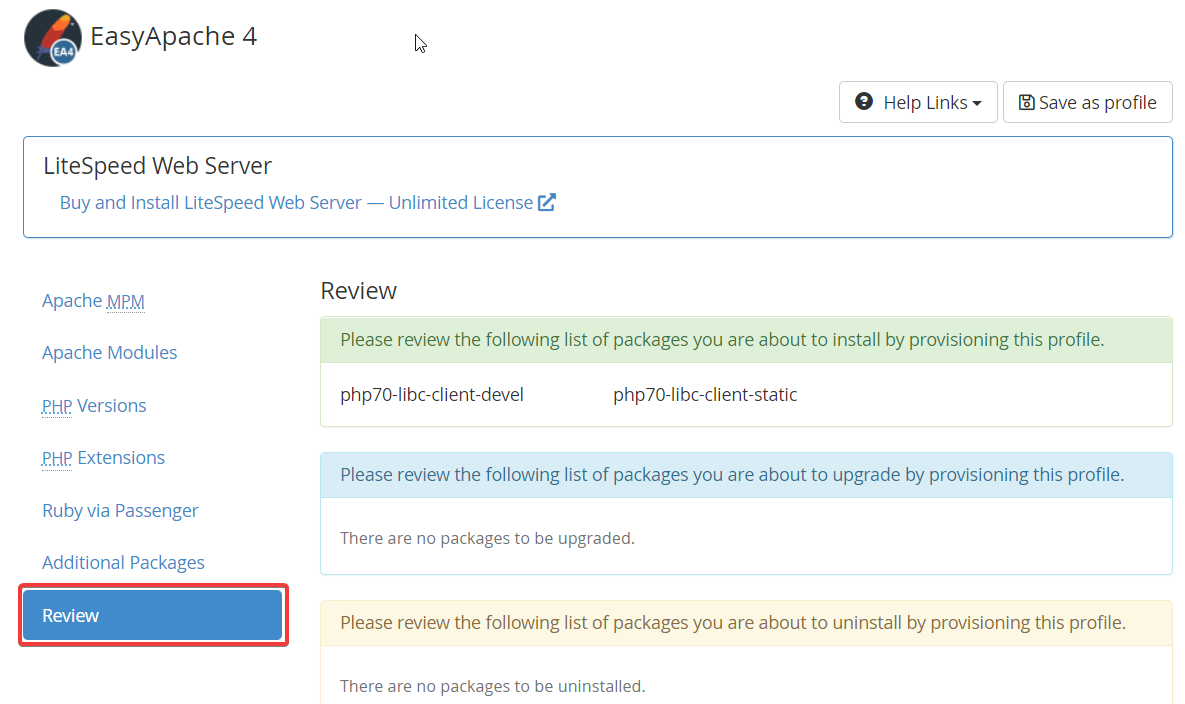
Review the selected extensions
Click Review to view the list of selected extensions.
Provision the Changes
Apply the changes
Review the selected extensions. If everything is correct, click Provision at the bottom of the page to install the selected extensions.
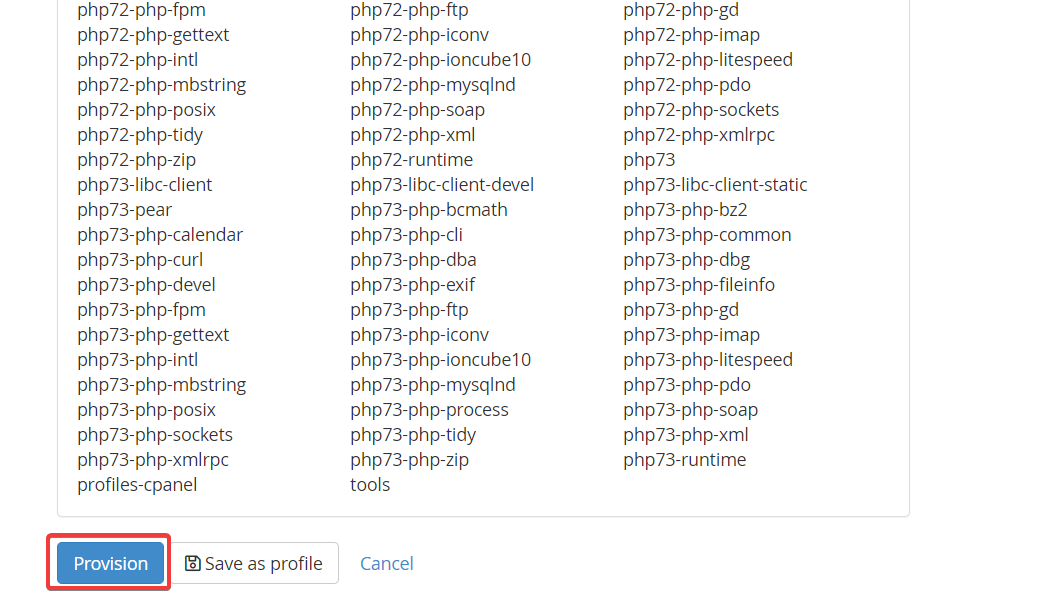
Provisioning applies the selected changes to the server. Review the selected extensions carefully before proceeding.