

Modify a cPanel Account from WHM
Modifying a cPanel username or account settings can affect active websites and services. We recommend creating a complete backup of the account before making changes, especially when changing the username.
After changing the cPanel username, verify that website files, MySQL databases, database users, and configuration files that reference the old username are updated as required.
Access the Account List
Log in to WHM
Log in to WHM using the following URL:
https://VPS_IP_Address:2087
Open List Accounts
Use the WHM search bar to search for List Accounts.
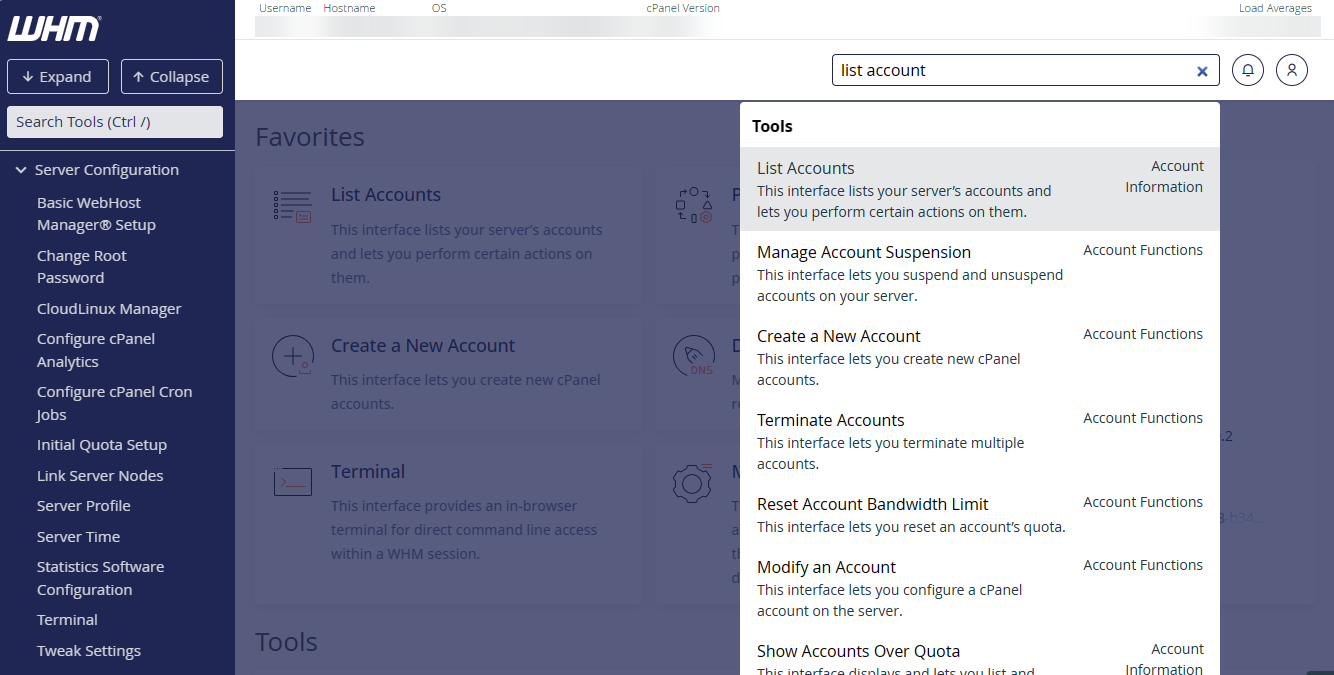
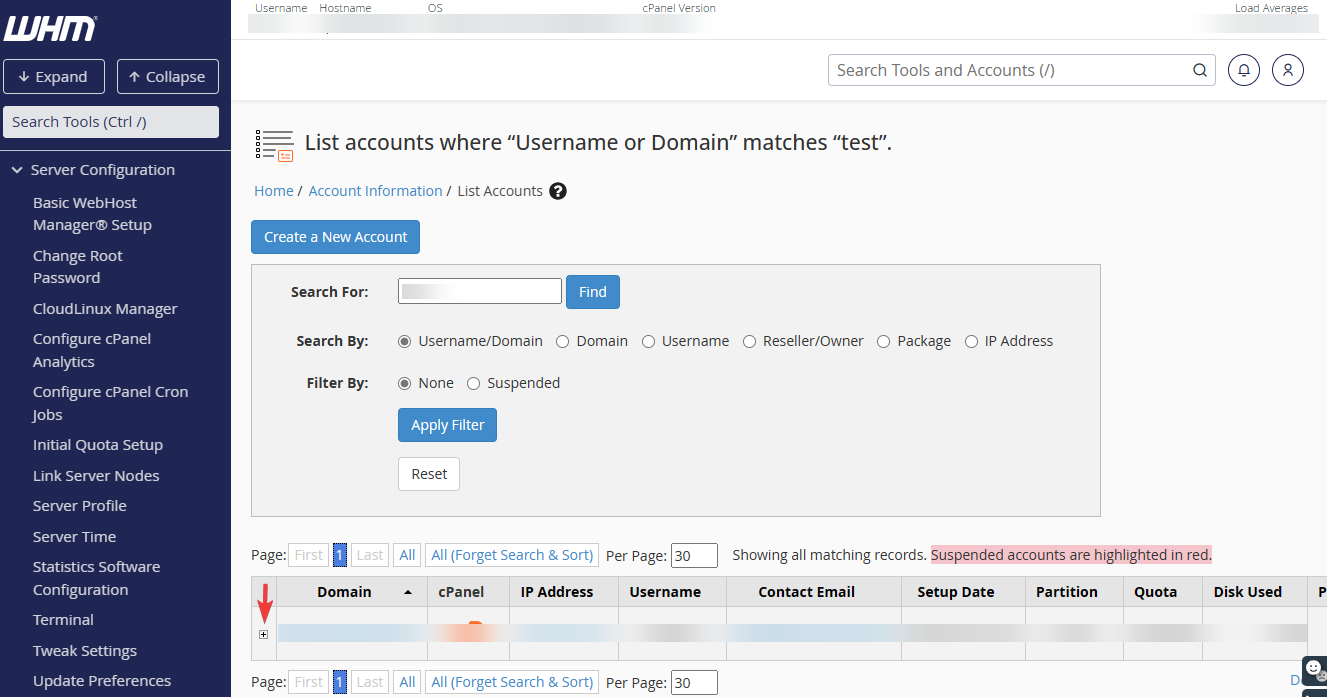
You will see a list of cPanel accounts. You can search for a specific account using its domain name or username.
Expand the account details
Click the + sign next to the account you want to modify.
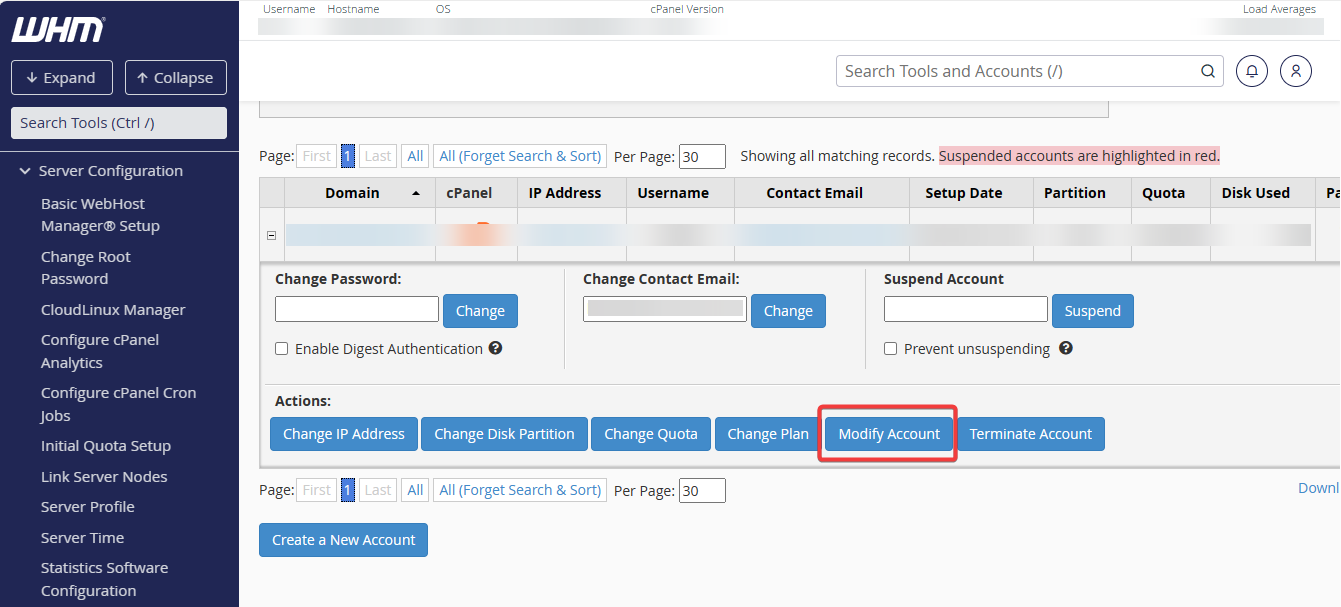
Open Modify Account
Click Modify Account.
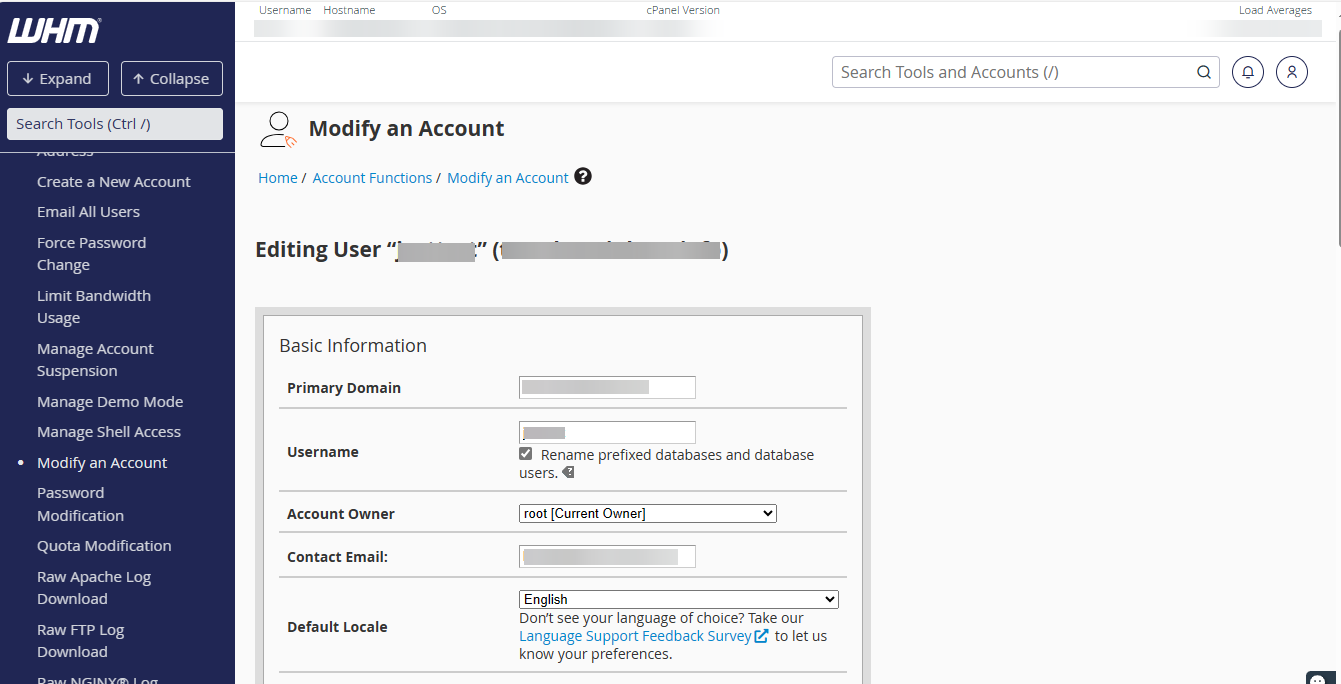
The Modify an Account interface will open, where you can edit the cPanel account settings.
Basic Information
The Basic Information section allows you to modify the following settings:
- Primary Domain: Enter a new primary domain for the account.
- Username: Enter a new username.
The new username must meet the following requirements:
- It must be unique and contain 16 characters or fewer.
- It can contain only letters and numbers.
- It cannot start with a number or the string
test. - If you plan to use MySQL or PostgreSQL, the first eight characters must be unique on the system to prevent issues with database prefixing and account transfers. This restriction does not apply to servers running MariaDB.
- Account Owner: If the account is owned by a reseller, select a different reseller from the available list to change the account owner.
- Contact Email: Enter a new contact email address for the account owner.
- Default Locale: Select the default locale for the account.
- cPanel Theme: Select the cPanel theme for the account.
Changing the cPanel username can affect website files, database users, and configuration files that reference the previous username. Verify the account after making the change.
Resource Limits
The Resource Limits section allows you to modify the resources assigned to the account.
- Package: Select a hosting package that defines the account's resource limits. Click Change to open the Upgrade/Downgrade an Account interface.
- Disk Space Quota (MB): Specify the amount of disk space available to the account in MB.
- Monthly Bandwidth Limit (MB): Specify the maximum amount of data the account can transfer each month in MB.
- Max FTP Accounts: Specify the maximum number of FTP accounts.
- Max Email Accounts: Specify the maximum number of email accounts.
- Mail Quota per Email Address (MB): Specify the maximum mailbox size that the account can assign to an email address.
- Max Mailing Lists: Specify the maximum number of mailing lists.
- Max SQL Databases: Specify the maximum number of each available SQL database type.
- Max Subdomains: Specify the maximum number of subdomains.
- Max Parked Domains: Specify the maximum number of parked domains (aliases).
- Max Addon Domains: Specify the maximum number of addon domains.
- Max Passenger Applications: Specify the maximum number of Passenger applications.
- Maximum Hourly Email by Domain Relayed: Specify the maximum number of emails a domain can send per hour.
The available resource options may vary depending on the cPanel and WHM configuration.
Privileges
The Privileges section allows you to modify account privileges.
- Reseller Privileges: Select this option to grant reseller privileges to the account.
- CGI Privilege: Select this option to allow the account to serve CGI files.
- Shell Access: Select this option to enable SSH access for the account.
Grant only the privileges required by the account. Shell and reseller access can provide additional administrative capabilities.
DNS Settings
The DNS Settings section allows you to configure DNS-related options for the account.
- Enable DKIM on this account: Select this option to create DKIM records for the account's zones.
- Enable SPF on this account: Select this option to create SPF records for the account's zones.
Save the Account Changes
Review and save the changes
After making the required changes, review the modified settings and save the account configuration.
Review the settings carefully before saving, especially the username, domain, resource limits, and account privileges.