

How to Restore a Backup in DirectAdmin Using FileZilla
Restoring backups in DirectAdmin is an important part of server management and data protection. This guide explains how to upload a backup file using FileZilla and restore it through DirectAdmin.
If you need help connecting to your server using FileZilla, refer to How to Connect to an FTP Account in cPanel Using FileZilla and WinSCP.
Prerequisites
Before proceeding, make sure you have:
- Access to your DirectAdmin control panel.
- FileZilla installed on your computer.
- A backup file ready for restoration.
- Server login credentials (hostname, username, and password).
- The backup directory path:
/home/admin/admin_backups.
Before restoring a backup, ensure you have a backup of your current configuration. Also, verify that you have the necessary permissions to upload and restore backup files.
Restore a Backup in DirectAdmin
Upload the backup file
Open FileZilla and connect to your server using your login credentials.
Navigate to the following directory on the server:
/home/admin/admin_backups
Drag and drop your backup file from your local computer into the /home/admin/admin_backups directory.
Access Admin Backup/Transfer
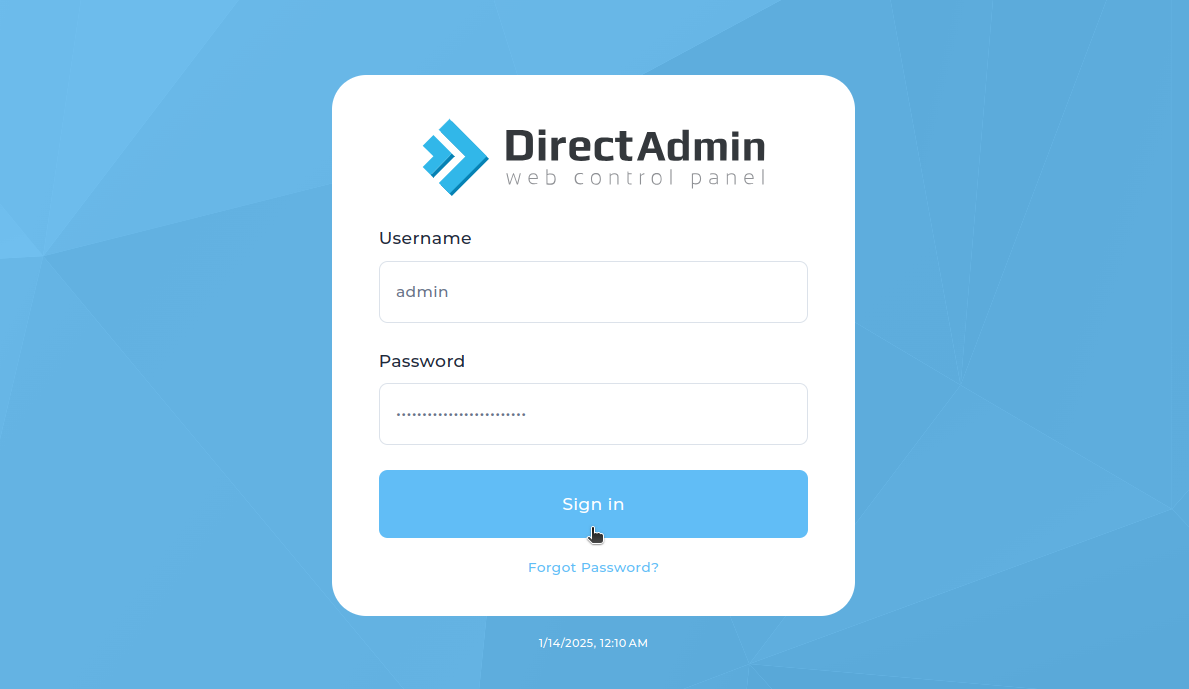
Log in to your DirectAdmin control panel.
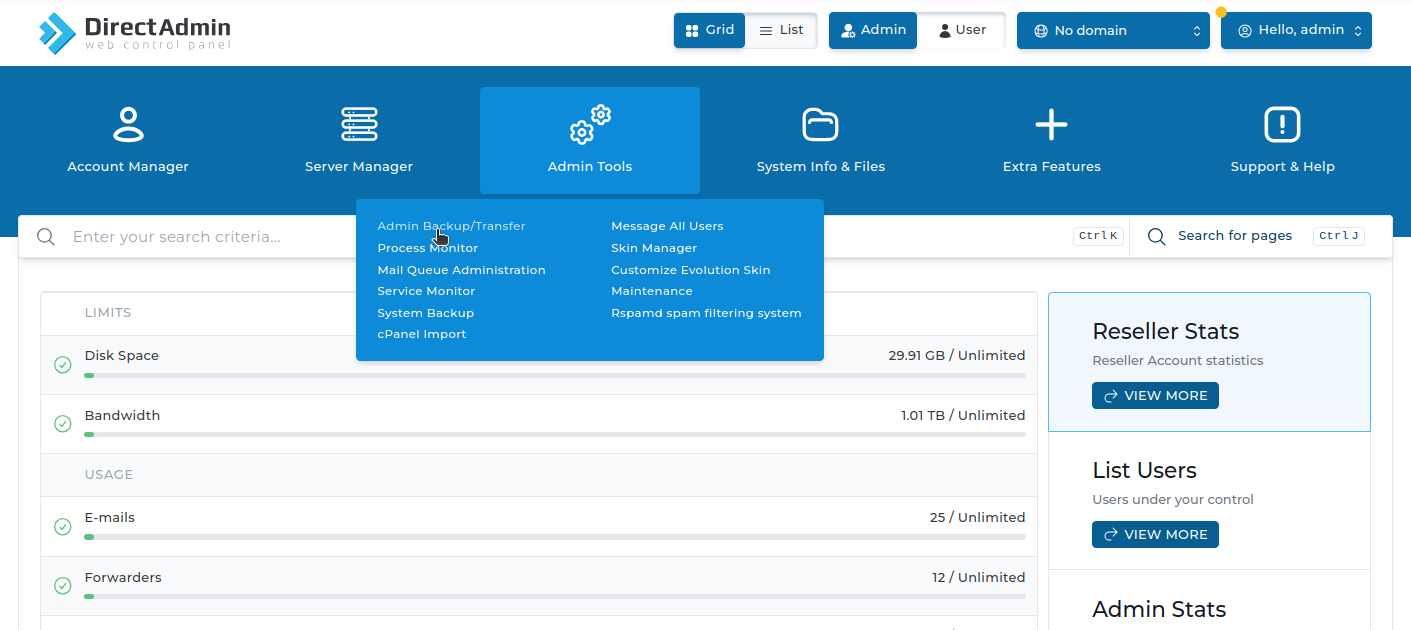
Navigate to Admin Tools → Admin Backup/Transfer.
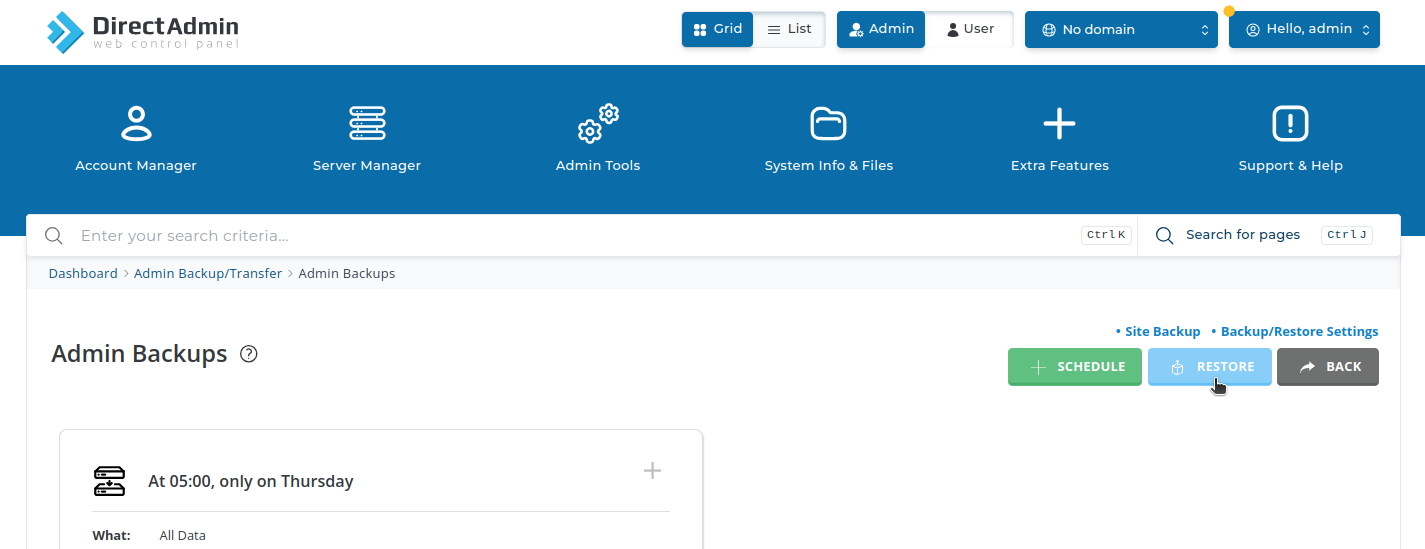
Start the restoration process
In the Admin Backup/Transfer section, click the Restore option.
Provide the backup file path
Enter the path to the uploaded backup file:
/home/admin/admin_backups
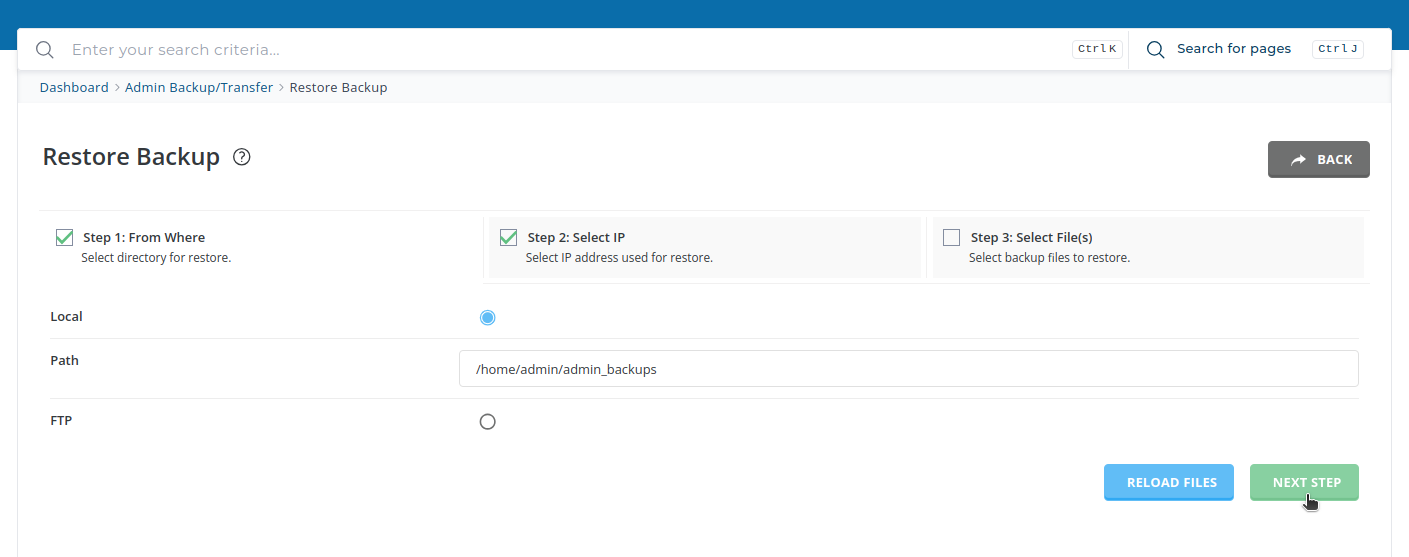
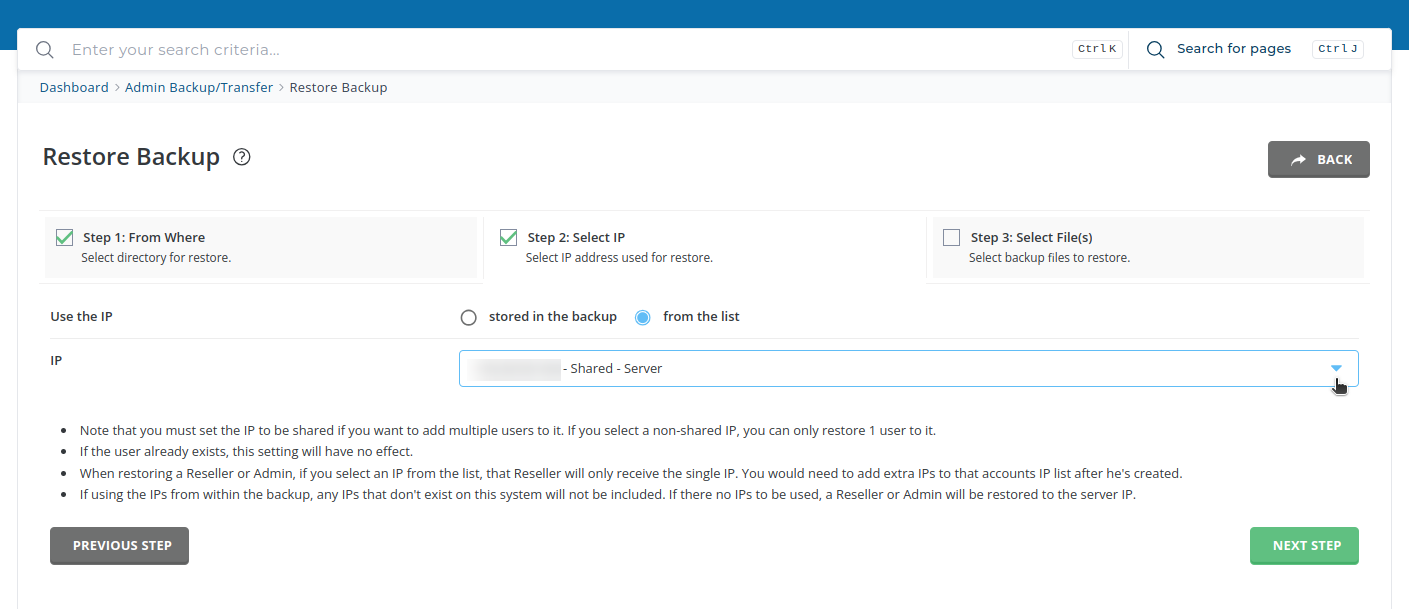
Select the IP address
From the dropdown menu, select the appropriate IP address for the restoration.
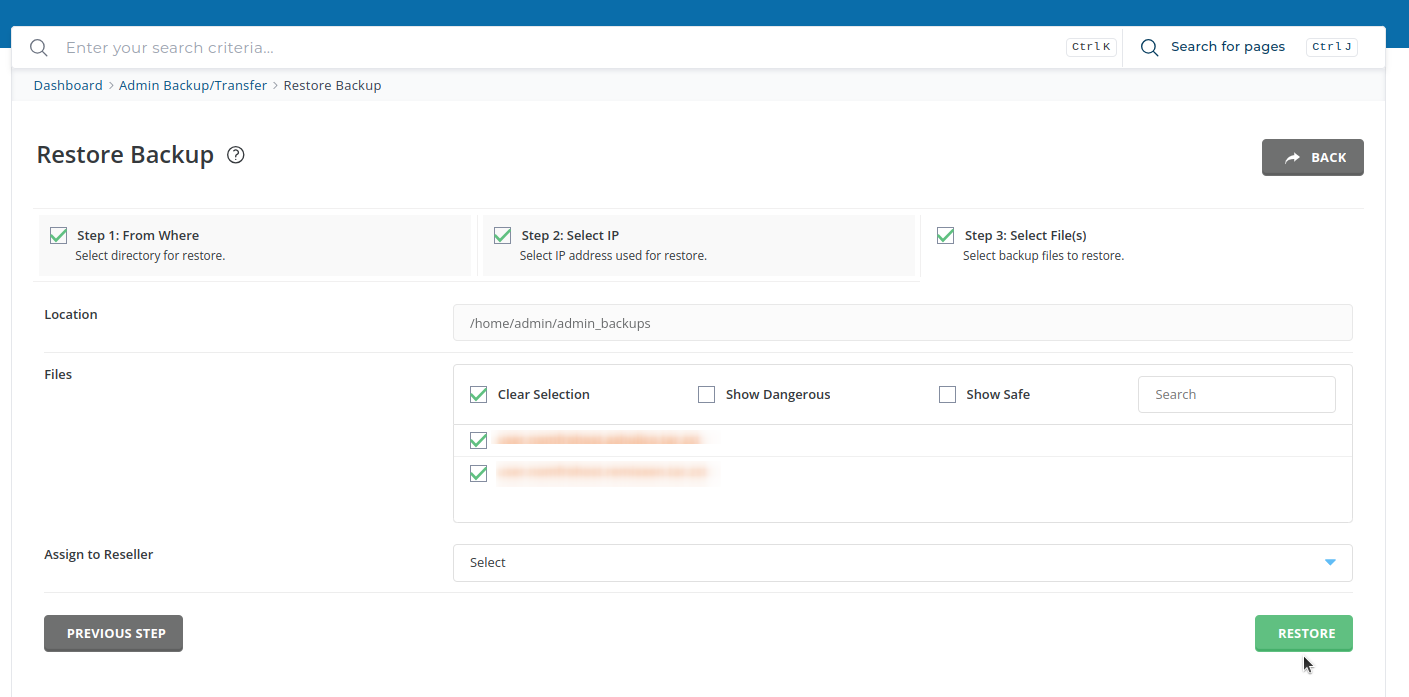
Complete the restoration
Click Restore to initiate the restoration process.
If you encounter any issues during the restoration process, contact your hosting provider's support team for assistance.