

How to Manually Install WordPress on DirectAdmin
Installing WordPress manually on DirectAdmin involves several steps. Below is a comprehensive guide to help you through the process:
Accessing the DirectAdmin Control Panel
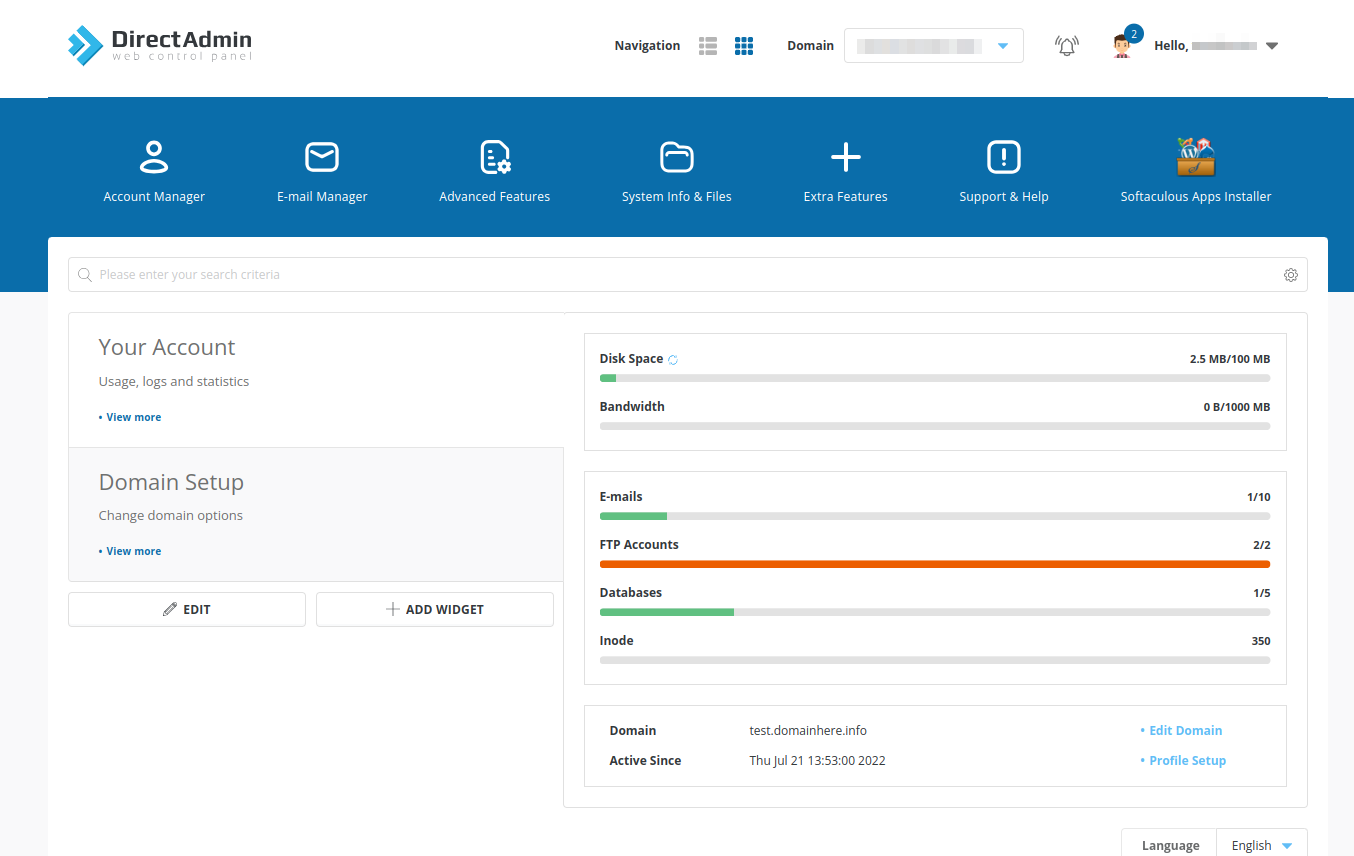
Creating a New Database
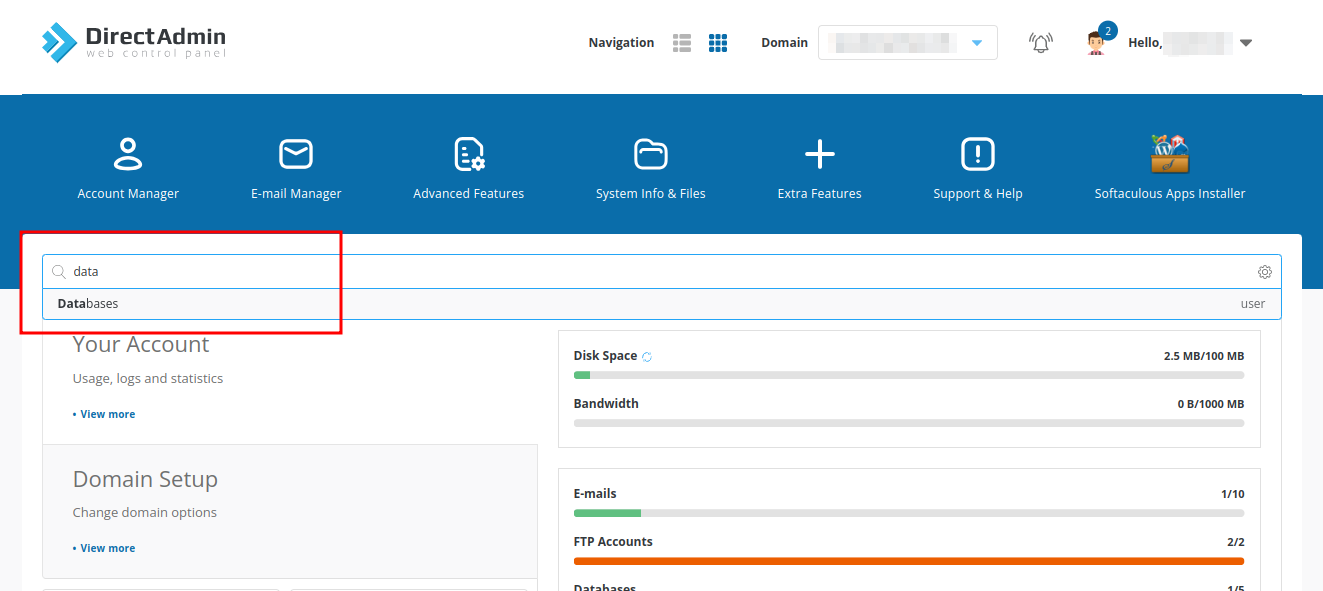
Locate Create Database
Search for "Create Database" and select it.
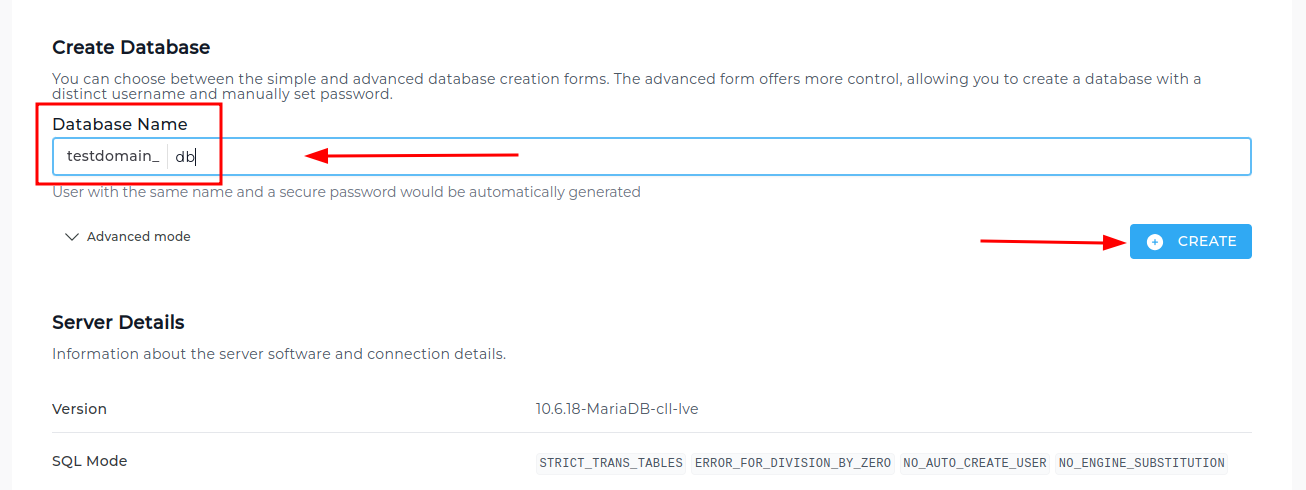
Enter Database Details
Enter your desired database username and password, then click Create Database.
Confirm Database Creation
A confirmation message "Database Created" will appear.
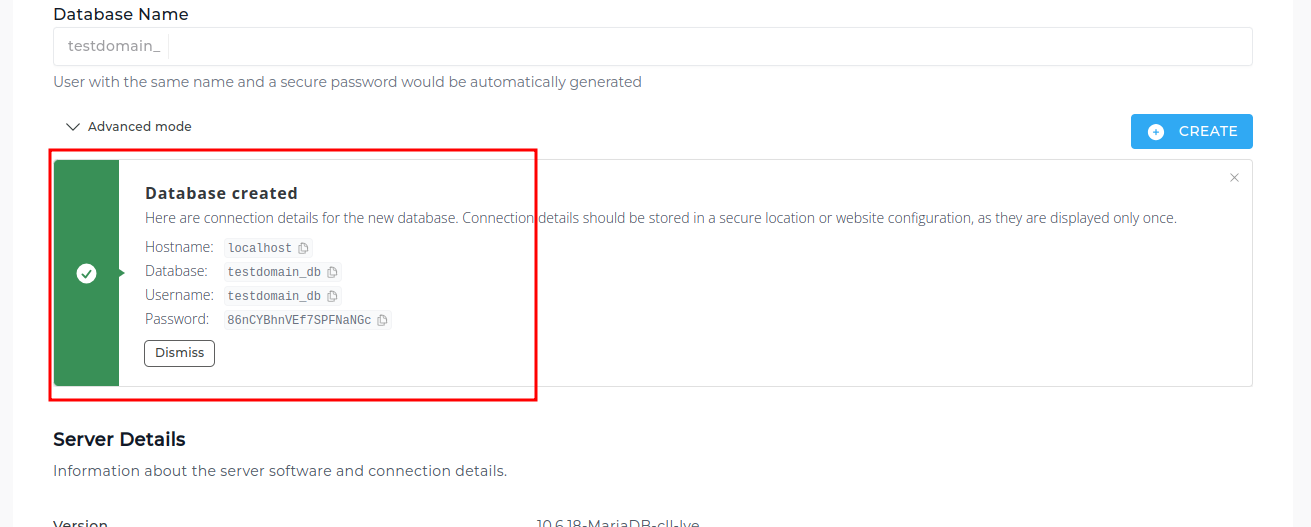
Note: Note down the details somewhere safe and secure as the database details will be displayed only once.
Uploading WordPress Files
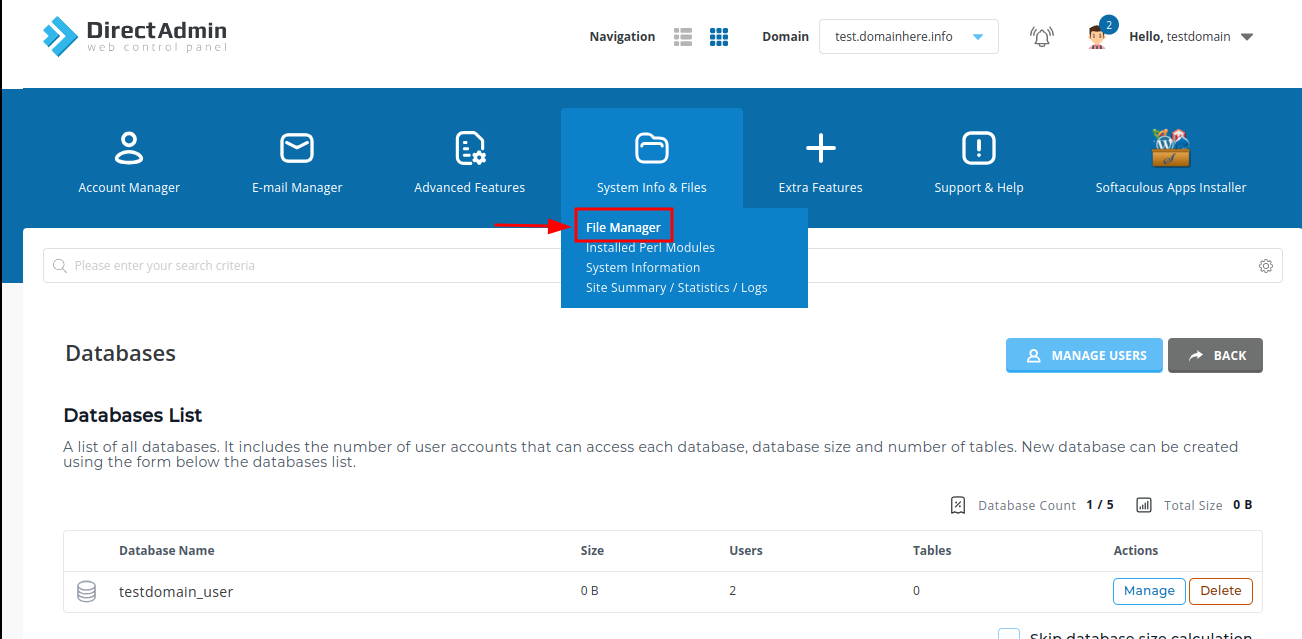
Open File Manager
Navigate to the File Manager.
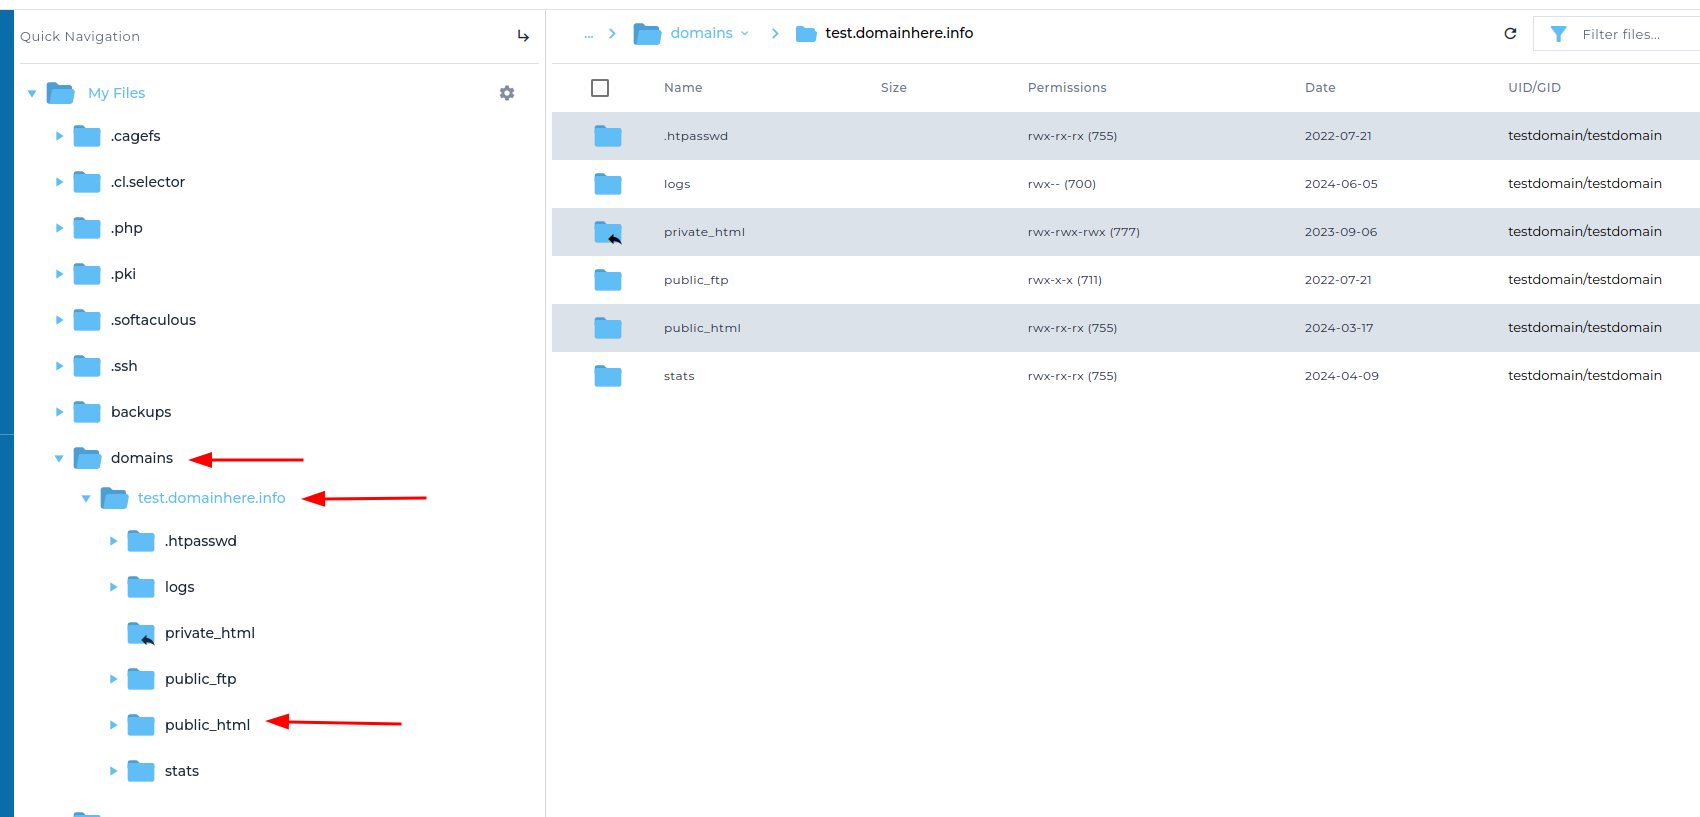
Navigate to public_html
Follow this path to access the directory where WordPress will be uploaded: domains >> yourdomainname.com >> public_html.
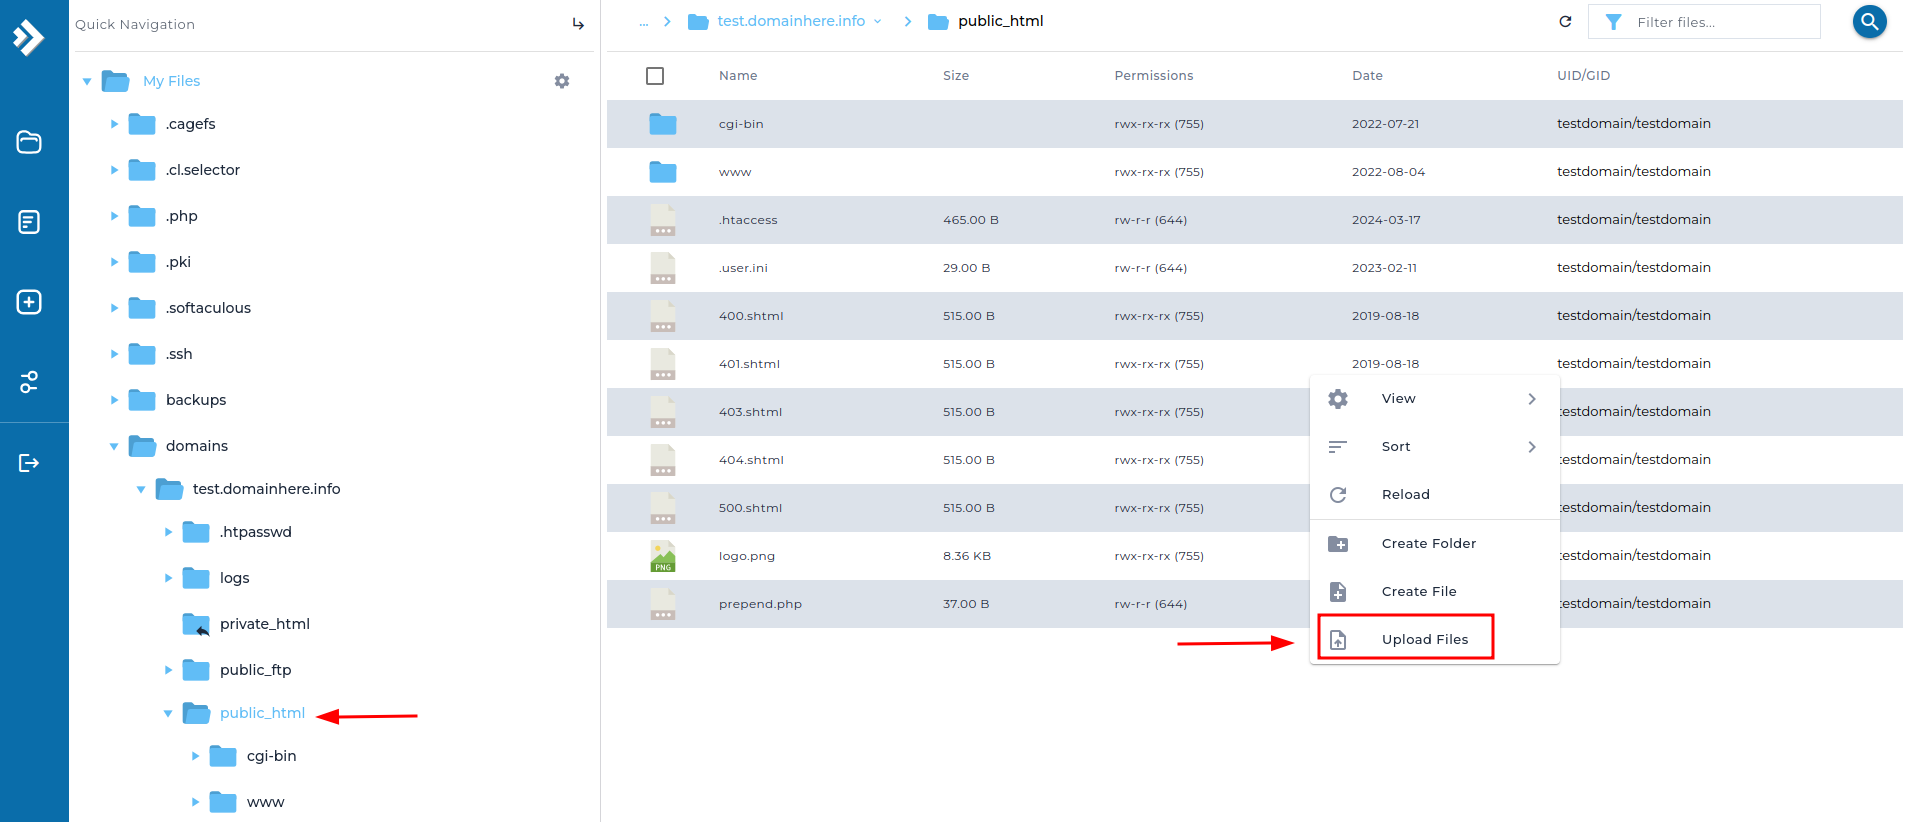
Upload WordPress Archive
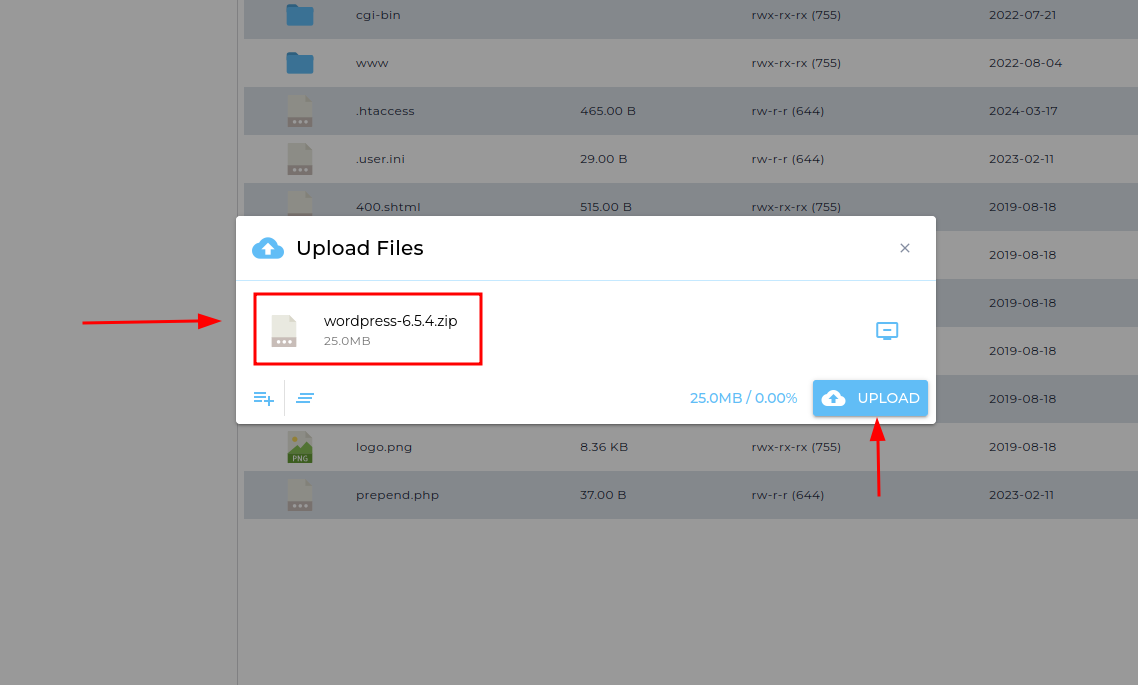
Download WordPress from the Official Site. Right-click in the directory, select Upload files, attach the wordpress.zip file, and click Upload. Wait for the upload to complete.
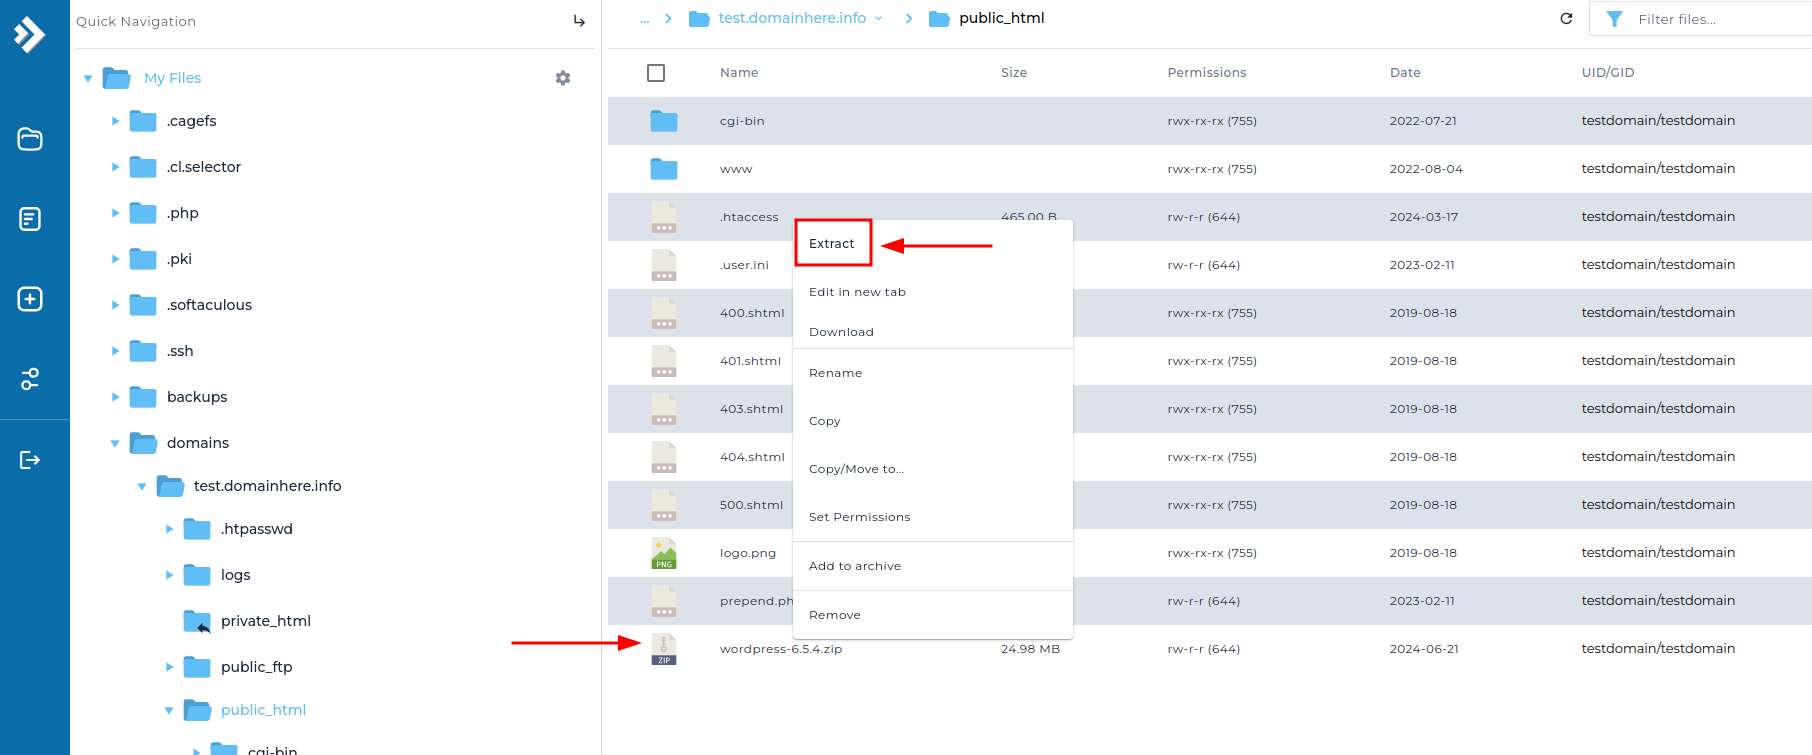
Extract the Zip File
Select the uploaded zip file and extract it.
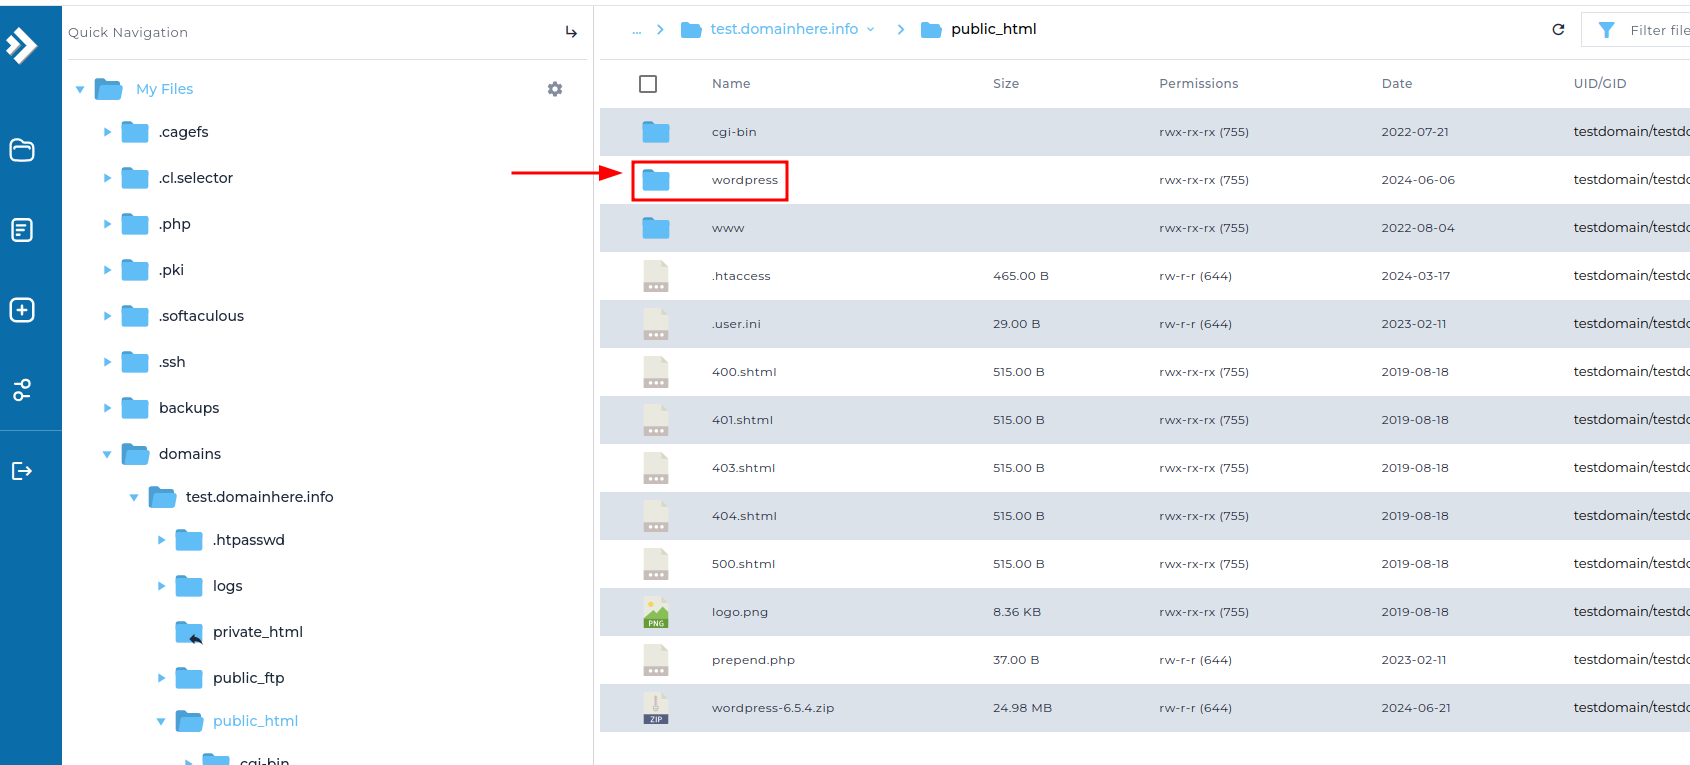
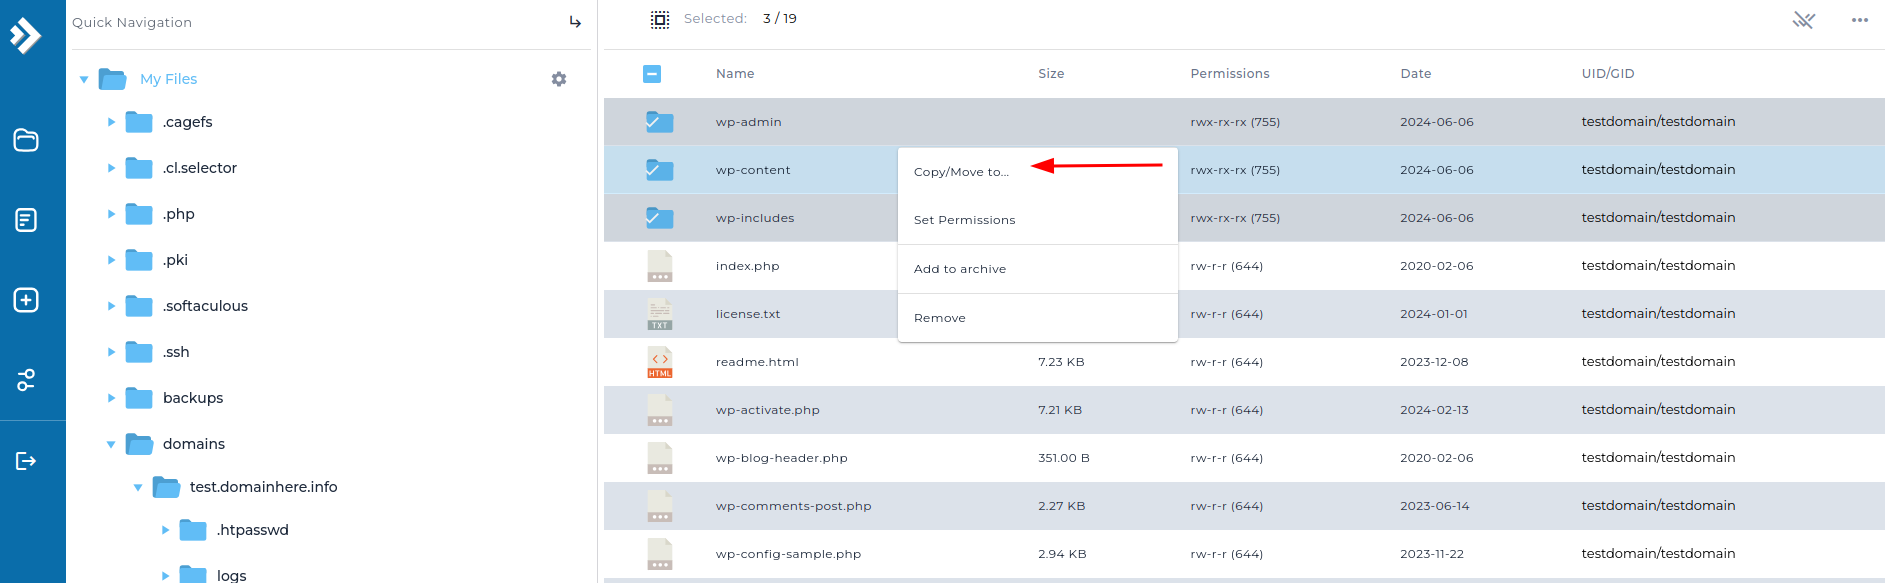
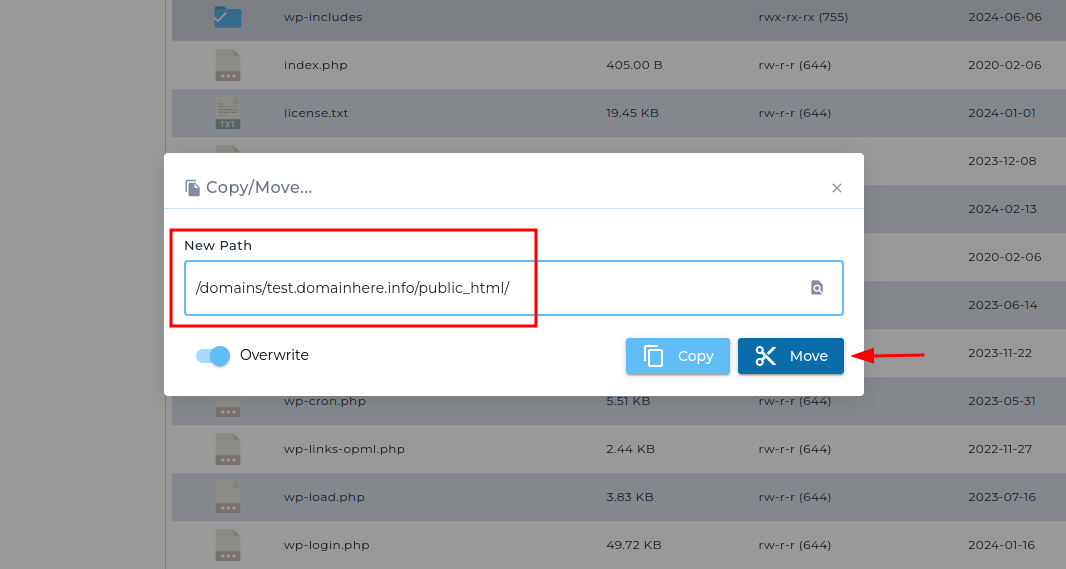
Move Files to public_html
Move all extracted files directly into the public_html directory.
Configuring WordPress
Rename Configuration File
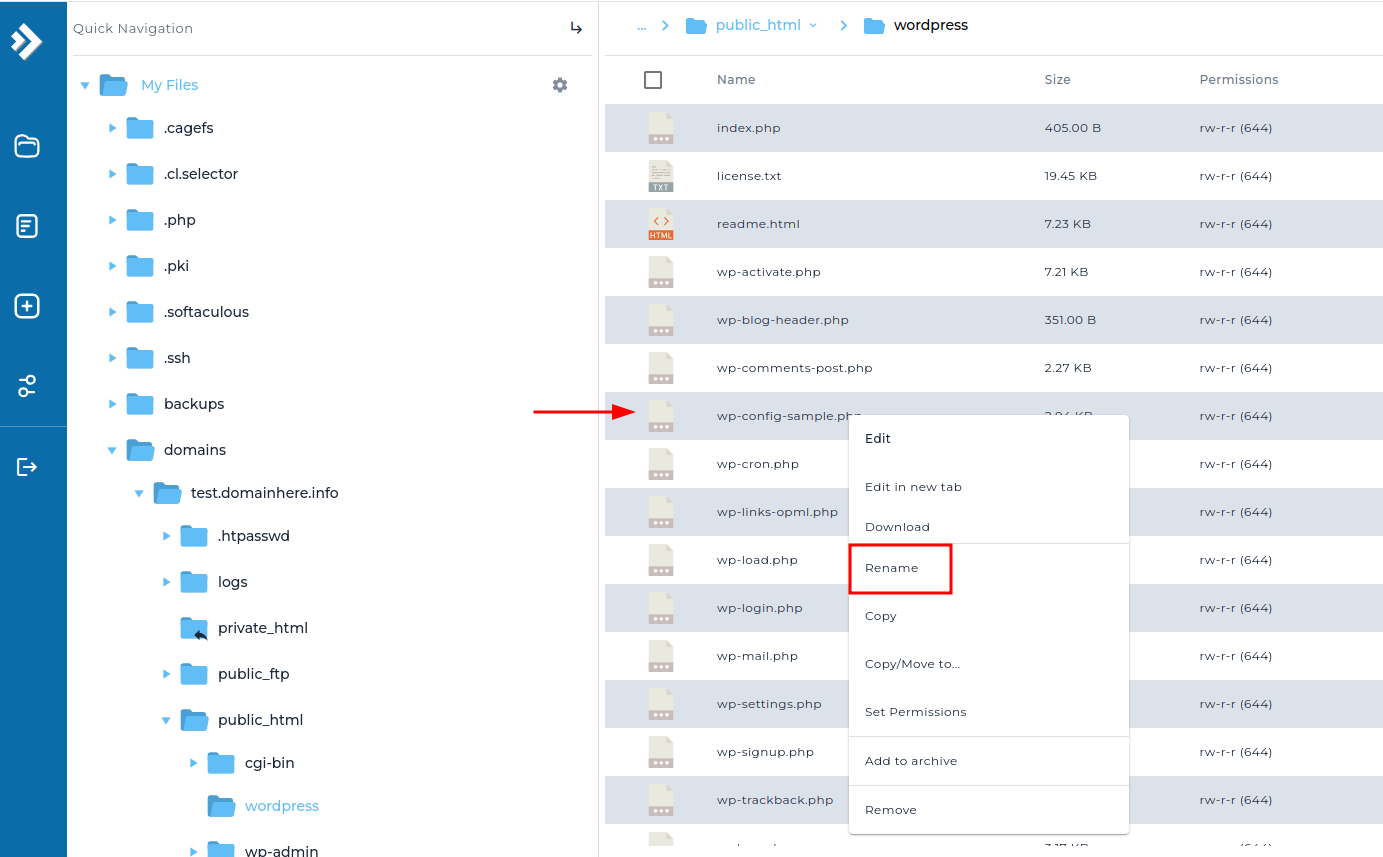
Rename the file wp-config-sample.php to wp-config.php.
Update Database Credentials
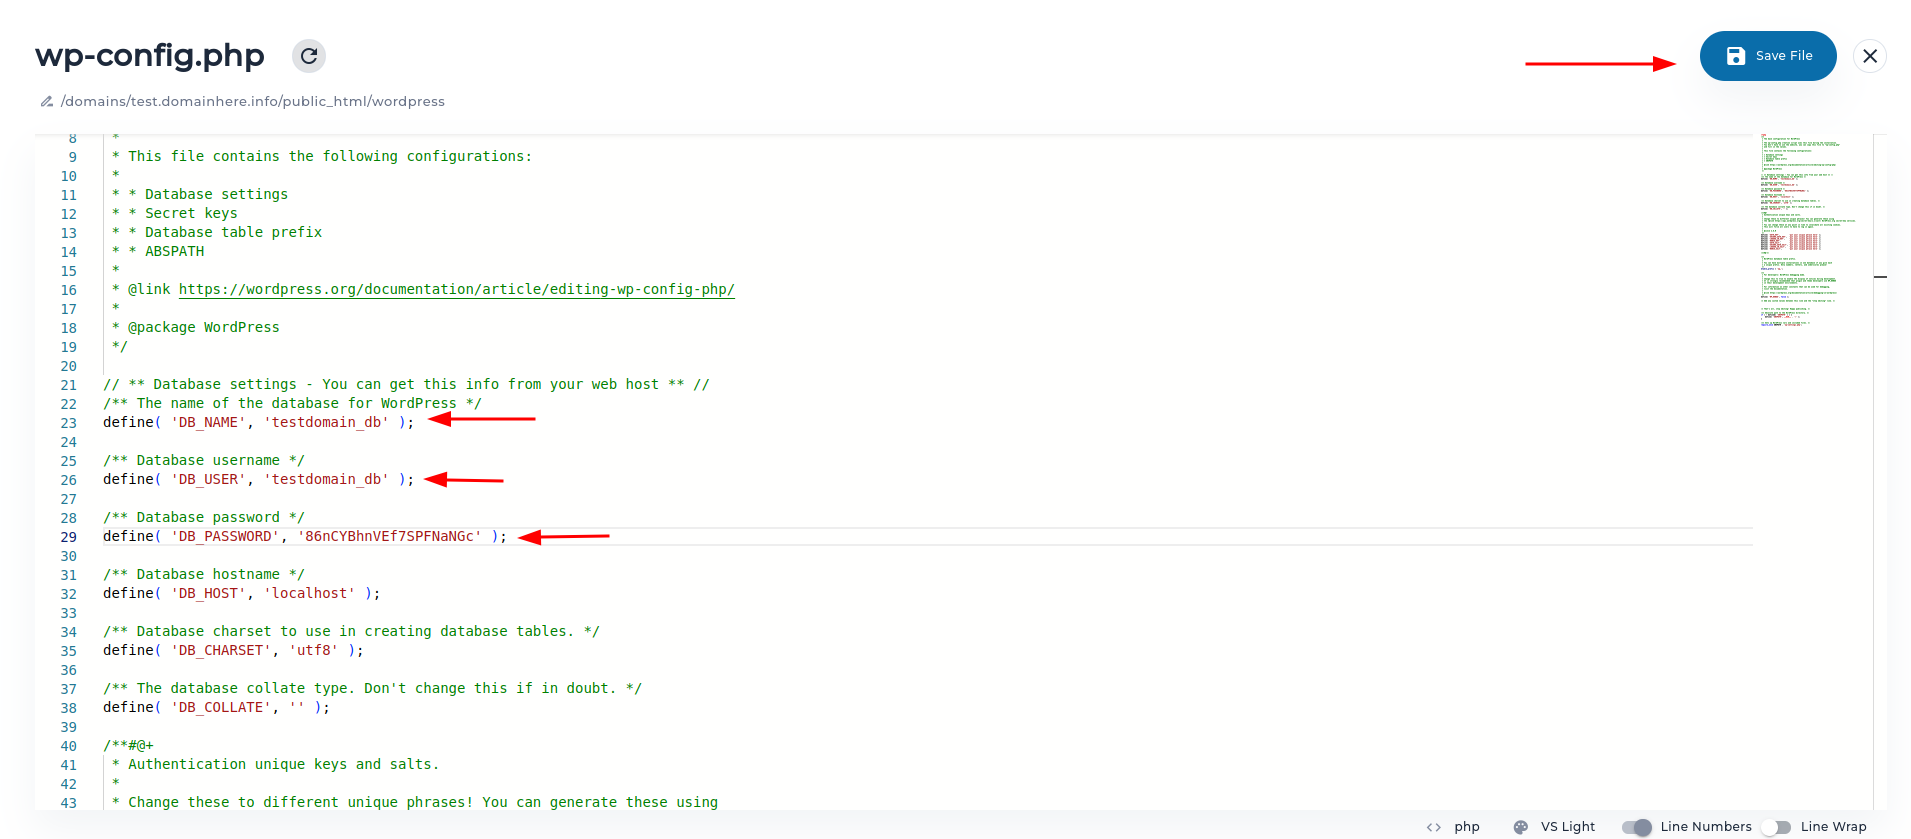
Edit the wp-config.php file and replace db_name, db_user, and db_password with your actual database details.
Installing WordPress
Open the Installation URL
Go to https://Your_Domain/wp-admin/install.php in your browser.
Note: Replace
Your_Domainwith your actual domain name.
Complete Setup
Enter your desired username, password, and email address, then click Install WordPress.
You will see a message saying “WordPress has been installed. Thank you, and enjoy!”
You have successfully set up WordPress using the DirectAdmin Control Panel. Your new website is now ready for customization and content creation. Explore the WordPress dashboard to install themes, add plugins, and start building your site.