

Enable Hotlink Protection in DirectAdmin
The main purpose of hotlink protection is to protect the bandwidth of your server or shared hosting account by preventing other websites from linking to content on your website, such as images and files.
If another website uses HTML code to display your images or files, they are fetched from your server or shared hosting account, and use your bandwidth.
If you are using the Standard theme on DirectAdmin, switch to the Refreshed theme as shown in How to change theme or layout on DirectAdmin.
In the Refreshed Theme
Log in to DirectAdmin
Log in to your DirectAdmin panel.
Open Hotlinks Protection
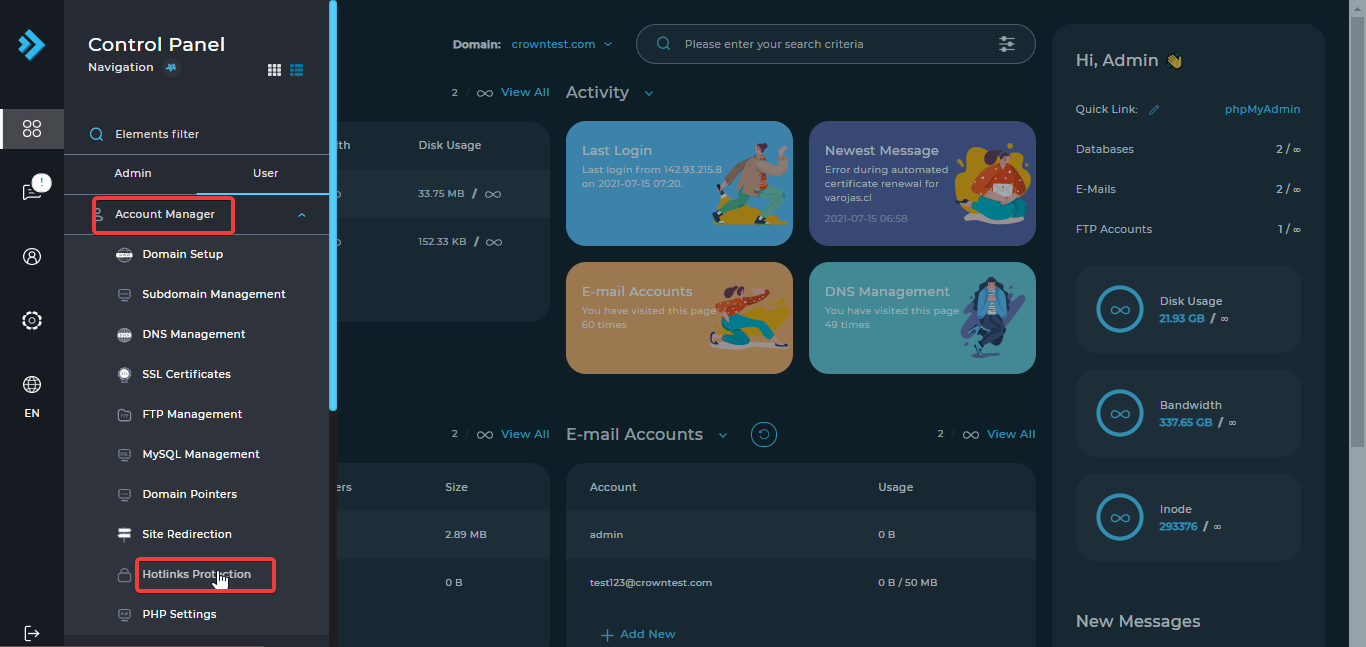
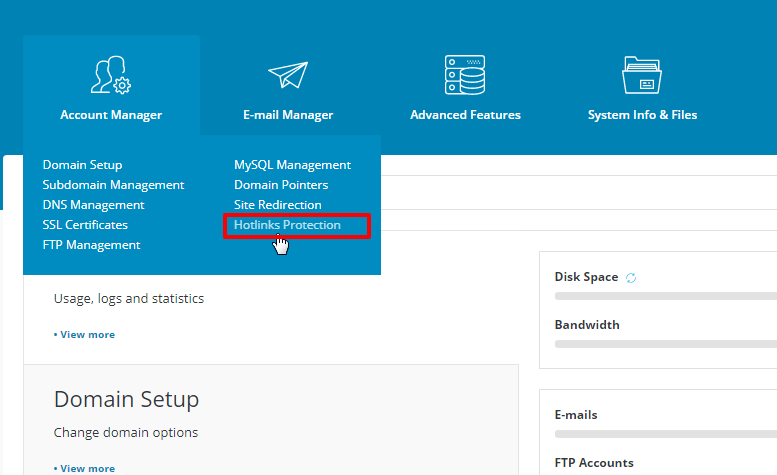
Move the cursor to Account Manager and click on Hotlinks Protection.
Enable Hotlinks Protection
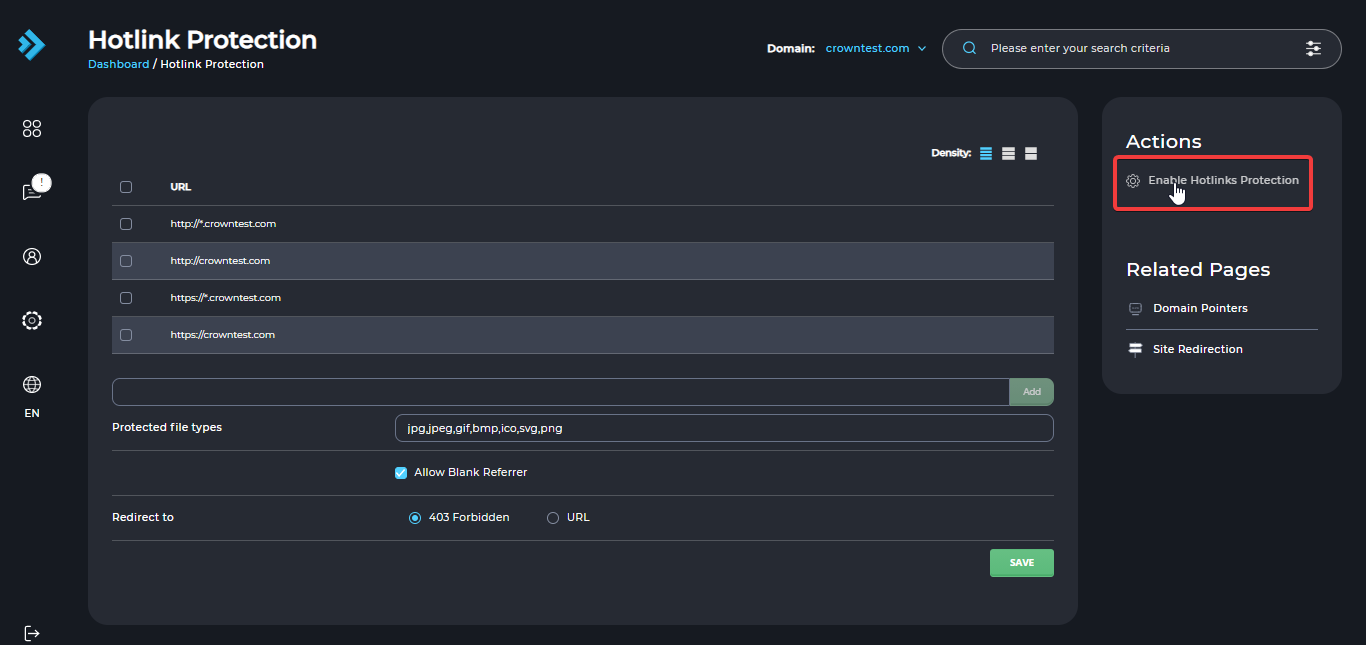
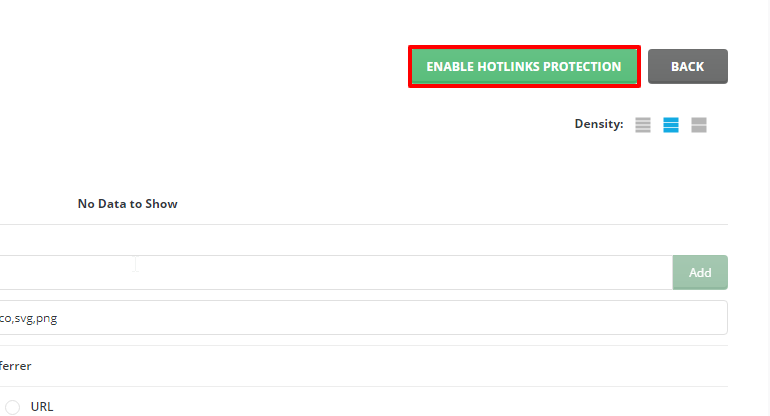
Click the Enable Hotlinks Protection button.
Add your domains
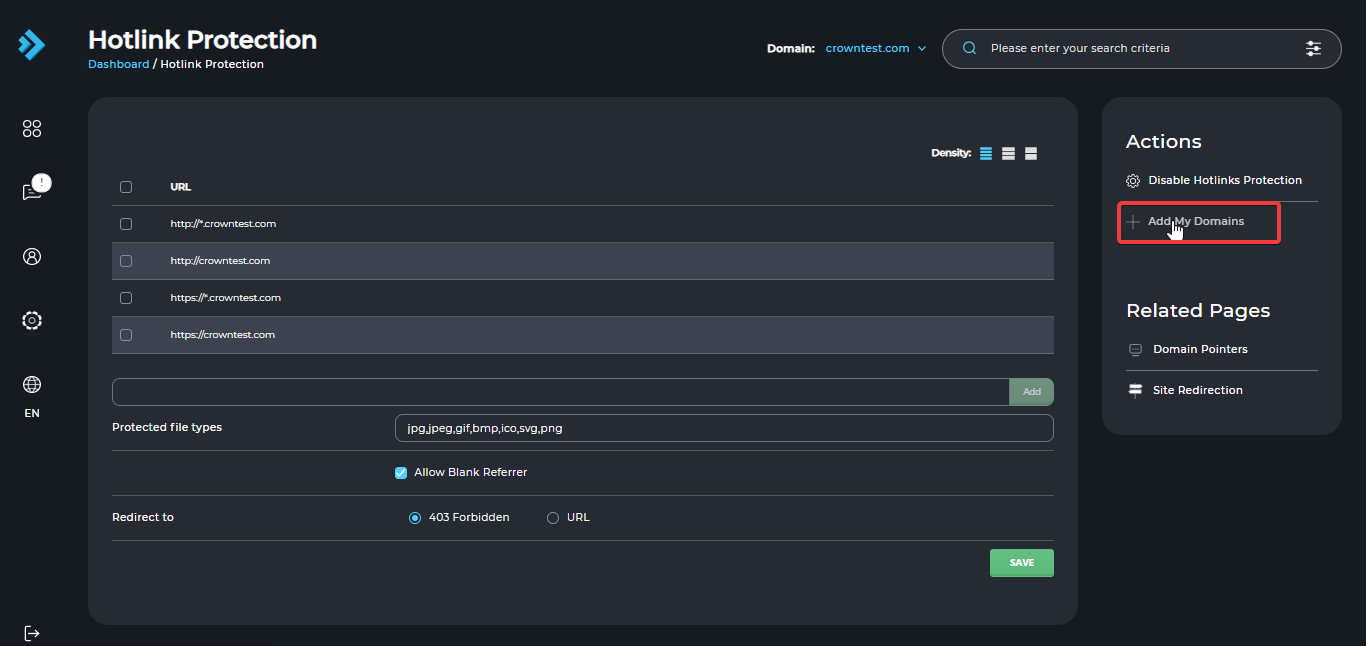
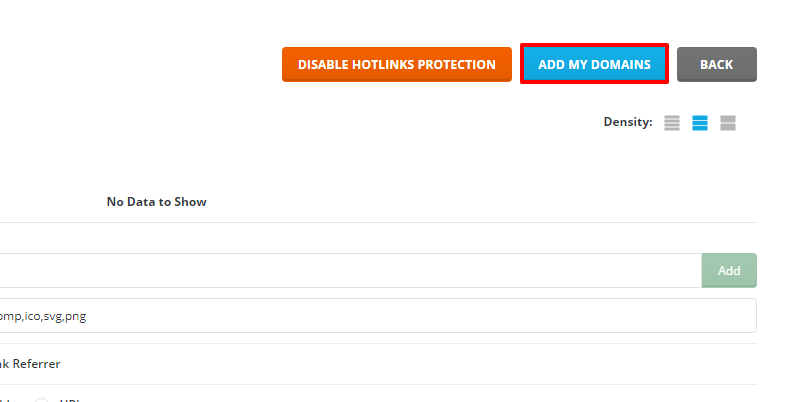
Add all the domains in your account. You can add them all at once by clicking the Add My Domains button.
Adjust the settings
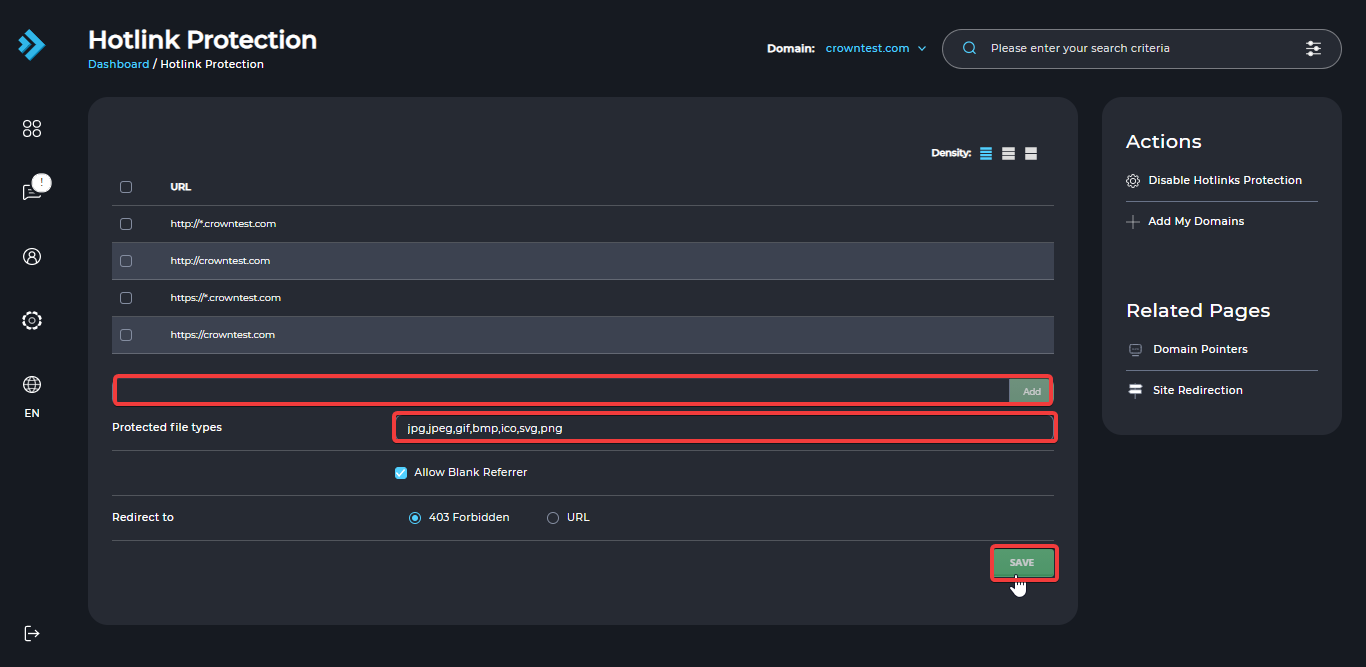
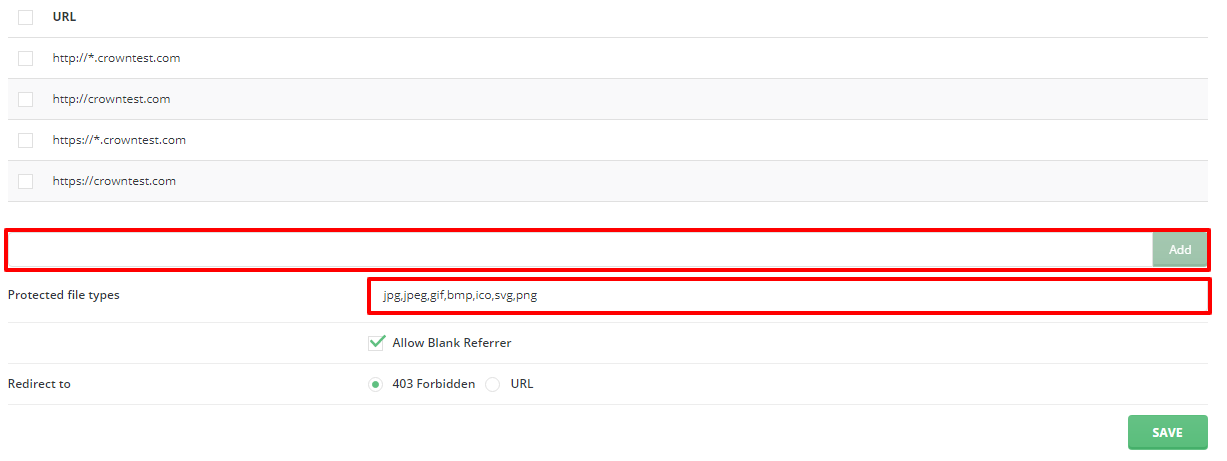
If any domain is missing, add it in the first text area and click the Add button.
You can add more file extensions that you want to protect in the Protected file types text area.
For the redirection, you can select and add a URL, or keep the default 403 Forbidden.
Save the settings
Click the Save button.
In the Standard Theme
Click here to show the steps
Log in to DirectAdmin
Log in to your DirectAdmin panel.
Open Hotlinks Protection
Move the cursor to Account Manager and click on Hotlinks Protection.
Enable Hotlinks Protection
Click the Enable Hotlinks Protection button.
Add your domains
Add all the domains in your account. You can add them all at once by clicking the Add My Domains button.
Adjust the settings
If any domain is missing, add it in the first text area and click the Add button.
You can add more file extensions that you want to protect in the Protected file types text area.
For the redirection, you can select and add a URL, or keep the default 403 Forbidden.
Save the settings
Click the Save button.