

How to Enable DKIM in DirectAdmin
If you are using the Standard theme on DirectAdmin, switch to the Refreshed theme as shown in How to change theme or layout on DirectAdmin.
DKIM stands for DomainKeys Identified Mail and is used to authenticate emails that are being sent. A DKIM record exists in the DNS, but it is a bit more complicated than SPF. DKIM's advantage is that it can survive forwarding, which makes it superior to SPF and a foundation for securing your email.
You need to log in as a User. If you are a Reseller, change the access level to User from the dropdown in the top-right corner.
In the Refreshed Theme
Enable DKIM
Log in as a User
Log in to DirectAdmin as a User.
Open Email Accounts
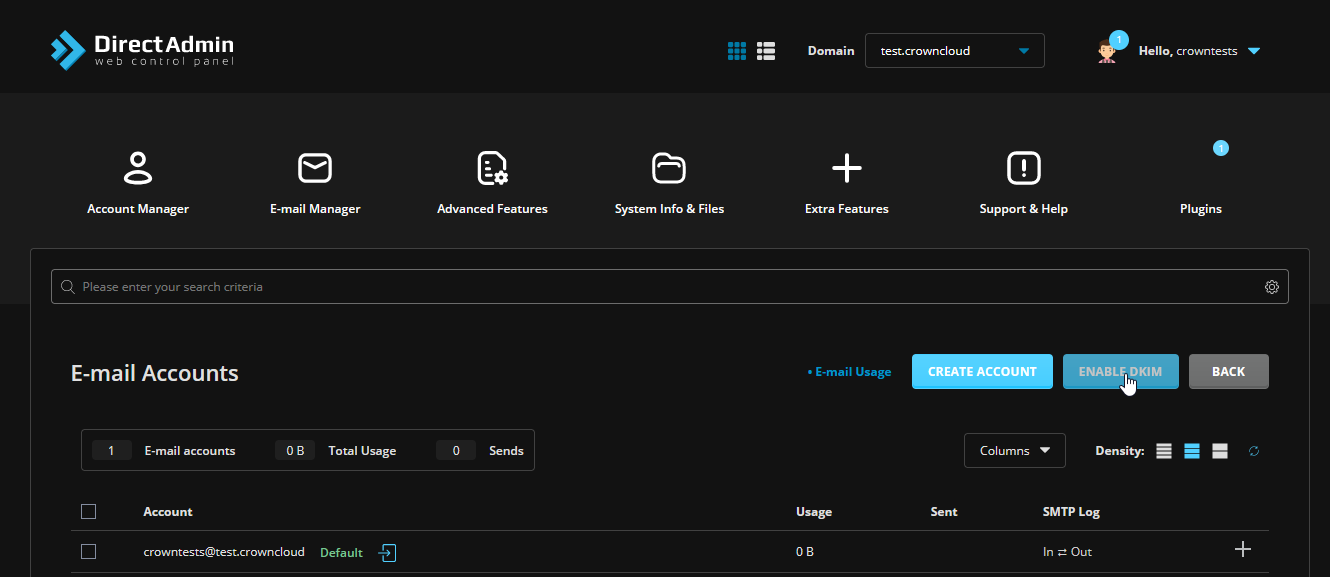
Navigate to Email Manager > Email Accounts.
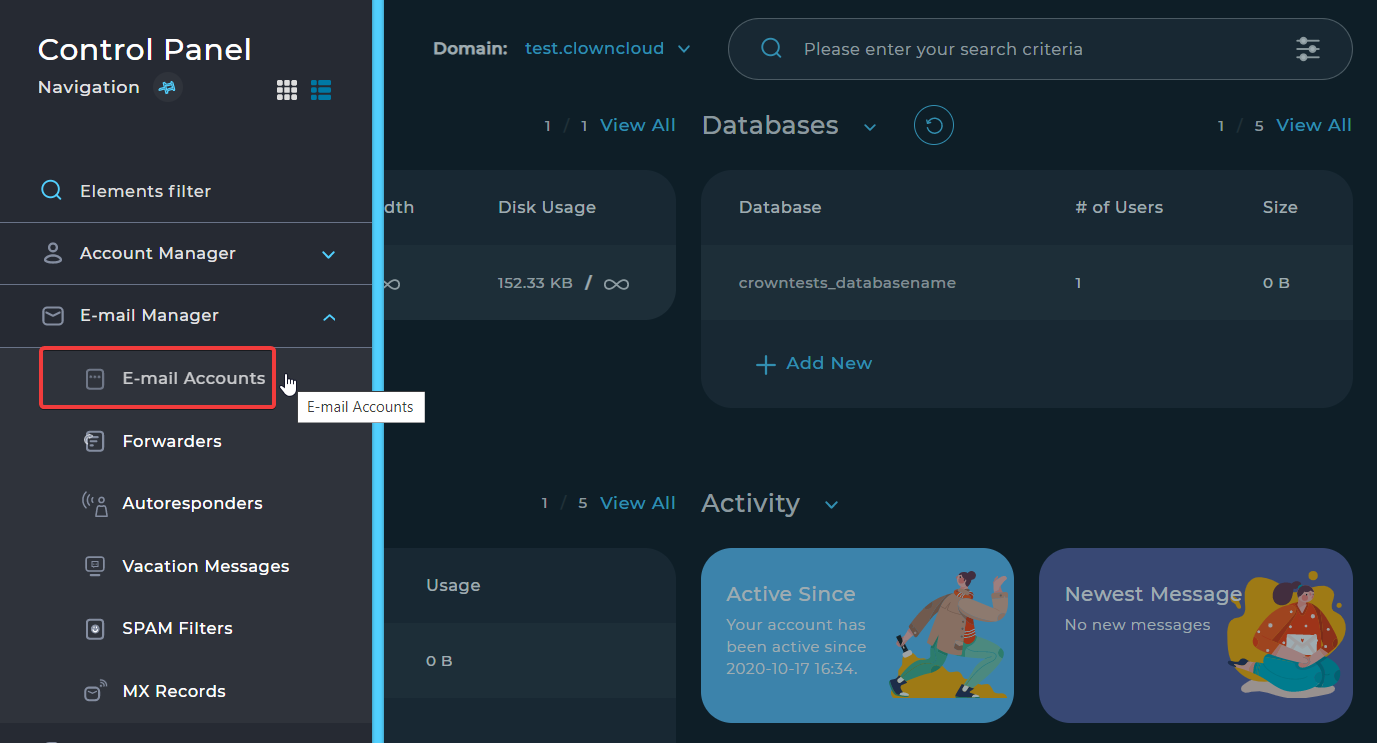
Click Enable DKIM
Click the Enable DKIM button.
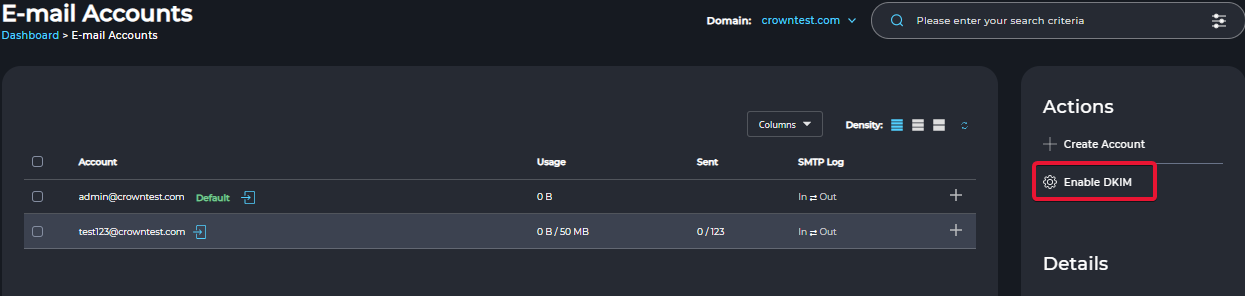
Update Your DNS Records
Enabling DKIM adds two new DNS records within DirectAdmin.
Open DNS Management
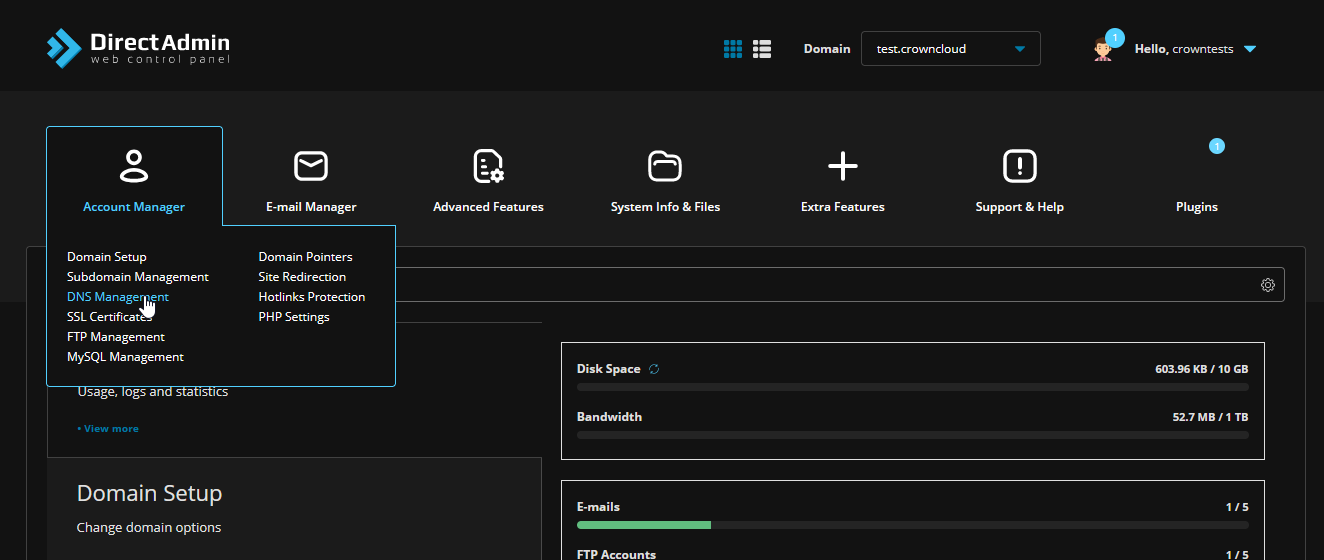
Navigate to Account Manager > DNS Management. Be sure you are on the right domain.
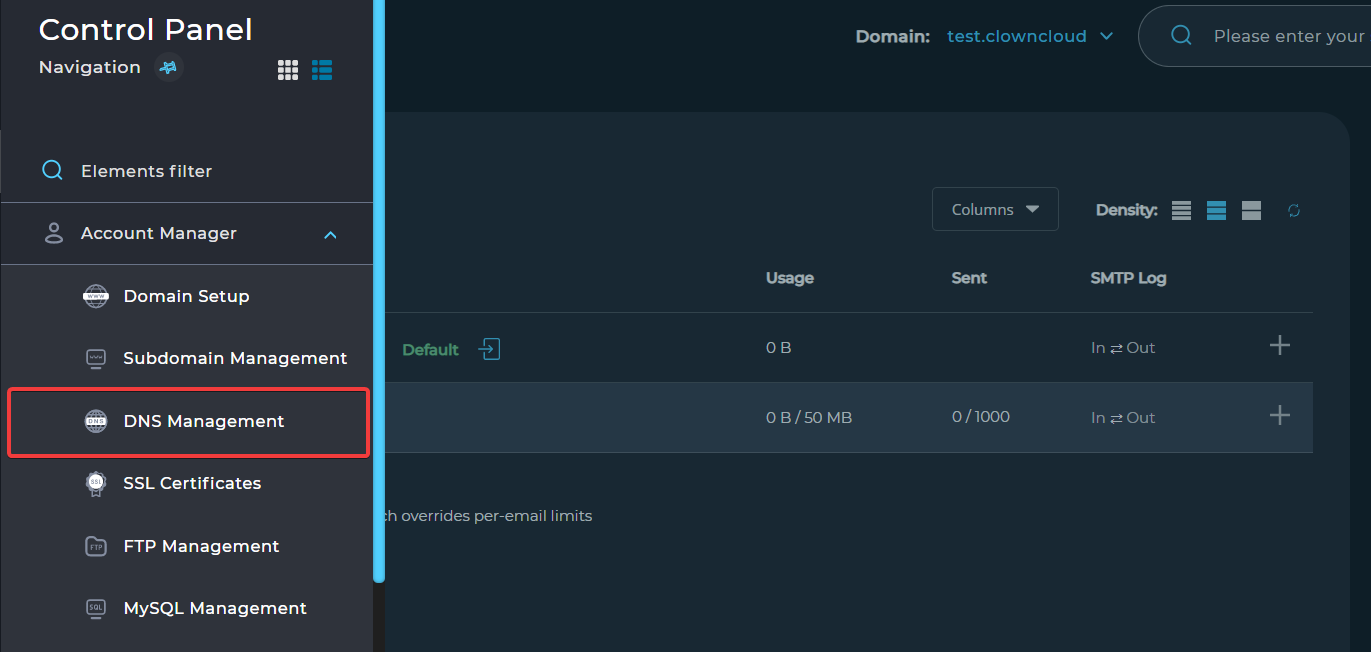
Find the DKIM record
Two new TXT records have been added. You need the contents of the x._domainkey record, which has the following format:
Add the record to external DNS (if needed)
If you use Cloudflare to manage your domain's DNS, add a new TXT record (DKIM is configured as a TXT record) with the contents of the TXT record from DirectAdmin. For more information, see Managing DNS records in Cloudflare.
Once everything is configured, you should be able to send signed emails.
In the Standard Theme
Click here to show the steps
Enable DKIM
Log in as a User
Log in to DirectAdmin as a User.
Open Email Accounts
Navigate to Email Manager > Email Accounts.
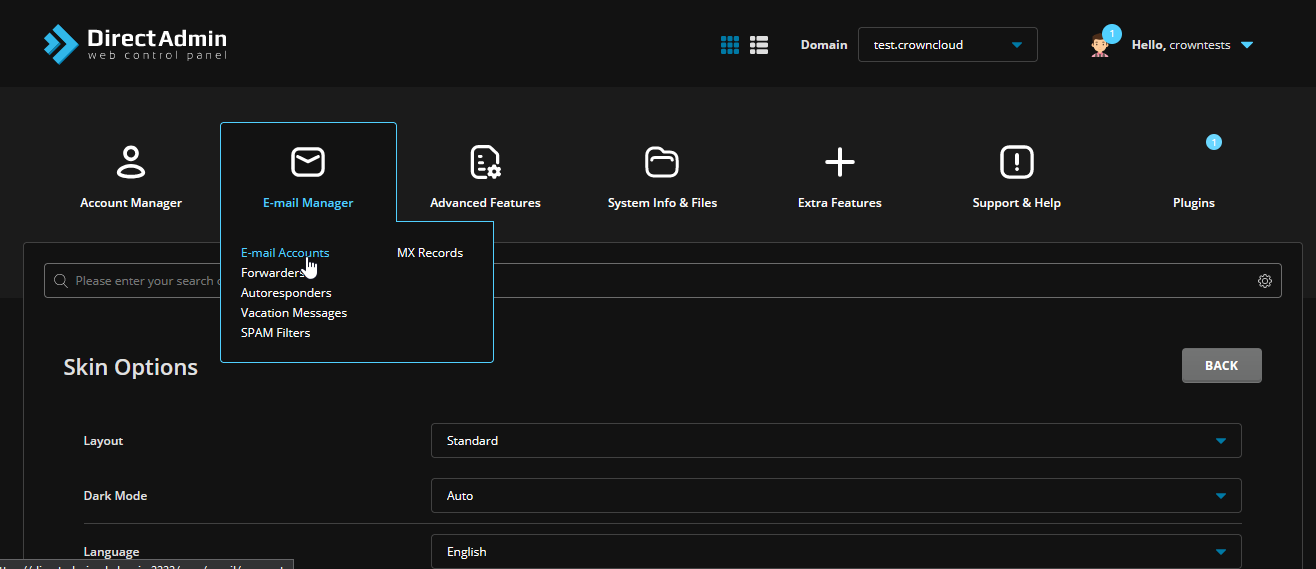
Click Enable DKIM
Click the Enable DKIM button.
Update Your DNS Records
Enabling DKIM adds two new DNS records within DirectAdmin.
Open DNS Management
Navigate to Account Manager > DNS Management. Be sure you are on the right domain.
Find the DKIM record
Two new TXT records have been added. You need the contents of the x._domainkey record, which has the following format:
Add the record to external DNS (if needed)
If you use Cloudflare to manage your domain's DNS, add a new TXT record (DKIM is configured as a TXT record) with the contents of the TXT record from DirectAdmin. For more information, see Managing DNS records in Cloudflare.
Once everything is configured, you should be able to send signed emails.