

How to Create an Email Account in DirectAdmin
DirectAdmin lets you create mailboxes for any domain hosted under your account. Each mailbox gets its own password, its own storage quota, and can be used through webmail or any mail client that supports IMAP or POP3.
This guide covers creating a new email account from the User level of DirectAdmin.
DirectAdmin offers two interface themes: the Standard theme (the traditional interface) and the Refreshed theme (a newer, more modern interface). Steps for both are below. To switch themes, see How to Change Theme or Layout in DirectAdmin.
Requirements
- A DirectAdmin User account, or a Reseller or Admin account switched into the User level.
- The domain already added under Account Manager > Domain Setup.
- MX records for the domain pointing to the mail server, so the new mailbox can receive external mail.
- Free disk space in the hosting package, since mailbox storage counts towards the account total.
In the Refreshed Theme
Log in to DirectAdmin
Log in to the DirectAdmin panel.
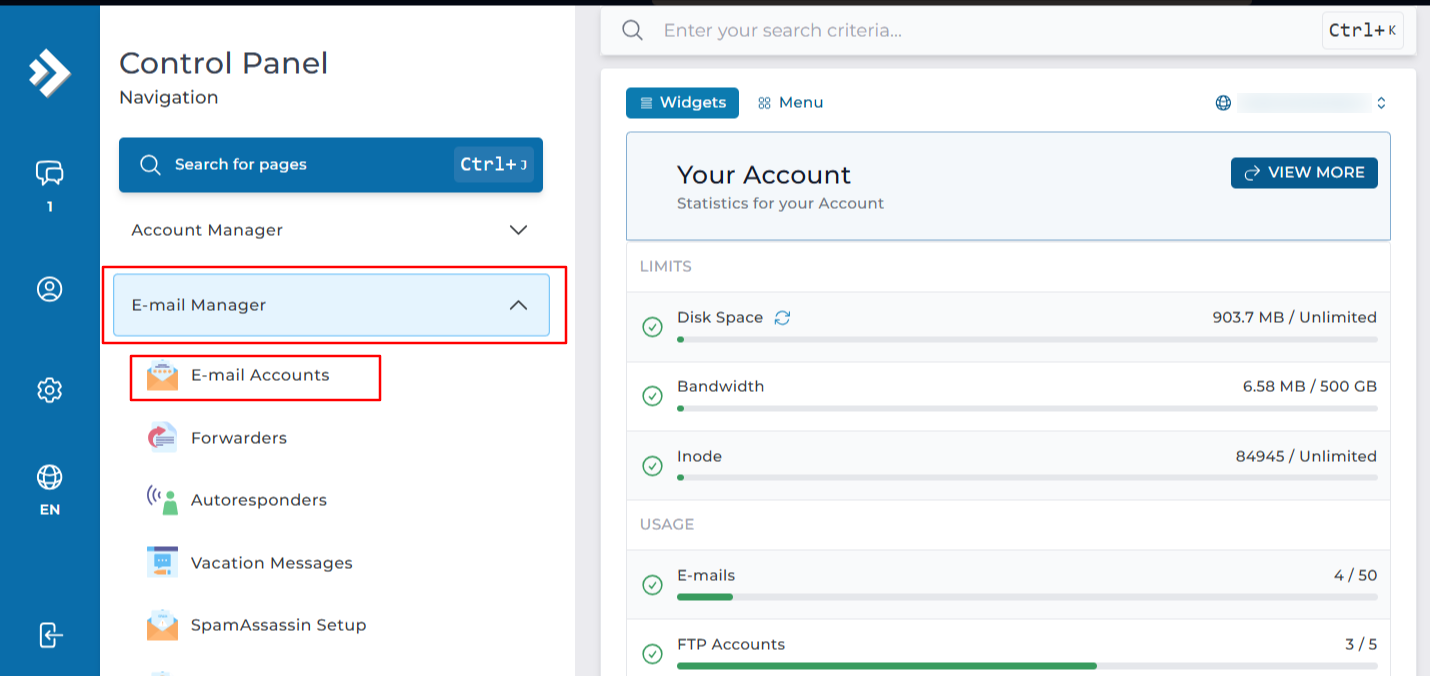
Open E-Mail Accounts
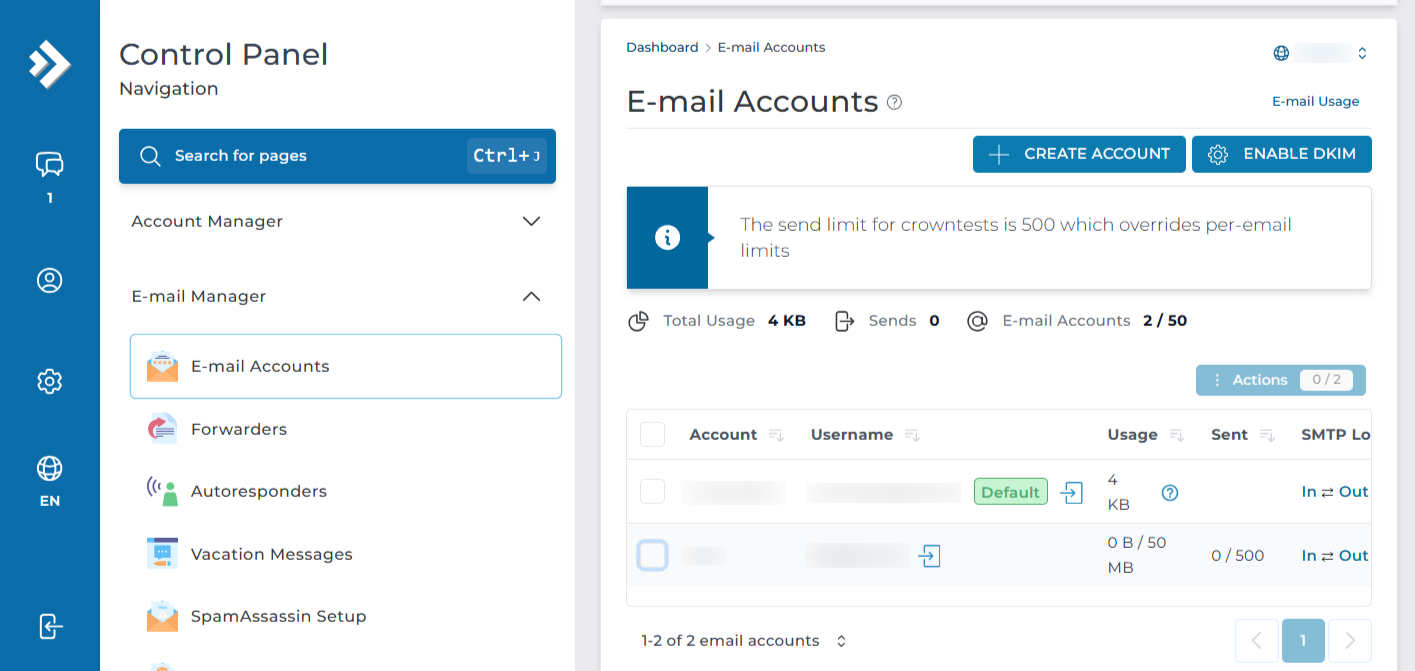
Click on E-Mail Accounts under E-Mail Manager. You can also type E-Mail Accounts in the navigation filter box to jump straight to the page.
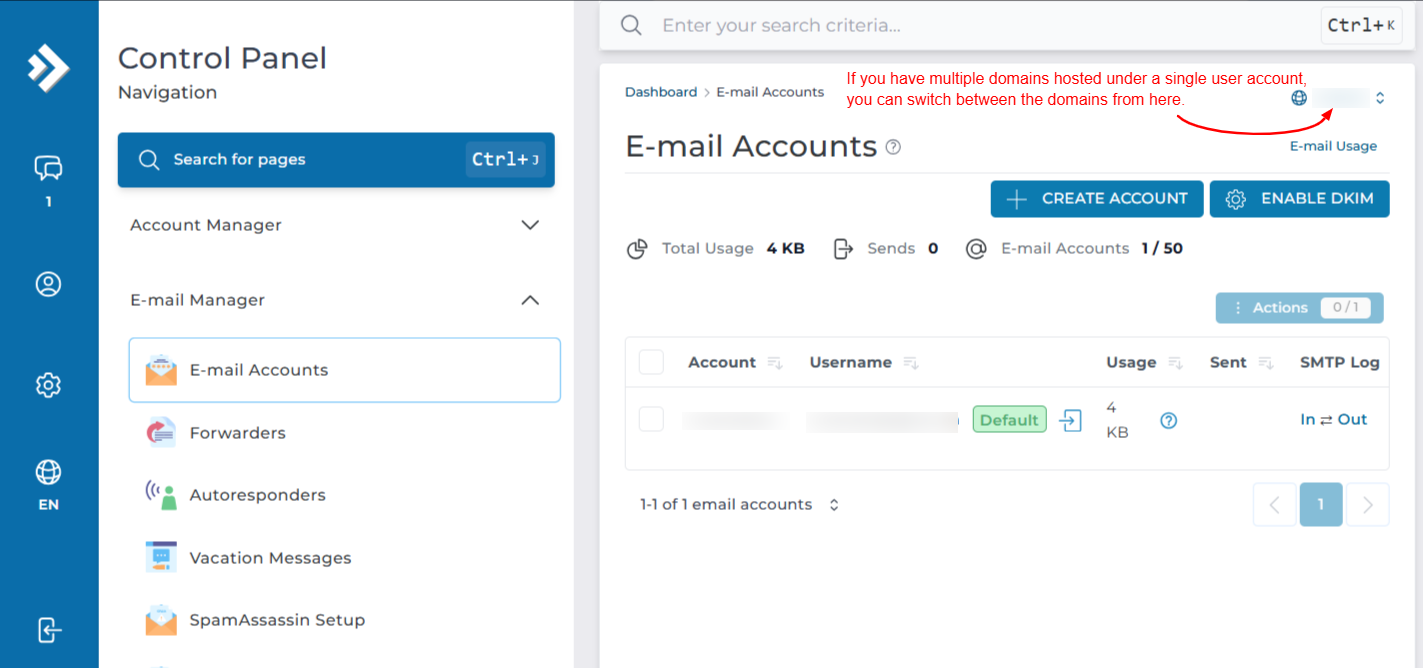
Select the domain
If your account holds more than one domain, check the domain shown at the top of the page and switch it if needed. Every mailbox you create belongs to the domain selected here.
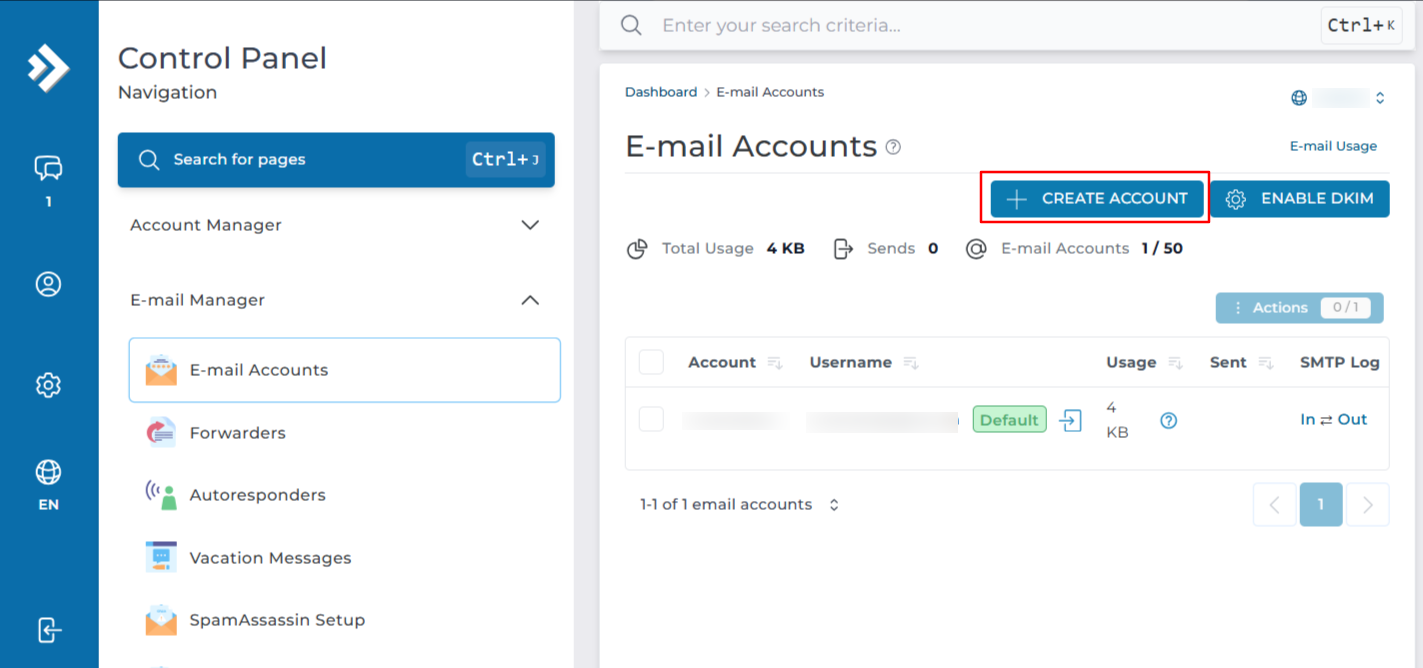
Click Create Account
Click on Create Account.
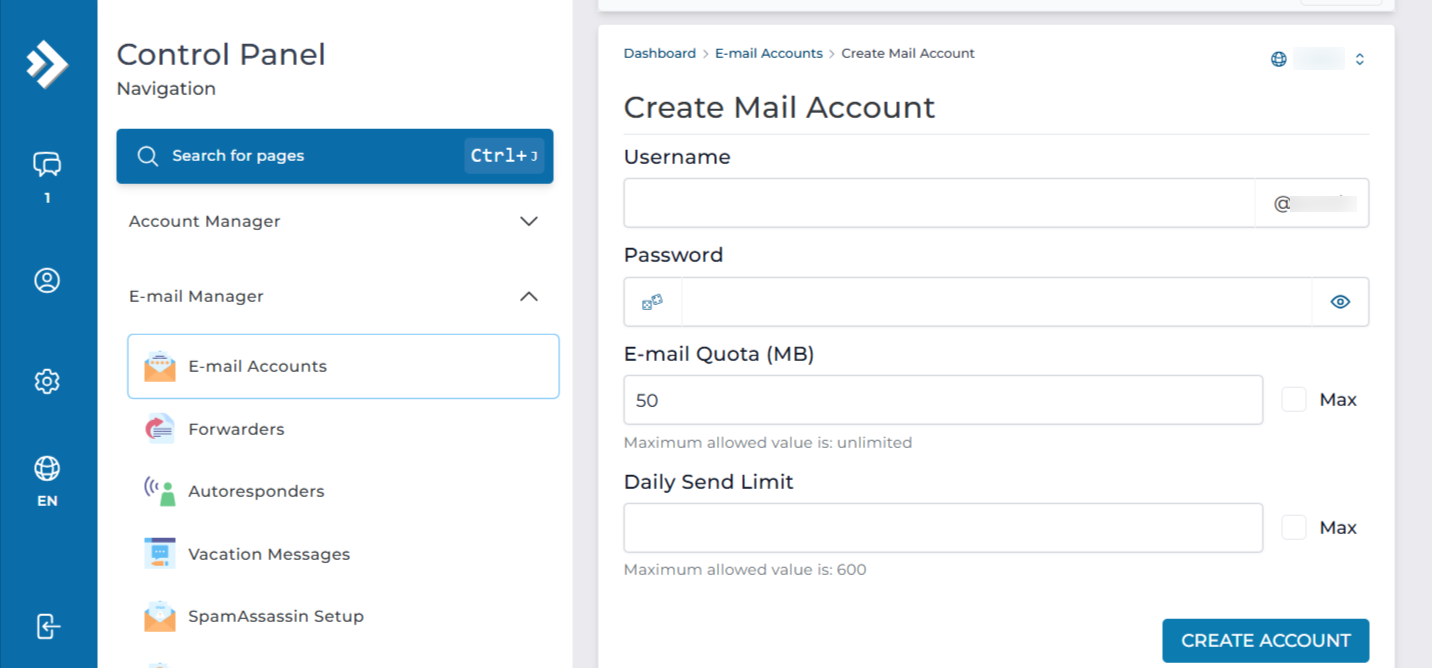
Fill in the account details
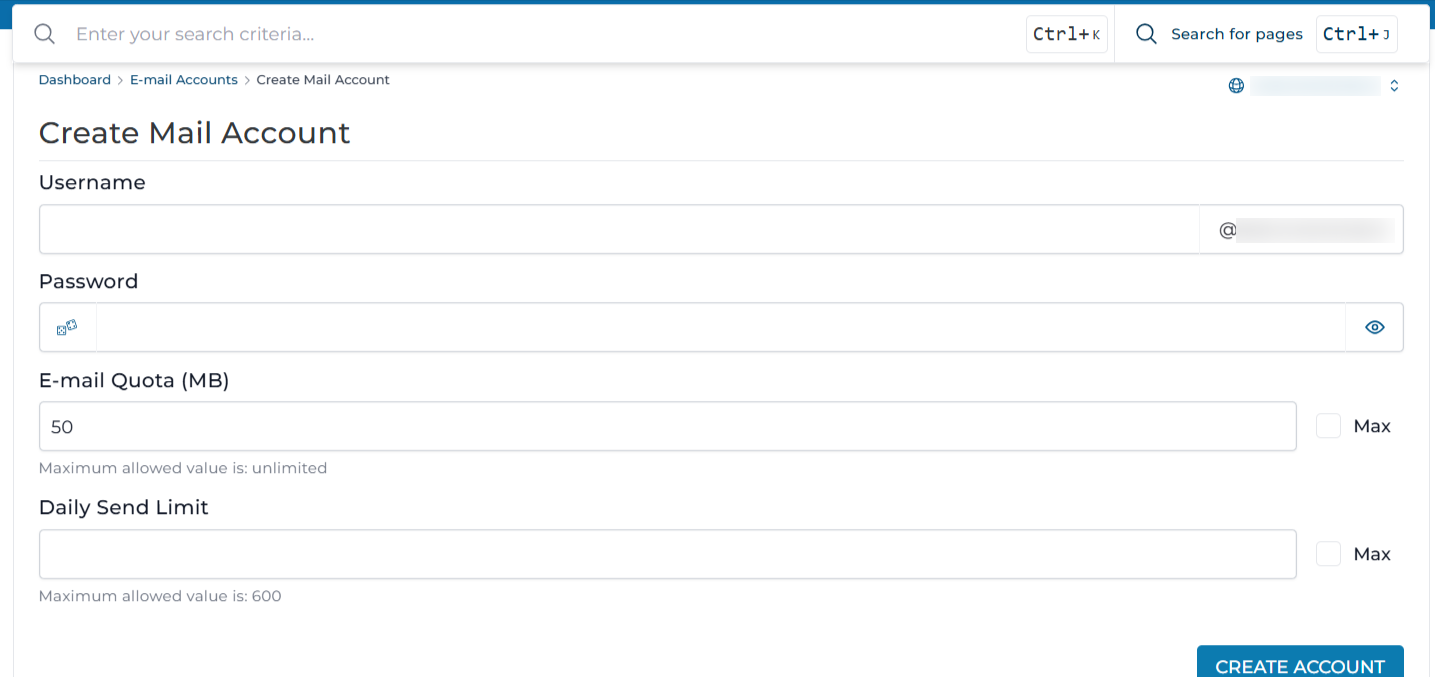
Fill in the account details:
- Username: the part before the
@, such assales. The domain is added automatically. - Password: set a strong password, or use the generator button.
- E-Mail Quota (MB): the storage limit for this mailbox, for example
2048for 2 GB. Tick Unlimited to remove the per-mailbox limit. - Send Limit: an optional cap on outgoing messages per day. Leave it blank to use the server default.
Create the account
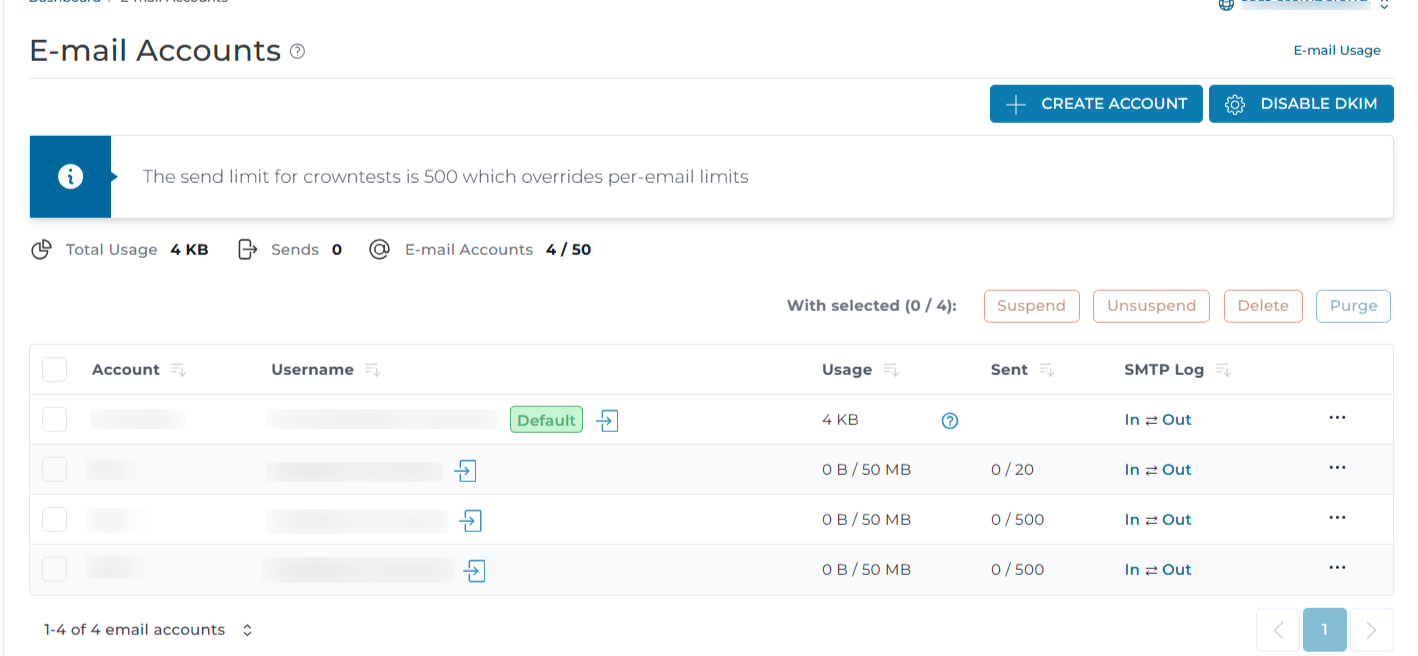
Click the Create Account button. The new email account is created and listed on the page along with its current usage and quota.
In the Standard Theme
Click here to show the steps
Log in to DirectAdmin
Log in to the DirectAdmin panel.
Open E-Mail Accounts
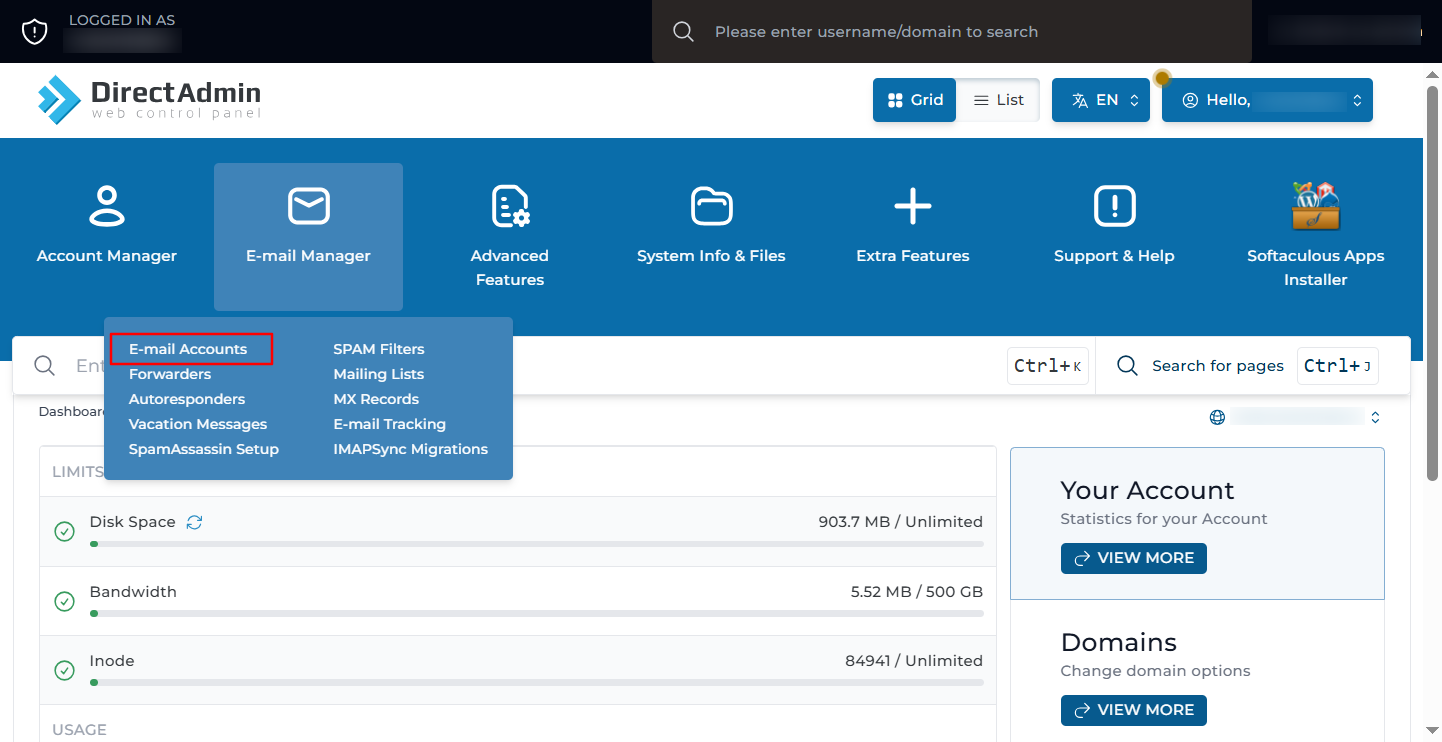
On the dashboard, go to E-Mail Manager and click E-Mail Accounts.
Click Create Account
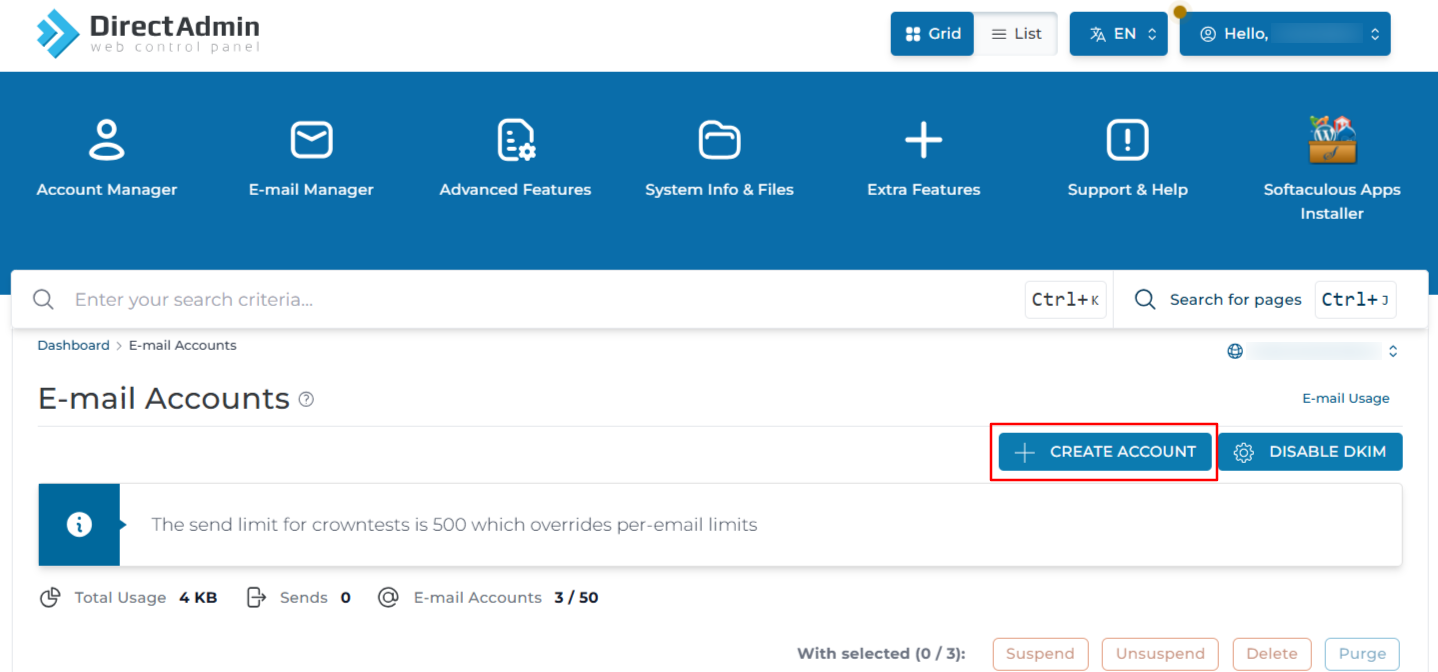
Click on Create Account in the top-right corner of the page. You will see a screen asking for the username, password, and other details.
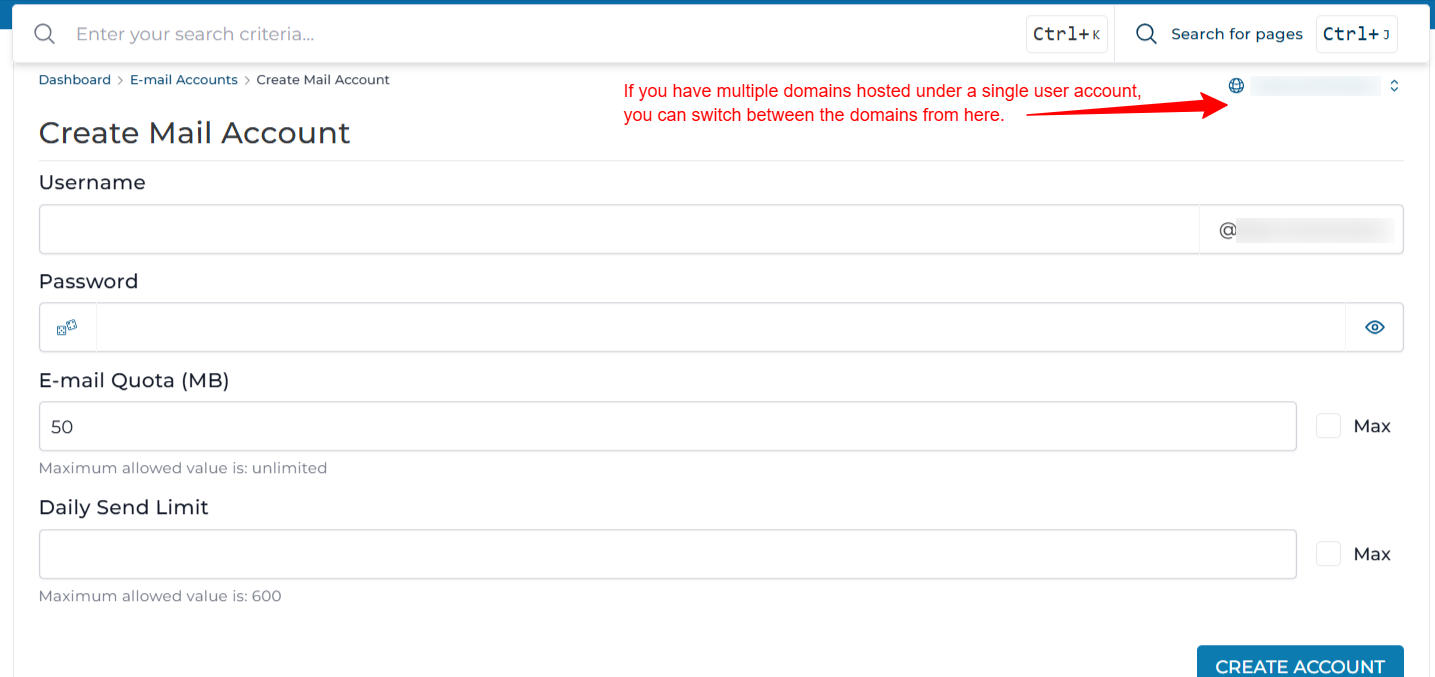
If you have multiple domains hosted under the same user account, this screen opens for creating an email account on the main domain by default. You can change the domain as shown below.
Fill in the account details
Enter the username you want to use for the email account in the Username field, set a password, and specify the Email Quota in MB. Enter 0 for unlimited storage.
Create the account
Click Create Account. The confirmation page shows the login details and the incoming and outgoing server names for the new email account.
Check the account list
The mailbox now appears in the account list. From there, you can change its password, adjust its limits, or delete the email account later.
Verification
Sign in to webmail with the new address to confirm the mailbox works. Open one of the following in a browser and use the full email address as the username:
You can also click the link in the Login column next to the account on the E-Mail Accounts page to sign in without entering the password.
Send a message from the new mailbox to an outside address and reply to it. That confirms sending and receiving in one test.
If you have shell access, confirm that the mailbox directory was created. Replace USERNAME, YOUR_DOMAIN, and MAILBOX with the DirectAdmin username, the domain, and the new mailbox name:
Check the MX records if external mail does not arrive:
Mail Client Settings
Use these values to connect the new mailbox to Outlook, Thunderbird, or a phone.
Troubleshooting
Important Notes
- One mailbox already exists and matches your DirectAdmin username. It is permanent and cannot be deleted.
- A mailbox name cannot be shared with a forwarder, autoresponder, or mailing list on the same domain.
- New accounts default to a 50 MB quota unless the server administrator changed the default.
- Mailbox storage counts towards the total disk usage of the hosting package. Setting every mailbox to unlimited does not add space, it only removes the per-mailbox ceiling.
- Record the password somewhere safe. DirectAdmin does not display it again after the account is created.
Conclusion
The email account is now active and can be used through webmail or any mail client using the settings above. From the same E-Mail Accounts page you can later change the password, adjust the quota, suspend the account, or delete it.