

How to Enable and Use Redis Cache with WordPress in DirectAdmin
Want to make your WordPress site faster? If you are a developer or manage your own website, improving speed matters, and one of the best ways to do it is caching. Redis Cache with WordPress on DirectAdmin is a strong combination for performance.
This guide walks you through setting up Redis object caching on your WordPress site hosted with DirectAdmin. You will see a noticeable speed boost, a smoother experience for visitors, and less load on your server.
What Is Redis Cache?
Redis (Remote Dictionary Server) is a very fast, open-source tool that stores data in your server's memory instead of on disk. This makes it ideal for caching data that is accessed often.
In WordPress, Redis is used as an object cache. Normally, WordPress runs many database queries to load a page. With Redis, the results of those queries are saved in memory, so the site loads much faster the next time.
Benefits of Redis for WordPress
- Faster page loads: Redis stores data in your server's memory (RAM), making page load times much quicker, especially for dynamic content and logged-in users.
- Less database load: Redis reduces the number of queries sent to your MySQL or MariaDB database, helping your server run more smoothly under heavy traffic.
- Improved user experience: a faster site means happier visitors, lower bounce rates, and better engagement.
- Better server performance: offloading tasks to Redis can lower CPU and memory usage, leading to a more stable and efficient server.
- SEO benefits: search engines favor fast-loading websites, so Redis can indirectly help your search rankings.
- Scales with traffic: for growing or high-traffic sites, Redis makes it easier to handle more users without constantly upgrading your server.
Shared and Reseller Hosting
This is the recommended setup for our clients.
In shared and reseller environments, Redis acts as an object cache for WordPress. Every page load usually involves multiple database queries (posts, menus, settings and so on). Redis caches those results, so future page loads fetch data directly from memory and not from the database. The result is faster site speeds, reduced load, and a smoother user experience.
If you are using our DirectAdmin shared or reseller hosting, you do not need to worry about server-level setup such as SSH or installing Redis. We have already handled that behind the scenes.
Set Up Redis on Shared or Reseller Hosting
Open the Redis settings
Log in to your DirectAdmin panel as a user, then navigate to Advanced Features > Redis.
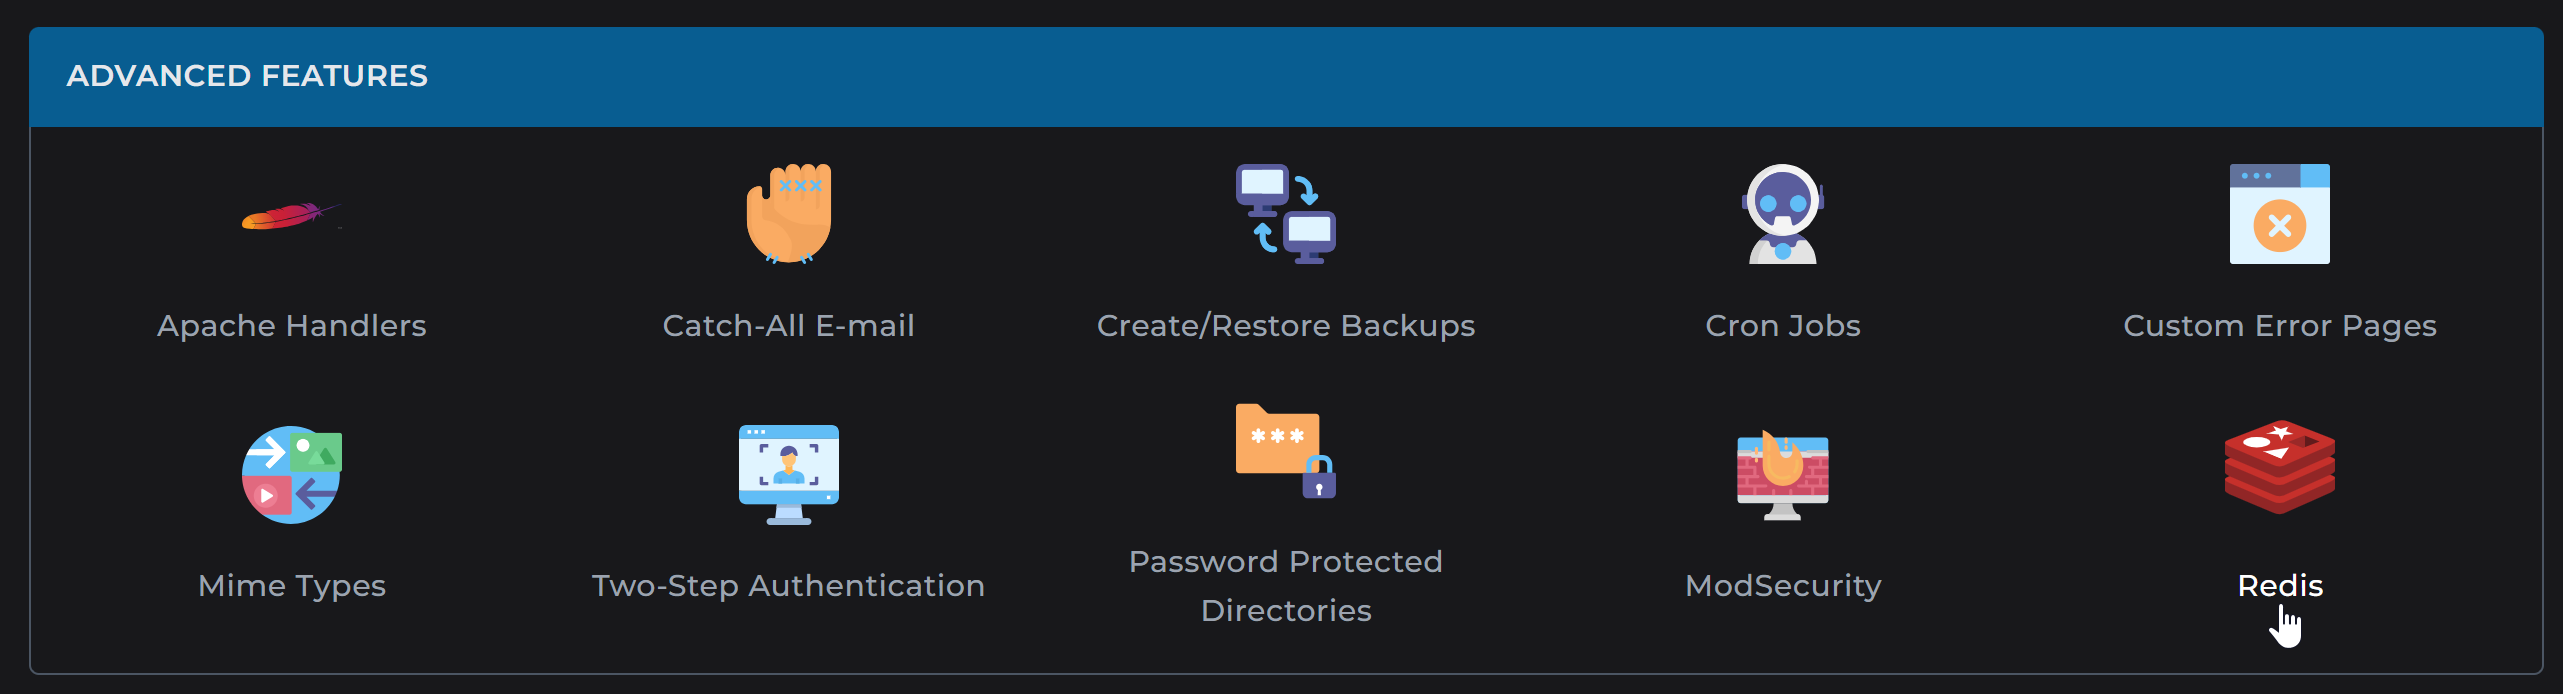
Enable Redis
If Redis is disabled, click the Enable button.
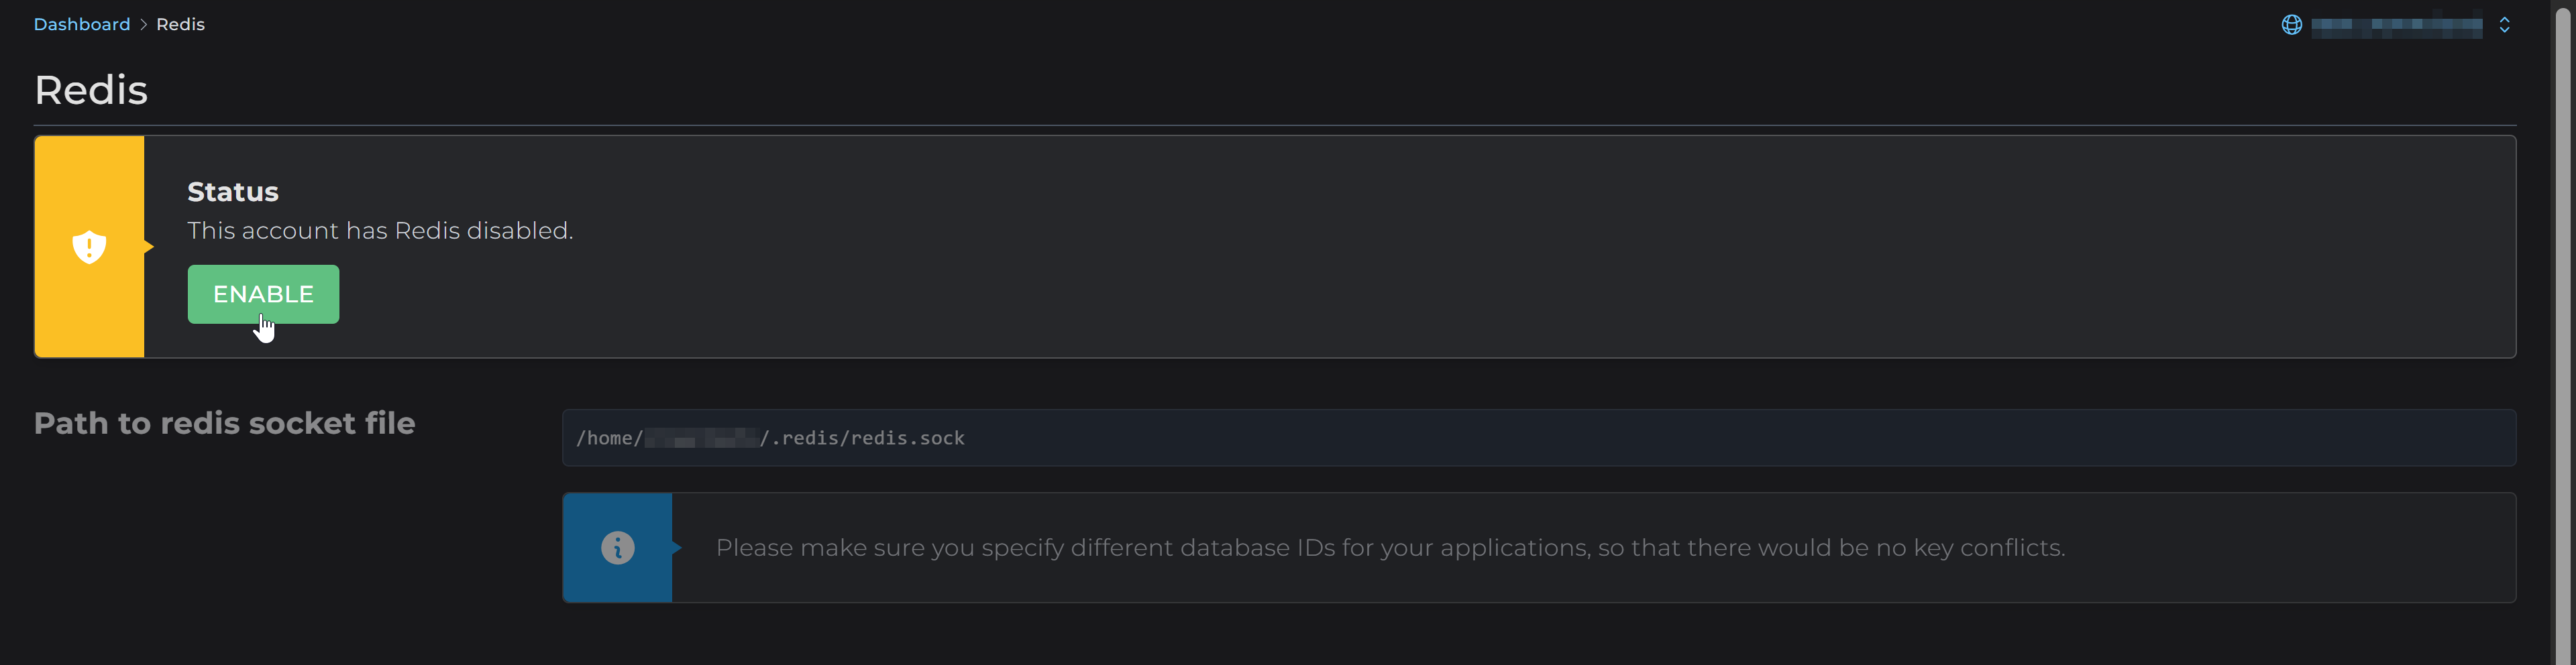
Note the Redis socket file path
Once enabled, Redis displays a socket file path. Copy and save this path, because you will need it in your WordPress configuration file.
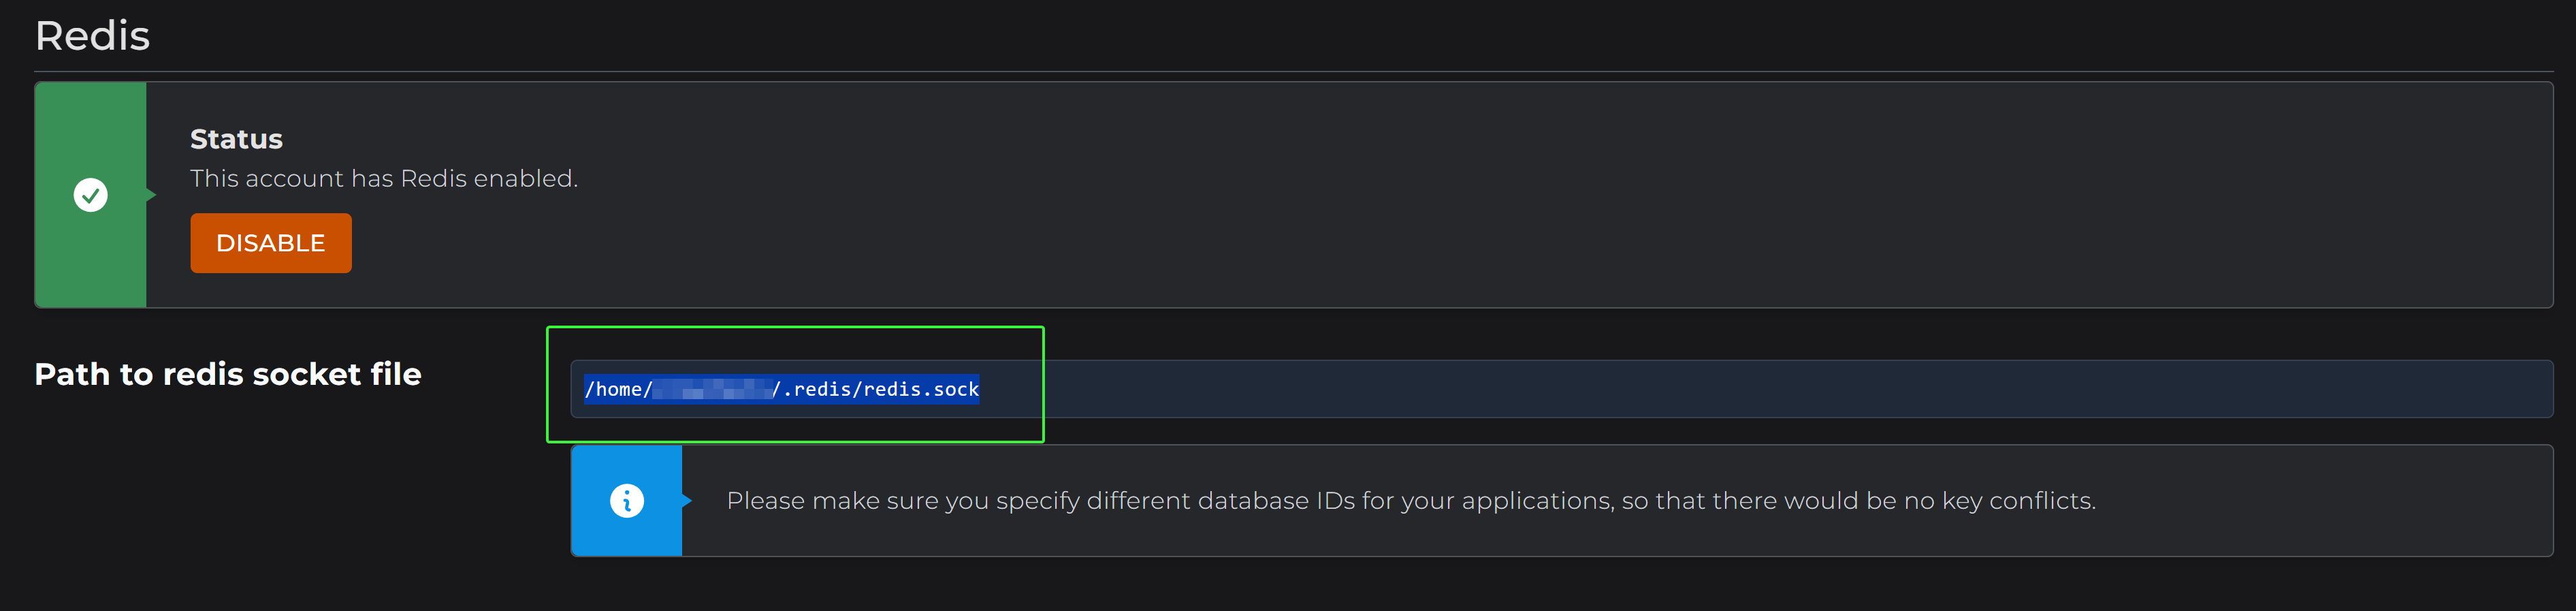
Locate your WordPress installation
Open File Manager from DirectAdmin and navigate to the folder containing your WordPress site.

Open wp-config.php
Locate and open the wp-config.php file.
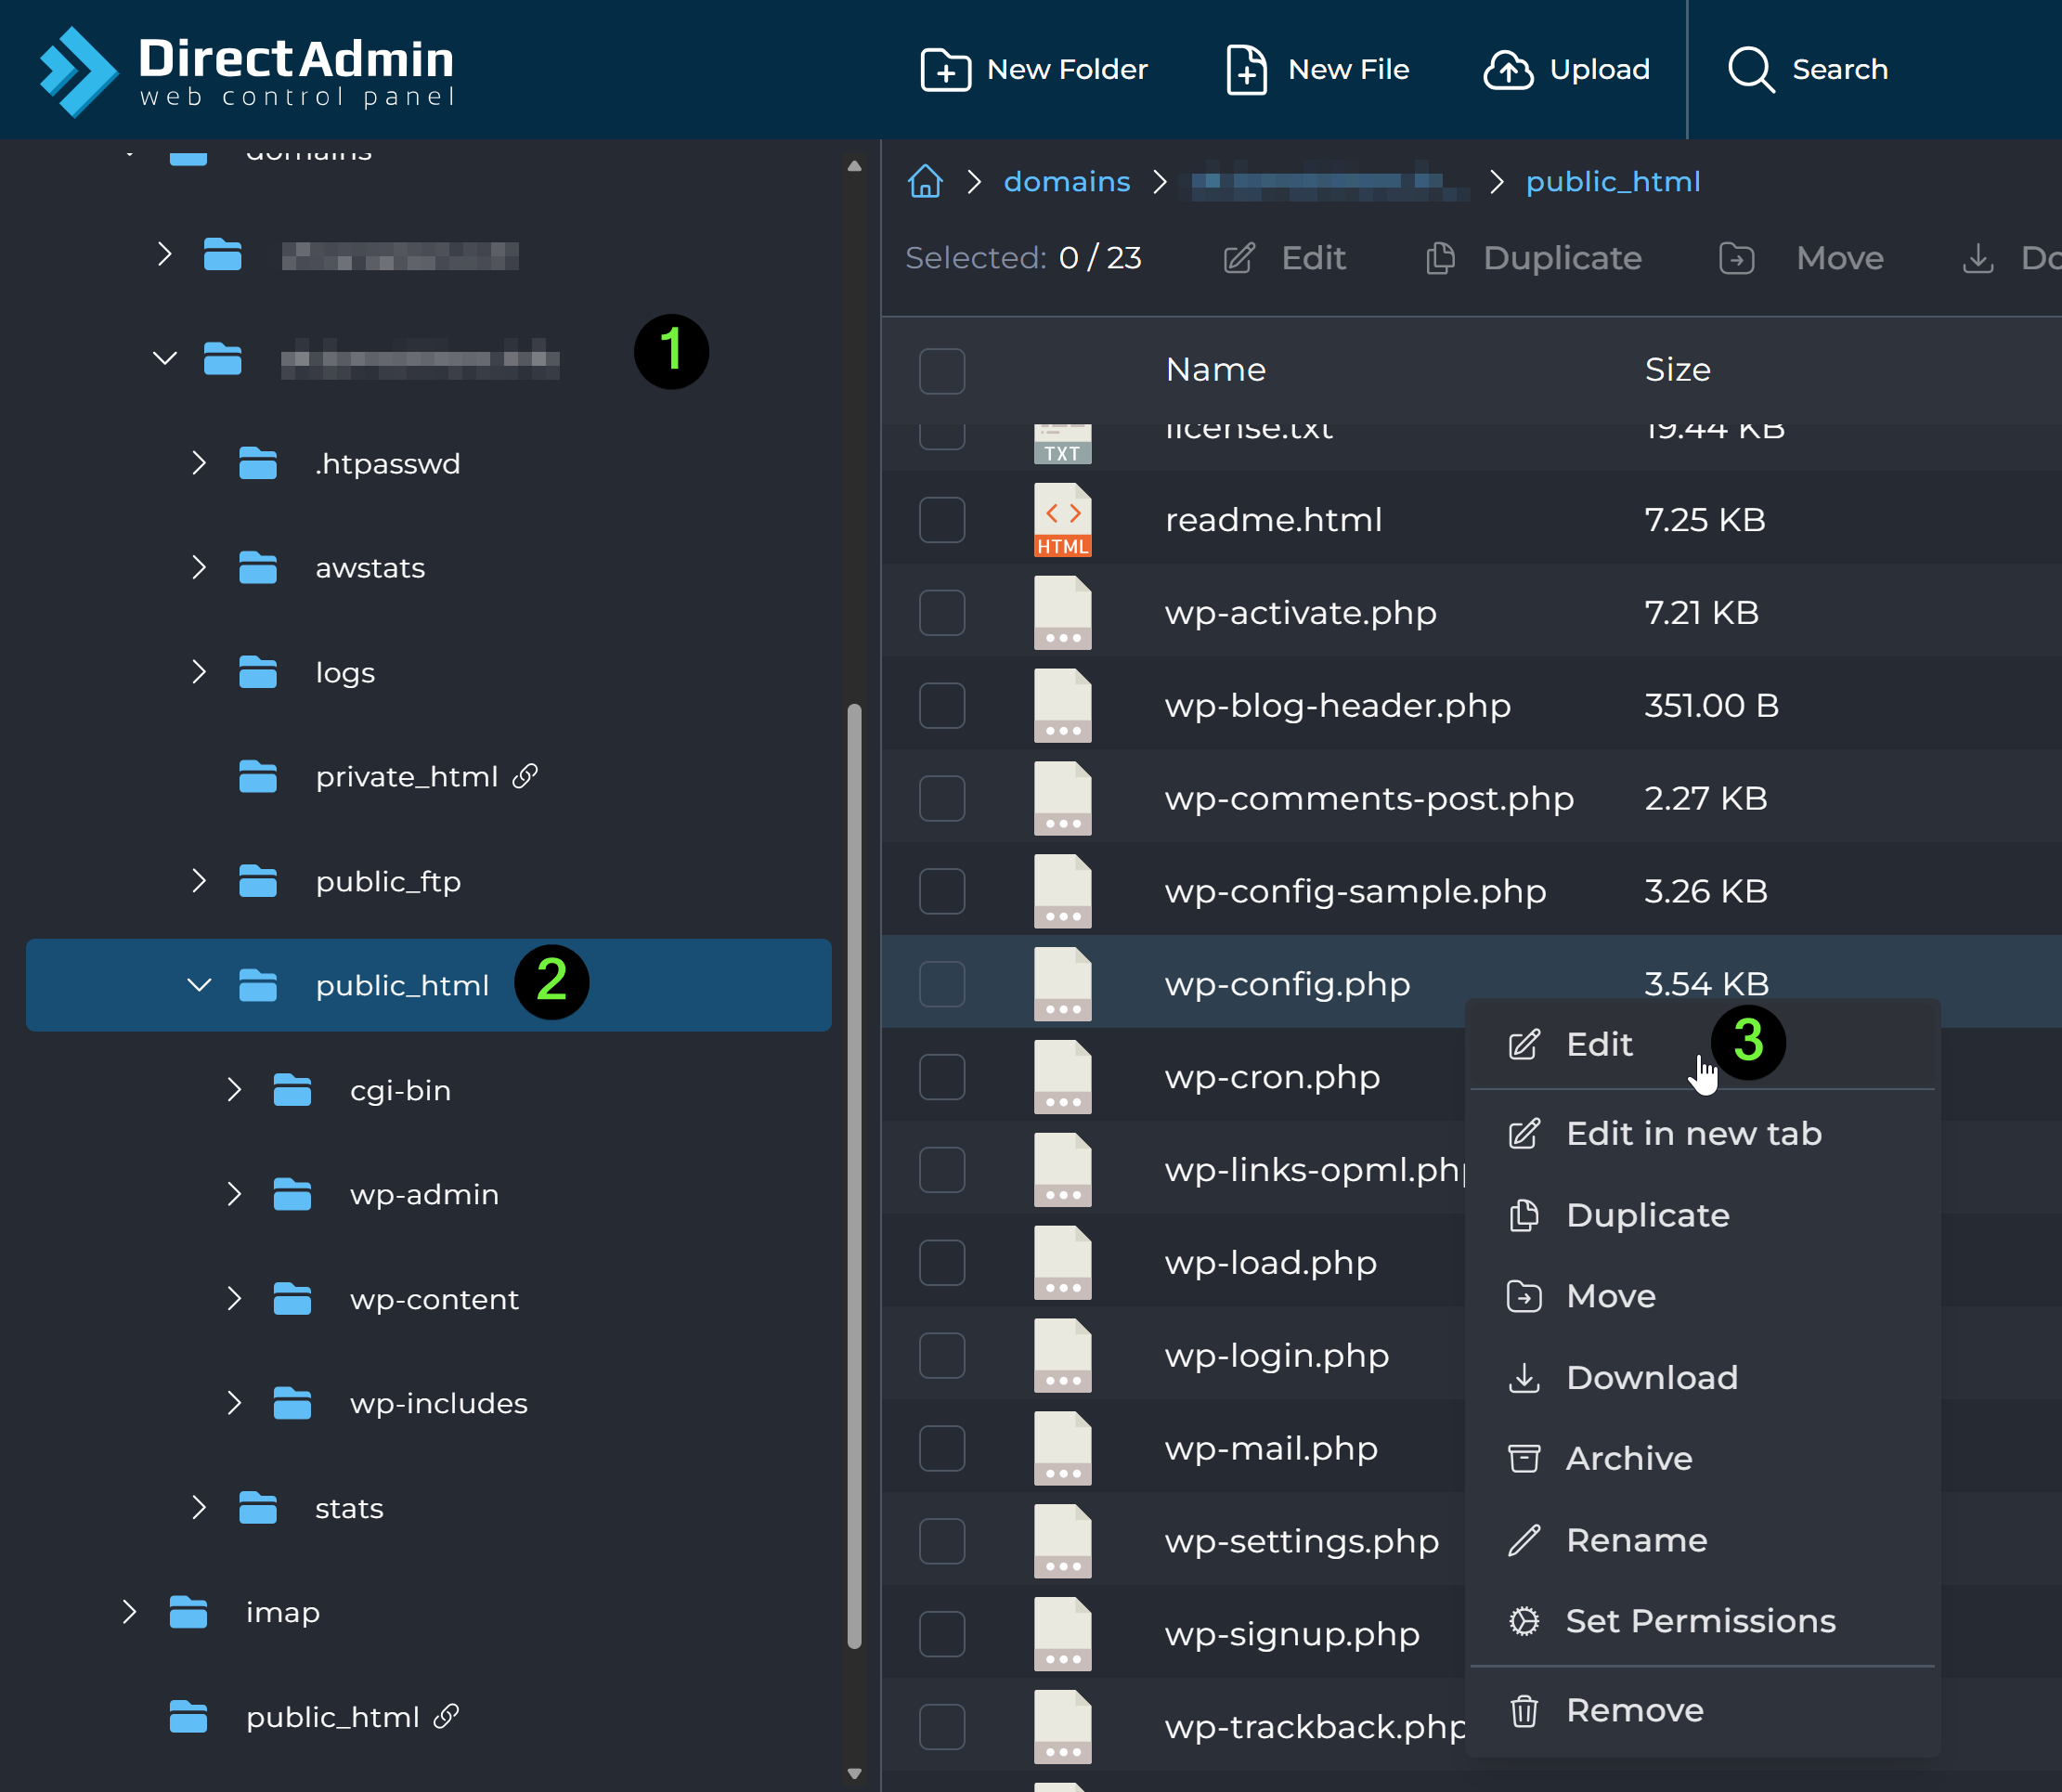
Add the Redis configuration lines
The WP_REDIS_* constants must be defined high up in the file. Insert the following lines near the top, or before the line that says /* That's all, stop editing! */:
Replace /path/to/redis.sock with the socket path you copied earlier.
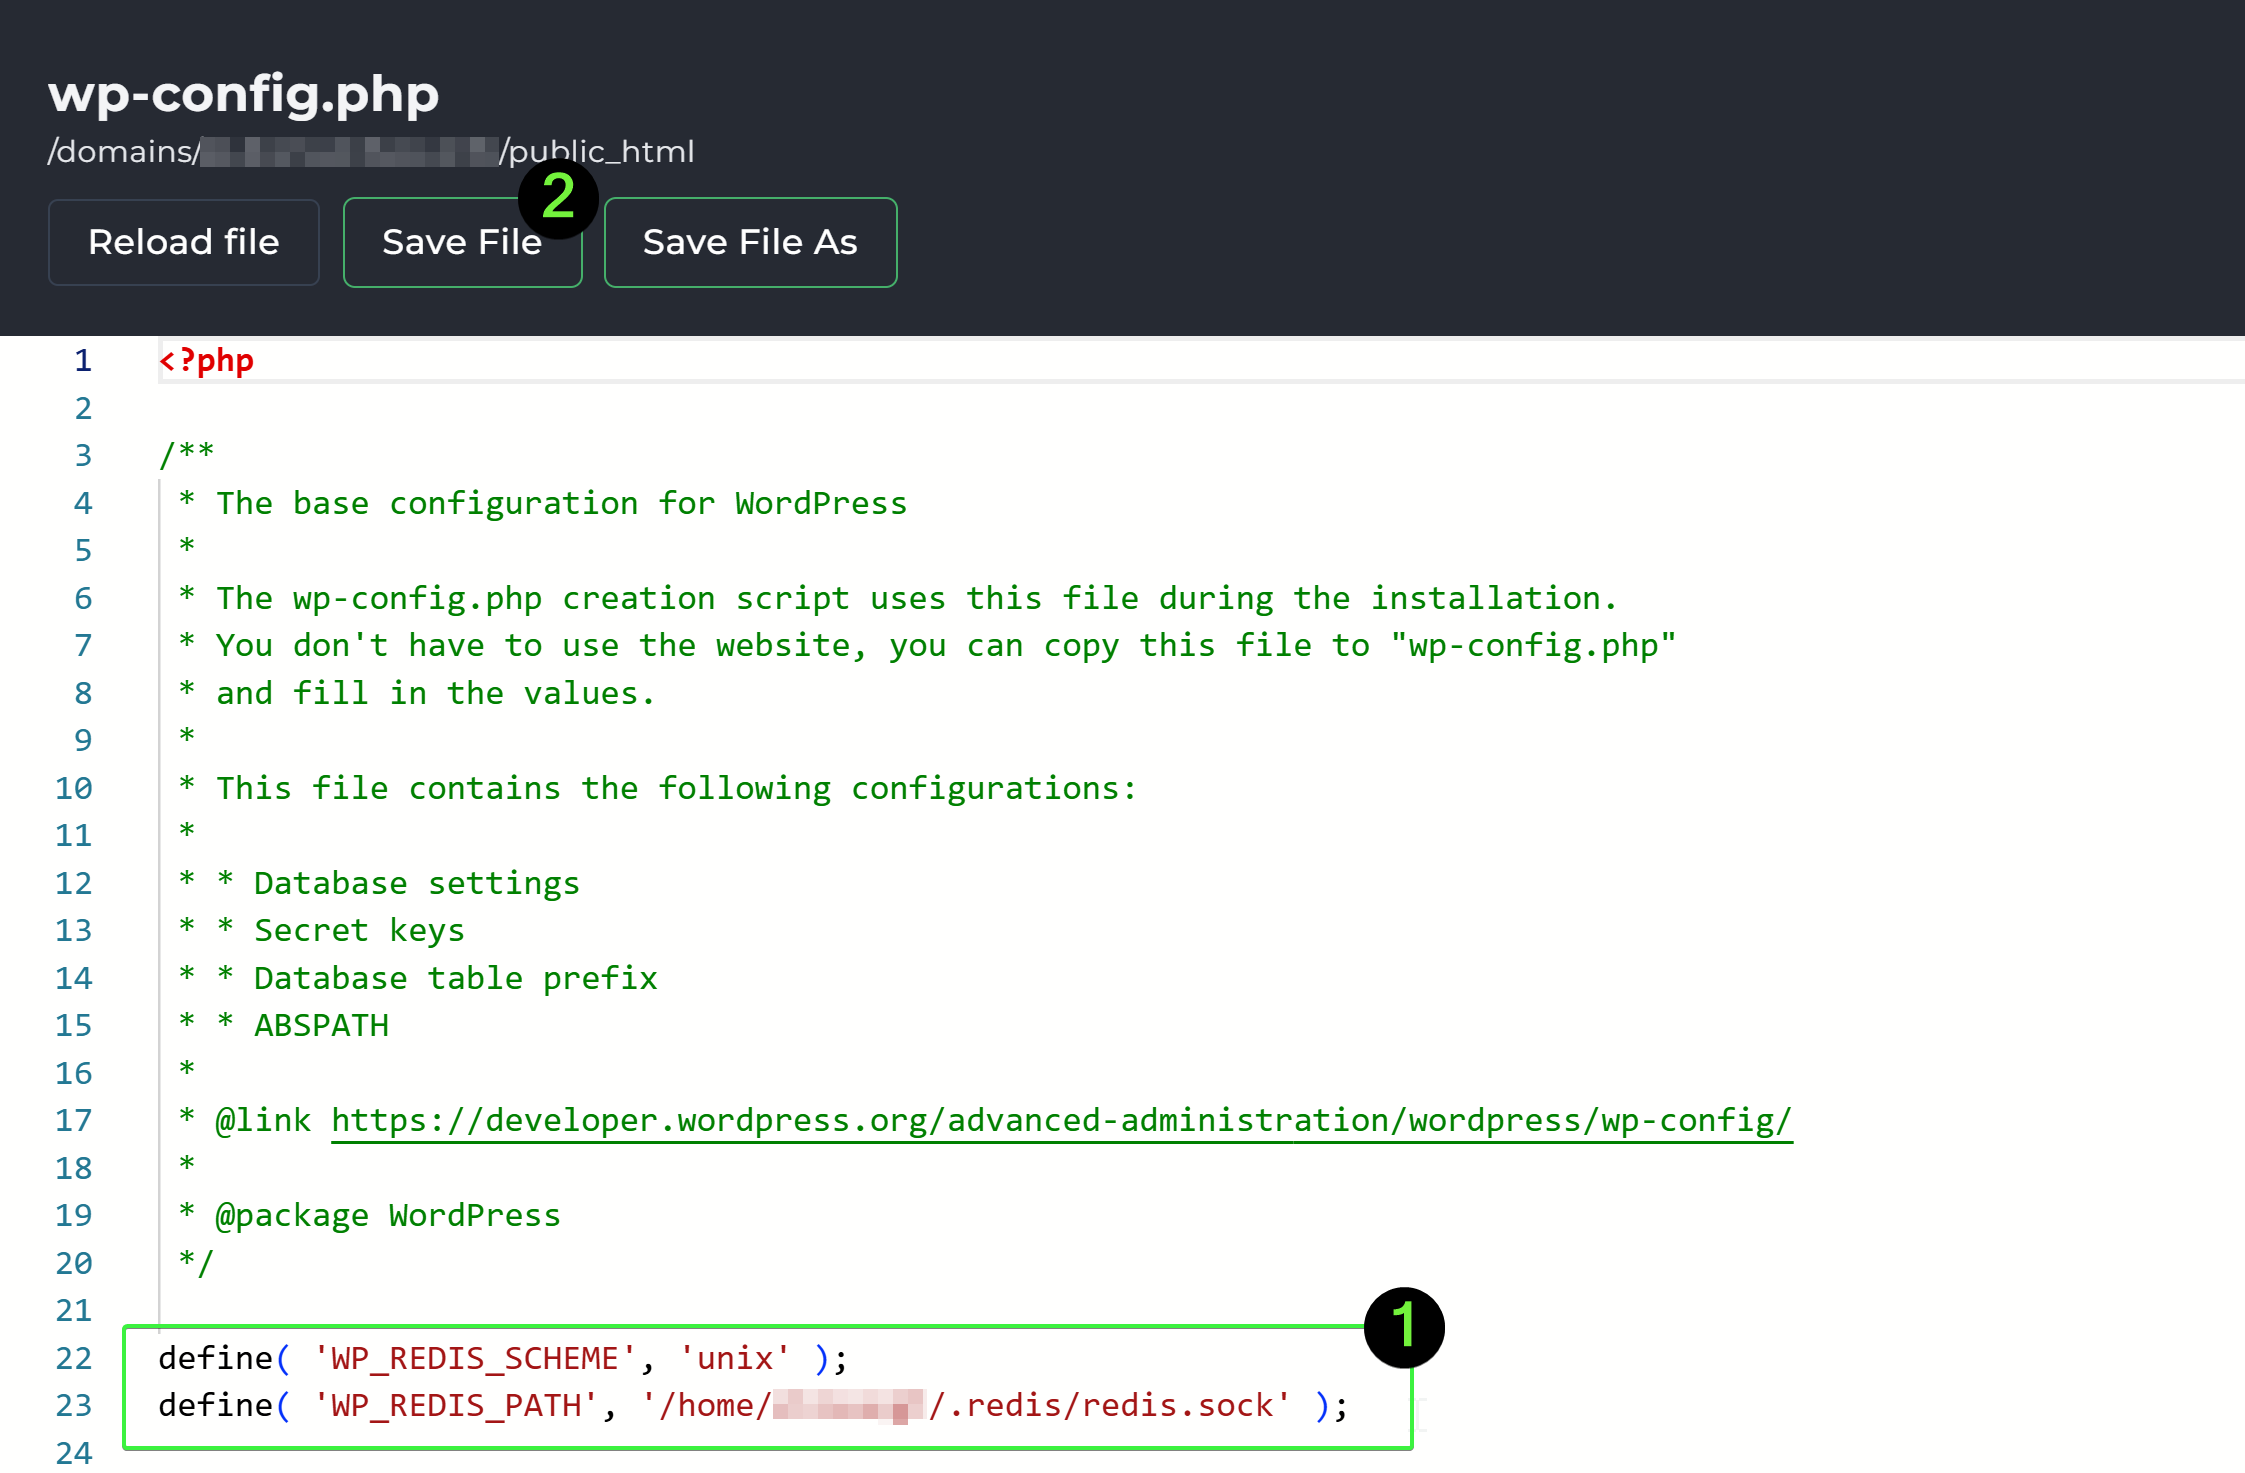
Save the file
Click Save and exit the editor.
Enable the PHP Redis extension
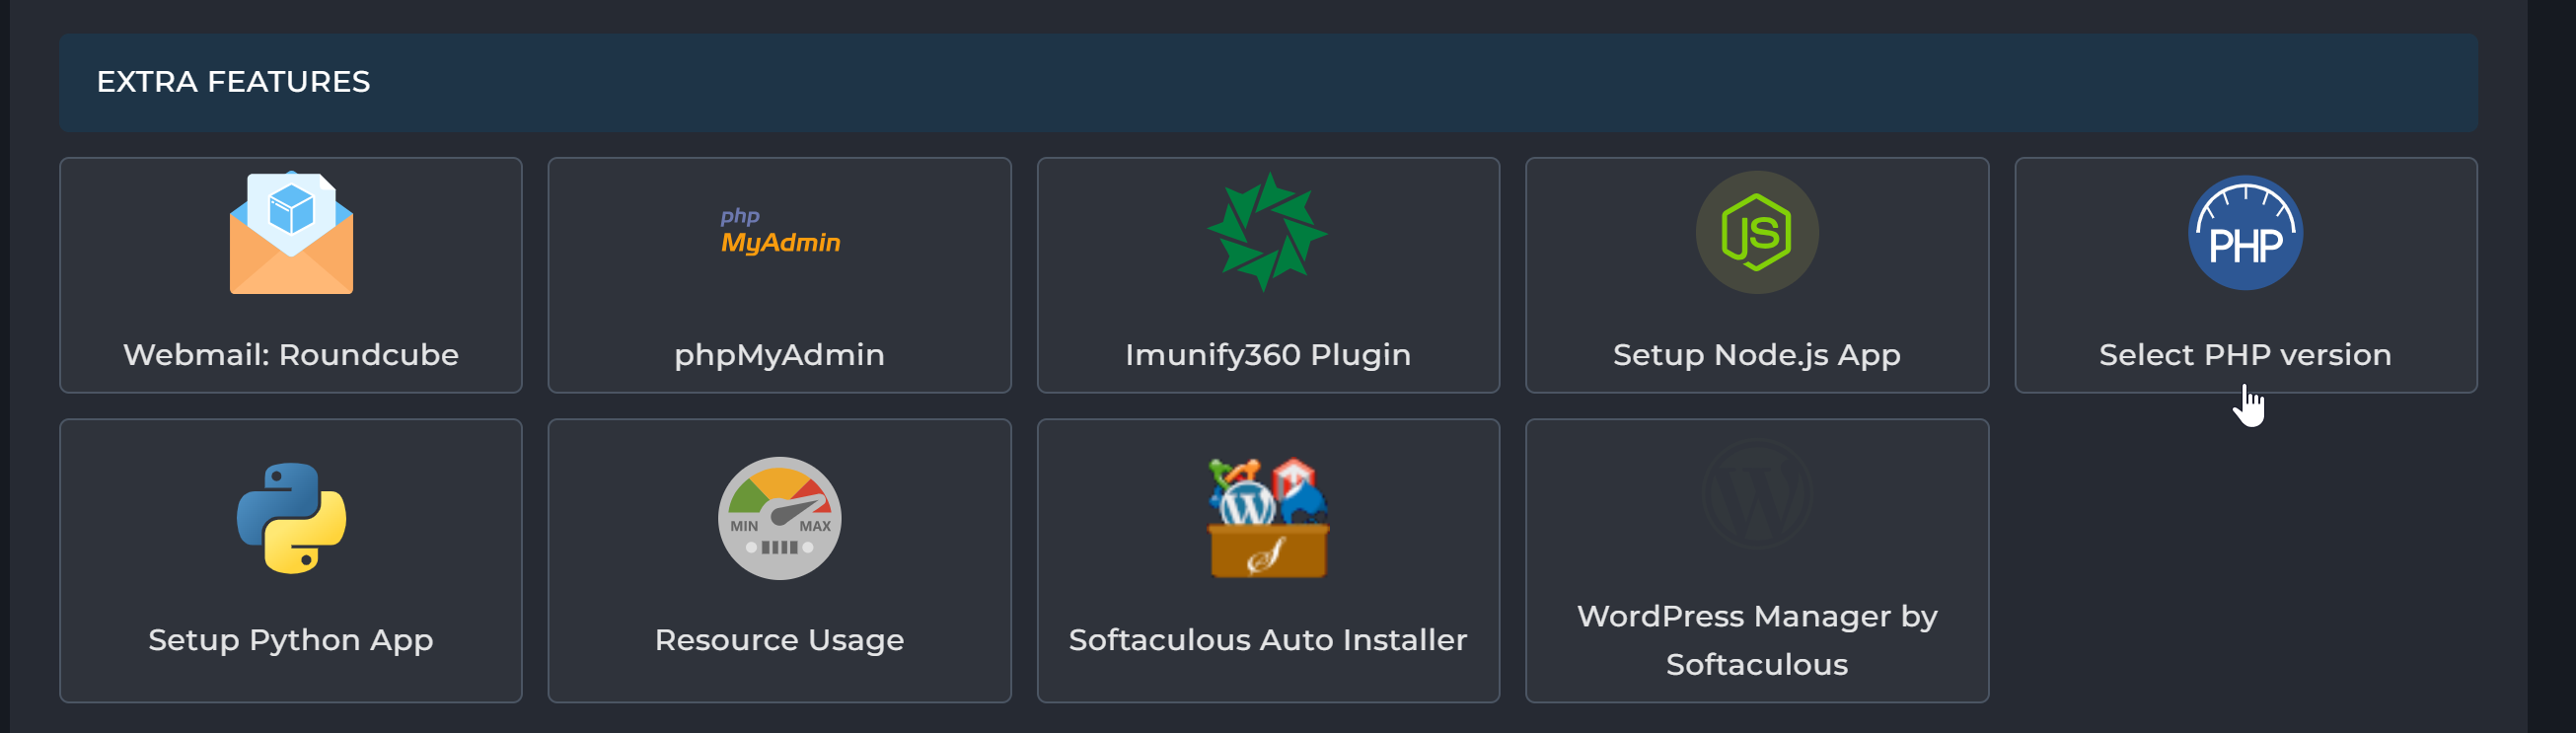
Your PHP version needs the Redis extension active to communicate with Redis. Go to Extra Features > Select PHP Version > Extensions.
Tick the redis extension and wait 15 to 40 seconds for it to activate. Then refresh the page to confirm it is enabled.
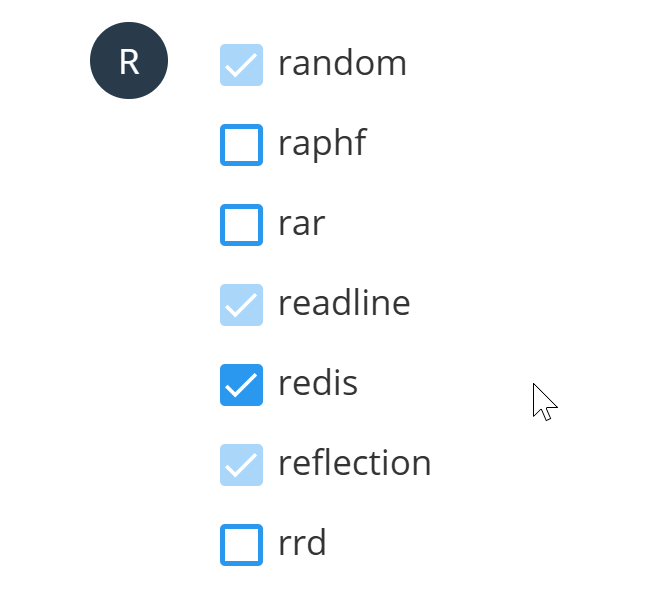
Your WordPress site is now ready to use Redis caching. Next, install the WordPress plugin that connects to it.
Install the Redis Object Cache Plugin
To make WordPress use Redis, you need a Redis-compatible caching plugin. We recommend Redis Object Cache.
Find the plugin
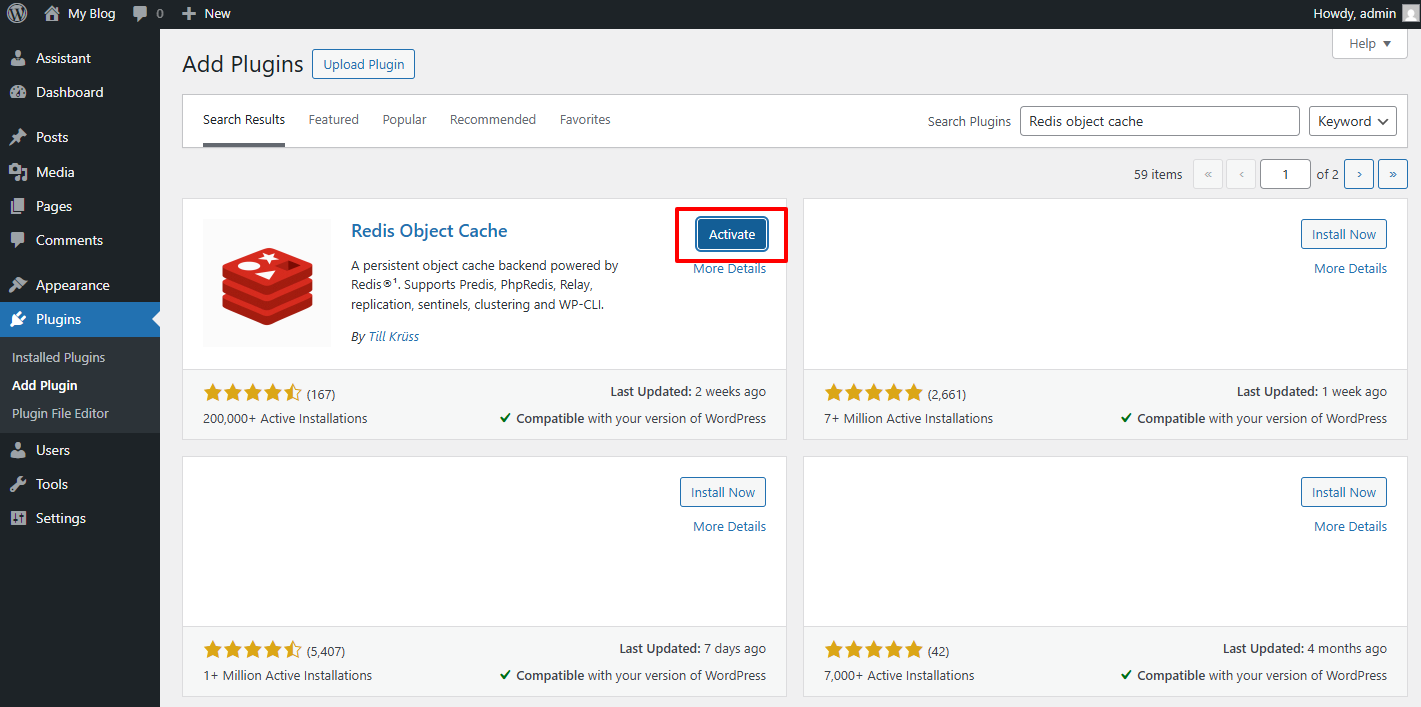
Log in to your WordPress admin area (dashboard). In the left menu, go to Plugins > Add New. In the search bar, type Redis Object Cache and look for the plugin by Till Krüss.
Install and activate it
Click Install Now.
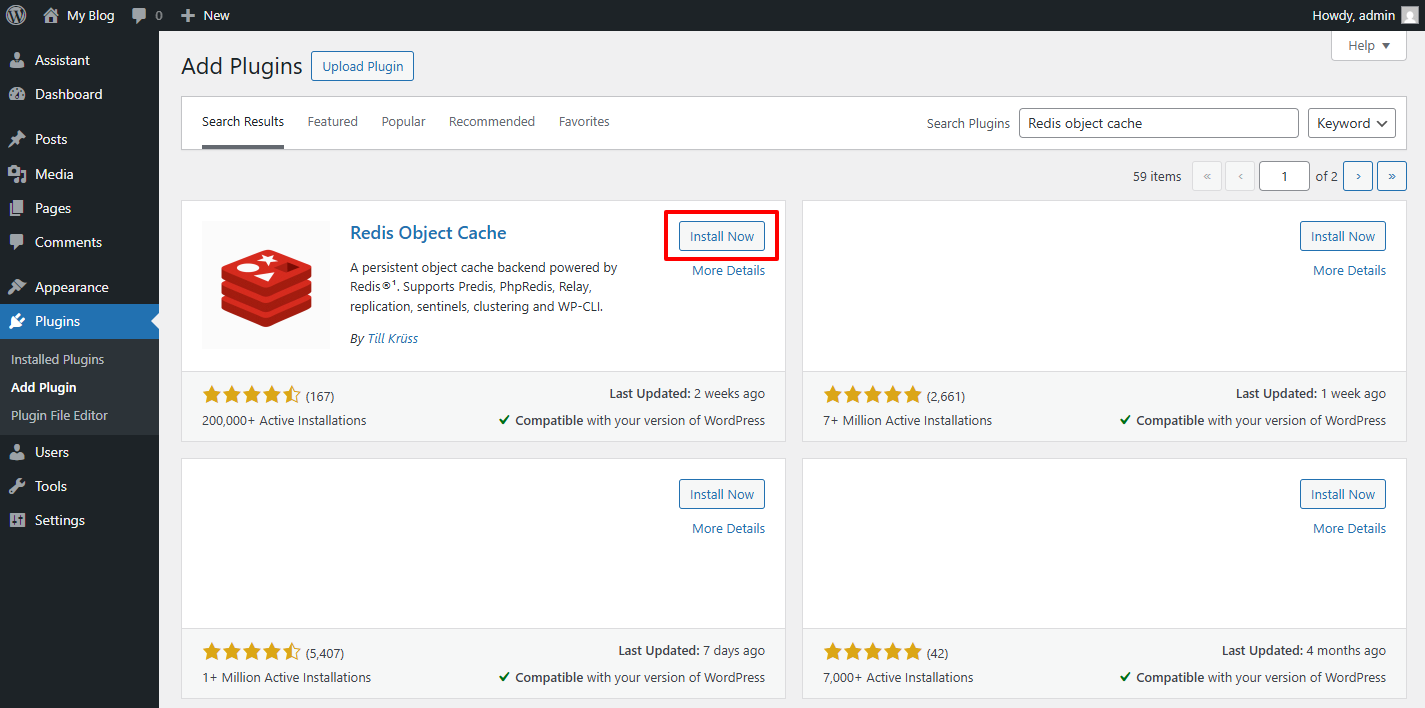
After it installs, click Activate.
Open the plugin settings
Once the plugin is activated, you are redirected to its settings. If you are not redirected automatically, go to Settings > Redis in your WordPress menu.
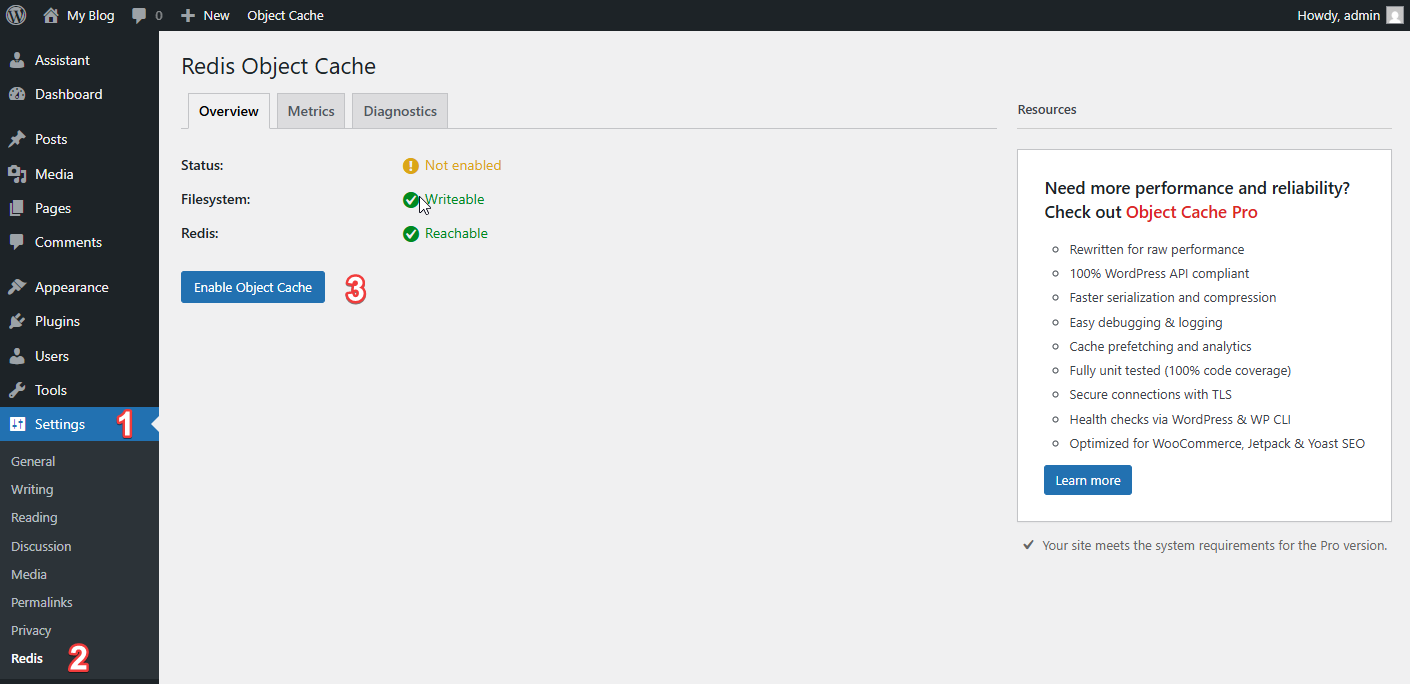
Enable Object Cache
On the plugin's page, click the Enable Object Cache button.
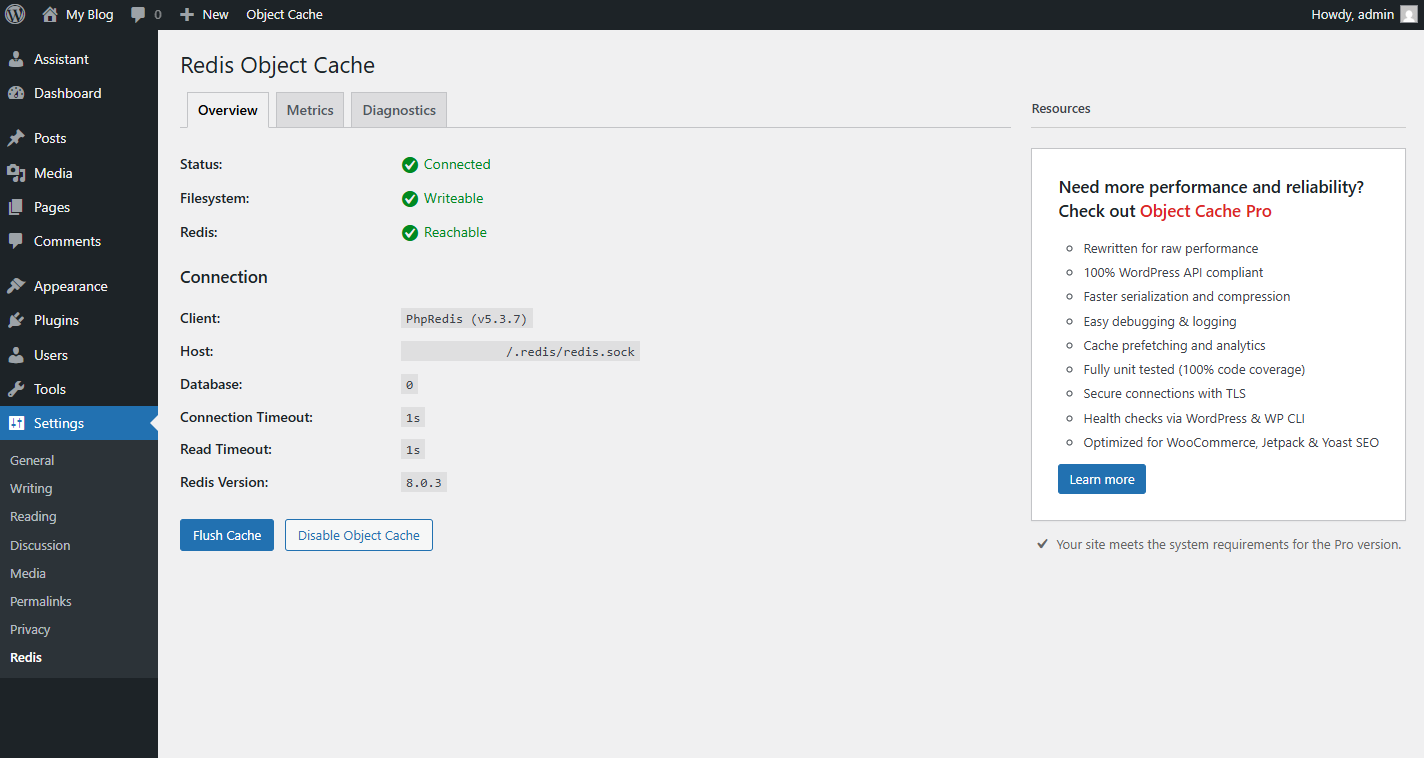
If your Redis server is set up correctly, the plugin connects and starts using Redis. It also places a file called object-cache.php in your WordPress wp-content folder, which is a good sign.
VPS and Dedicated Servers
If you run a VPS or Dedicated Server with DirectAdmin, you can get much more from Redis. It is not only for object caching. It can also:
- Speed up WordPress with object caching.
- Boost performance using full-page caching.
- Store things like user sessions or custom app data.
- Act as a NoSQL database.
Since you have full server access, you can fine-tune Redis to your exact needs.
You need root access to your server and DirectAdmin installed.
Install Redis on a VPS or Dedicated Server
If Redis is not already installed, the simplest way to install it on a DirectAdmin server is with CustomBuild, a script that manages and compiles server components.
Connect to your server
Connect to your server via SSH. Replace your_server_ip with the actual IP address of your server:
Open the CustomBuild directory
Enable Redis in CustomBuild
Install Redis
This downloads, compiles and installs the Redis server. It might take a few minutes.
Start Redis and enable it at boot
Check the status
You should see a message saying Redis is active (running).
If it shows inactive or failed, don't worry. Redis may be running under your user account and not as a system service, so it can appear inactive or failed when checked at the root level.
Enable the PHP Redis Extension
For your WordPress site to connect to the Redis server, enable the PHP Redis extension for the PHP version your site uses.
Open the CustomBuild directory
If you are not already there:
Enable the extension in CustomBuild
Install the extension
This installs the php-redis extension for all active PHP versions on your server.
Connect Redis to WordPress
Once Redis and the PHP Redis extension are installed on your server, the next step is to connect Redis with WordPress. The steps are the same for shared hosting, reseller accounts, and VPS or dedicated servers with DirectAdmin:
- Set Up Redis on Shared or Reseller Hosting: Redis settings, the
wp-config.phplines, and the PHP extension. - Install the Redis Object Cache Plugin: install the plugin, activate it, and enable Object Cache.
Once you have followed those sections, your WordPress site will be using Redis for faster performance.
Performance Tips
A few quick tips to get the most out of Redis with WordPress:
- Use page cache with Redis: Redis handles the object cache, and a page-cache plugin (LiteSpeed Cache, WP Rocket and others) handles full-page caching.
- Enable the PHP Redis extension and set the correct Redis settings in
wp-config.phpif needed (WP_REDIS_HOST,WP_REDIS_PORT, timeouts). - Monitor hits and misses with
redis-cli info stats. A high hit rate means good caching. - Give Redis enough RAM. Redis keeps data in memory, so memory is important.
- Clear stale transients from the plugin occasionally to avoid wasted cache.
- Keep WordPress and plugins updated. Updates often include performance and security fixes.
Conclusion
Enabling Redis Cache for WordPress on DirectAdmin boosts speed, lowers server load, and makes your site feel faster for visitors.
Redis works by serving data straight from memory, which gives very fast responses. With the right setup and occasional tuning, you can maintain a stable, high-performance caching environment.